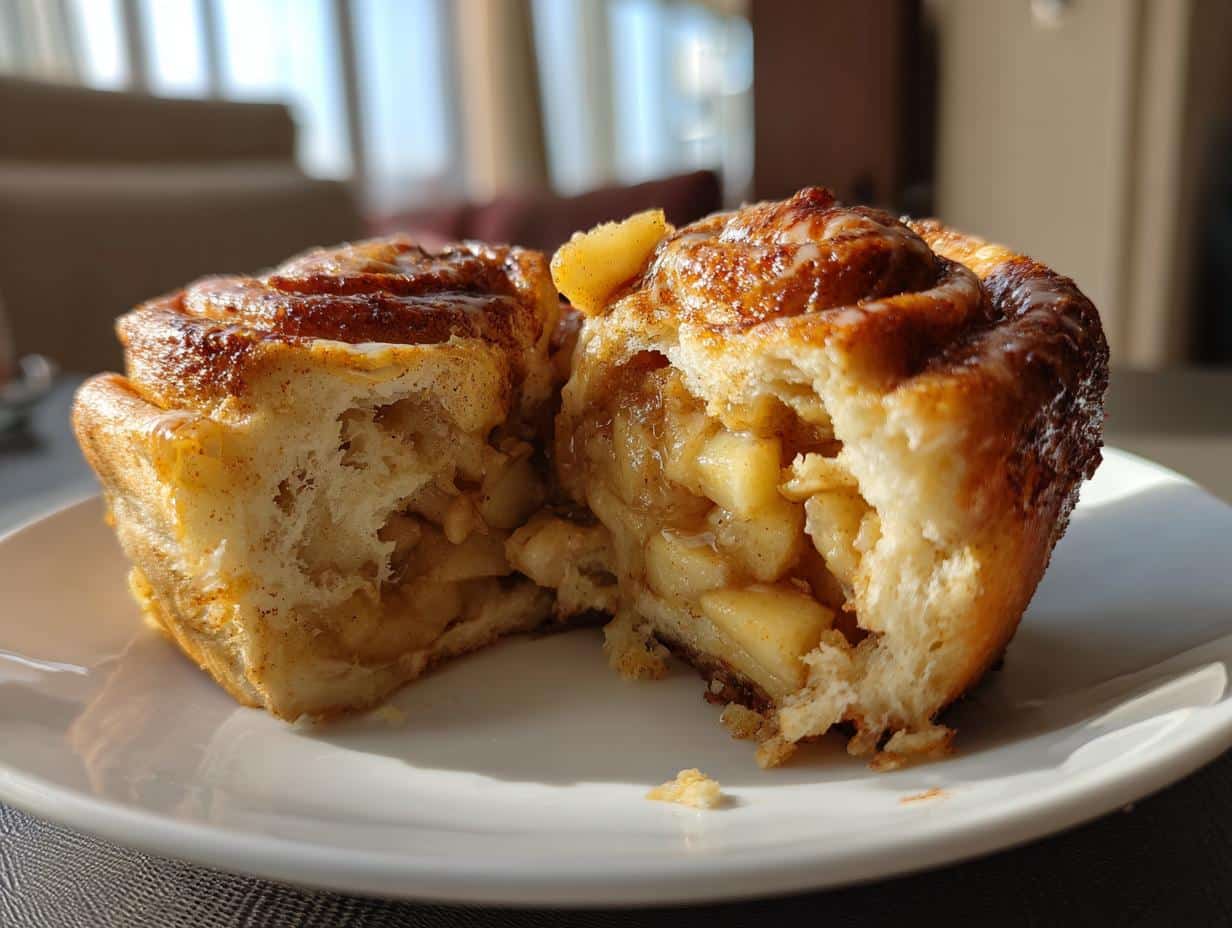
Nothing screams fall baking quite like the smell of cinnamon-spiced apples wafting through the kitchen! My obsession with Classic Apple Crumble Bars started years ago when I desperately needed a dessert for a last-minute potluck. I threw together this simple recipe using pantry staples and apples from my neighbor’s tree, and suddenly I was the most popular person at the party. These bars have since become my go-to treat – they’re easier than pie (no rolling pin required!) but pack all that cozy apple-cinnamon goodness we crave. After testing dozens of variations, I’ve perfected the balance of buttery oat crumble to juicy apple filling. Trust me, one bite and you’ll understand why this recipe gets requested at every family gathering!
Table of Contents
Why You’ll Love These Classic Apple Crumble Bars

Listen, I know you’re going to adore these bars as much as I do – here’s why:
- Foolproof baking: No fancy techniques needed – just mix, layer and bake!
- That perfect texture: Crunchy oat topping meets tender, cinnamon-kissed apples in every bite
- Anytime treat: Equally at home at a fancy brunch or packed in lunchboxes
- Crowd-pleaser magic: Kids go crazy for the sweet crumble, adults appreciate the homemade touch
Honestly, I’ve lost count of how many times this recipe has saved me when unexpected guests drop by. That crumbly topping? Absolute perfection every single time.
Ingredients for Classic Apple Crumble Bars
Okay, let’s gather our ingredients – I promise everything here is simple and probably already in your pantry! The magic happens when these basic items come together just right. Here’s what you’ll need:
- 2 cups all-purpose flour – spooned and leveled, please don’t pack it!
- 1 cup rolled oats – the old-fashioned kind, not instant
- 1 cup brown sugar – dark brown gives the best caramel notes
- 1/2 tsp baking soda – just enough lift without making it cakey
- 1/2 tsp salt – balances all that sweetness perfectly
- 1 cup unsalted butter, melted – yes, melted! So much easier than cold butter
- 4 cups peeled and diced apples – Granny Smith are my favorite for their tartness
- 1/4 cup granulated sugar – helps draw out the apple juices
- 2 tbsp lemon juice – keeps those apples looking fresh
- 1 tsp cinnamon – the warm hug your apples need
- 1/4 tsp nutmeg – just a whisper makes all the difference
- 1 tbsp cornstarch – our secret weapon against runny filling
See? Nothing fancy – just good, honest ingredients that create magic together. Now let’s get mixing!
Looking for another way to enjoy crumble? Check out this Peach Crumble Recipe that uses juicy summer peaches instead of apples.
How to Make Classic Apple Crumble Bars
Okay, let’s turn these simple ingredients into something magical! I promise this is one of those recipes where the process is just as satisfying as the results. That moment when the sweet cinnamon aroma fills your kitchen? Absolute bliss. Follow these steps and you’ll have perfect apple crumble bars every time.
Preparing the Crust and Topping
First things first – preheat that oven to 350°F (175°C) and line your 9×13 inch baking pan with parchment paper. Trust me, you’ll thank me later when these beauties lift out cleanly!
Now for the fun part – grab a big bowl and mix together your flour, oats, brown sugar, baking soda and salt. Don’t be shy with the mixing here – we want everything well combined. Then pour in that glorious melted butter and stir until the mixture looks like coarse sand with some pea-sized clumps. That perfect crumbly texture? That’s what we’re after! Set aside about 1½ cups of this mixture for the topping (I just eyeball it – no need to measure perfectly).
Making the Apple Filling
While your oven’s heating up, let’s prep those apples. Peel and dice them into about ½-inch pieces – big enough to give some texture but small enough to bake through evenly. Toss them in a bowl with the granulated sugar, lemon juice, cinnamon, nutmeg and cornstarch. The cornstarch is our secret weapon here – it’ll thicken all those delicious apple juices as they bake. Mix until every little piece is coated in that sweet, spicy goodness.
Assembling and Baking
Time to build our masterpiece! Take the larger portion of your crumb mixture and press it firmly into the bottom of your prepared pan. I mean really press it – use your fingers or the bottom of a measuring cup to create an even, compact layer. This becomes our buttery base that holds everything together.
Spread your apple mixture evenly over the crust, then sprinkle the reserved crumb topping all over the apples. No need to press this down – we want those lovely, rustic crumbs to get nice and golden. Pop it in the oven and bake for 45 minutes – you’ll know it’s done when the topping is golden brown and you can see the apple juices bubbling around the edges. The hardest part? Letting it cool completely before cutting! I know it’s tempting, but waiting ensures clean slices.

Want more on-the-go apple treats? These Cinnamon Apple Cottage Cheese Bites are a protein-packed snack with a sweet twist.
Tips for Perfect Classic Apple Crumble Bars
After making these bars more times than I can count, I’ve picked up some tricks that take them from good to “Oh my goodness, give me the recipe!” Here are my can’t-live-without tips:
- The apple test: Poke a piece with a fork after baking – it should be tender but still hold its shape. Mushy apples = sad bars.
- Spice it your way: Love cinnamon? Add an extra 1/2 teaspoon. Feeling adventurous? A pinch of cardamom is magical.
- The cool-down rule: I know it’s hard, but wait until completely cool before cutting. Warm bars crumble (pun intended) under pressure.
- Butter temperature trick: For extra crispiness, use slightly cooled melted butter instead of piping hot – it creates better crumbs.
- Cornstarch insurance: If your apples are extra juicy, bump up the cornstarch to 1½ tablespoons to prevent a soggy bottom.
My biggest tip? Make a double batch – these disappear faster than you’d think! The second pan freezes beautifully for when you need a quick dessert emergency fix.
Variations for Classic Apple Crumble Bars
While I adore the original version of these bars, sometimes I get playful with mix-ins and twists – here are my favorite ways to shake things up when the mood strikes:
Nutty Delight: Toss 1/2 cup chopped pecans or walnuts into the crumb mixture before sprinkling over the apples. The extra crunch and toasty flavor takes these bars to another level! Just last fall, I made this version for my book club and they raved about the “grown-up” twist.
Caramel Apple Dream: Drizzle the cooled bars with homemade or store-bought caramel sauce. Pro tip: Warm it slightly so it flows beautifully over the crumbles. My niece calls this “apple pie’s fancier cousin” – it’s her birthday request every year.
Seasonal Fruit Swap: When apples aren’t in season, try peeled diced pears or even peaches! Reduce the sugar slightly since these fruits are naturally sweeter. Last summer, I used a mix of peaches and raspberries – the tart berries cut through the sweetness perfectly.
The beauty of this recipe is how forgiving it is – don’t be afraid to make it your own! Whatever variation you choose, that buttery oat crumble makes everything taste like home.
Serving and Storing Classic Apple Crumble Bars
Now comes the best part – enjoying your masterpiece! But first, let’s talk about the all-important cooling time. I know it’s torture waiting when your kitchen smells incredible, but trust me – let these beauties cool completely before cutting (about 2 hours). This gives the apple filling time to set up properly so you get clean, picture-perfect squares instead of crumbly messes.
Once cooled, here’s how I handle leftovers:
- Room temp storage: Keep bars in an airtight container with parchment between layers for up to 3 days. The crumble stays surprisingly crisp!
- Freezer magic: These freeze beautifully for up to 3 months. Wrap individual bars tightly in plastic wrap then foil before freezing. Thaw overnight in the fridge or pop straight into a 300°F oven to rewarm.
My absolute favorite way to serve these? Warm with a scoop of vanilla ice cream melting over the top – the cold creaminess against the spiced apples is pure heaven. They’re also fantastic with a dollop of whipped cream for breakfast (no judgment here!) or packed in lunchboxes for a sweet surprise. Pro tip: Microwave refrigerated bars for 15 seconds to bring back that just-baked warmth.
For more crumbly dessert ideas, give these Lemon Crumb Bars a try—they’re tart, sweet, and buttery, just like the apple version.
Nutritional Information for Classic Apple Crumble Bars
Let’s be real – we’re not eating apple crumble bars for their nutritional benefits, but it’s still good to know what’s in each delicious bite! Keep in mind these values are estimates – your exact numbers might vary slightly depending on your apples’ sweetness or how generous you are with that crumble topping (no judgment here!).
Here’s the breakdown per bar (assuming you cut the pan into 12 equal pieces, though I won’t tell if you prefer bigger portions):
- Calories: 280 – totally worth every one!
- Fat: 12g (7g saturated) – that’s the butter working its magic
- Carbohydrates: 40g – hello, apples and oats!
- Sugar: 18g – nature’s candy plus a little extra sweetness
- Fiber: 2g – thank you, apple skins and oats
- Protein: 3g – not bad for a dessert!
- Sodium: 120mg – just enough to balance the flavors
Remember, these are guidelines, not rules. My philosophy? Enjoy your apple crumble bars mindfully, savor each bite, and maybe take an extra walk if you indulge in seconds (which you absolutely should when they’re this good!). After all, homemade treats made with love are always better than anything store-bought – that’s my nutritional justification and I’m sticking to it!
Frequently Asked Questions
Over the years, I’ve gotten all sorts of questions about these apple crumble bars – here are the ones that pop up most often with my tried-and-true answers!
Can I use gluten-free flour?
Absolutely! A 1:1 gluten-free flour blend works beautifully here – just make sure it contains xanthan gum for the best texture.
How do I prevent a soggy bottom?
Two secrets: press your base layer firmly and don’t skip the cornstarch – it thickens those apple juices perfectly.
Can I make these ahead?
You bet! They actually taste better on day two, just store them airtight at room temp.
What apples work best?
I swear by Granny Smith for their tartness, but Honeycrisp or Braeburn work too – just avoid mushy varieties.
Can I freeze the unbaked bars?
Yes! Assemble completely, wrap tightly in plastic and foil, then freeze. Bake straight from frozen, adding 10-15 extra minutes.
Still have questions? Drop them in the comments – I love helping troubleshoot baking adventures! and for more Inspirations Follow me on Pinterest


Deliciously Irresistible Classic Apple Crumble Bars Recipe
- Total Time: 1 hour 5 minutes
- Yield: 12 bars
- Diet: Vegetarian
Description
Classic apple crumble bars combine sweet apple filling with a buttery oat crust and topping. Easy to make and perfect for any occasion.
Ingredients
- 2 cups all-purpose flour
- 1 cup rolled oats
- 1 cup brown sugar
- 1/2 tsp baking soda
- 1/2 tsp salt
- 1 cup unsalted butter, melted
- 4 cups peeled and diced apples
- 1/4 cup granulated sugar
- 2 tbsp lemon juice
- 1 tsp cinnamon
- 1/4 tsp nutmeg
- 1 tbsp cornstarch
Instructions
- Preheat oven to 350°F (175°C). Line a 9×13 inch baking pan with parchment paper.
- In a large bowl, mix flour, oats, brown sugar, baking soda, and salt. Stir in melted butter until crumbly.
- Press half of the mixture into the bottom of the prepared pan.
- In another bowl, toss apples with granulated sugar, lemon juice, cinnamon, nutmeg, and cornstarch. Spread evenly over the crust.
- Sprinkle the remaining crumb mixture over the apples.
- Bake for 45 minutes or until golden brown. Cool completely before cutting into bars.
Notes
- Use firm apples like Granny Smith or Honeycrisp for best texture.
- Store in an airtight container at room temperature for up to 3 days.
- Serve warm with vanilla ice cream for extra indulgence.
- Prep Time: 20 minutes
- Cook Time: 45 minutes
- Category: Dessert
- Method: Baking
- Cuisine: American