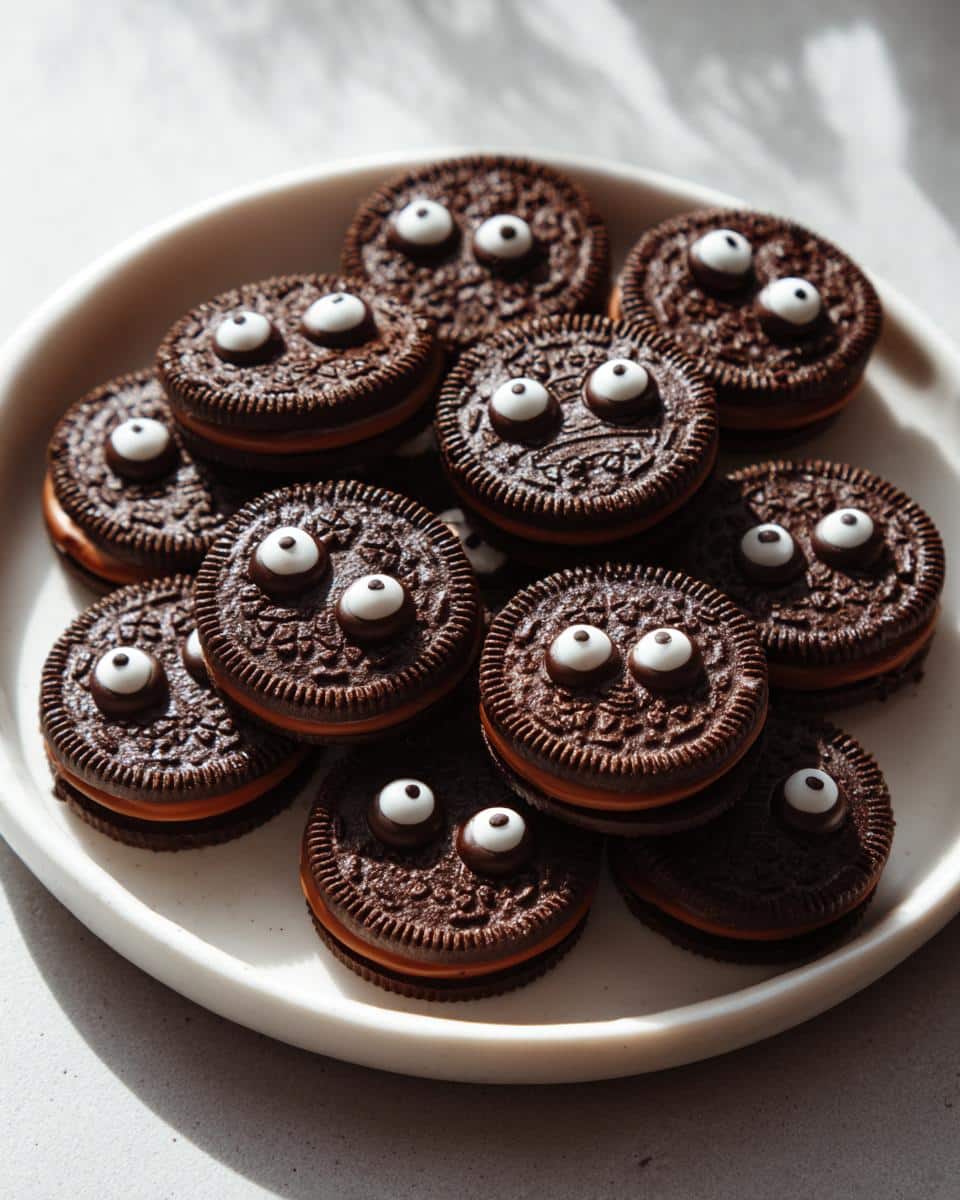
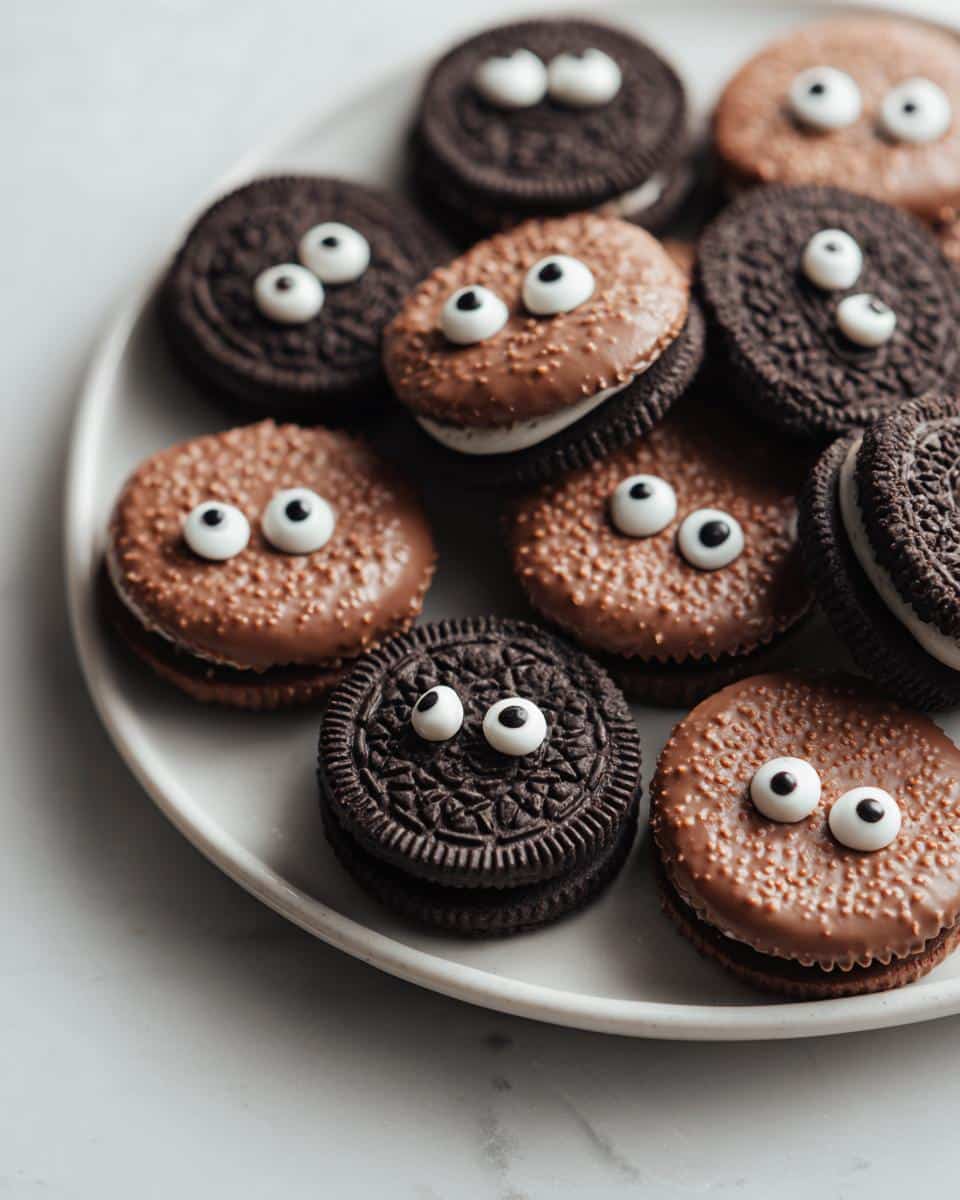
Halloween just isn’t complete without a little spooky sweetness, and these Bat Oreos have become our family’s favorite quick treat! I stumbled upon this idea one frantic October afternoon when my kids begged for “something fun” to bring to their school party. With just Oreos, melted chocolate, and candy eyes, we transformed ordinary cookies into adorable bats in under 15 minutes. The best part? No baking required – just dip, decorate, and watch them disappear faster than a ghost in the night. These little guys are so simple even my 5-year-old can help (though fair warning: you might lose a few candy eyes to “quality testing”).

Why You’ll Love These Bat Oreos
Trust me, these little bats will steal the show at your next Halloween gathering – and here’s why:
- Faster than a witch’s cackle: Seriously, 15 minutes from start to finish. Even when you’re scrambling last-minute for a party treat.
- Kid-approved magic: My littles go wild for the decorating part (though half the candy eyes mysteriously vanish before the cookies are done).
- No oven required: Melt, dip, and done. Perfect for those sweltering October days when baking feels impossible.
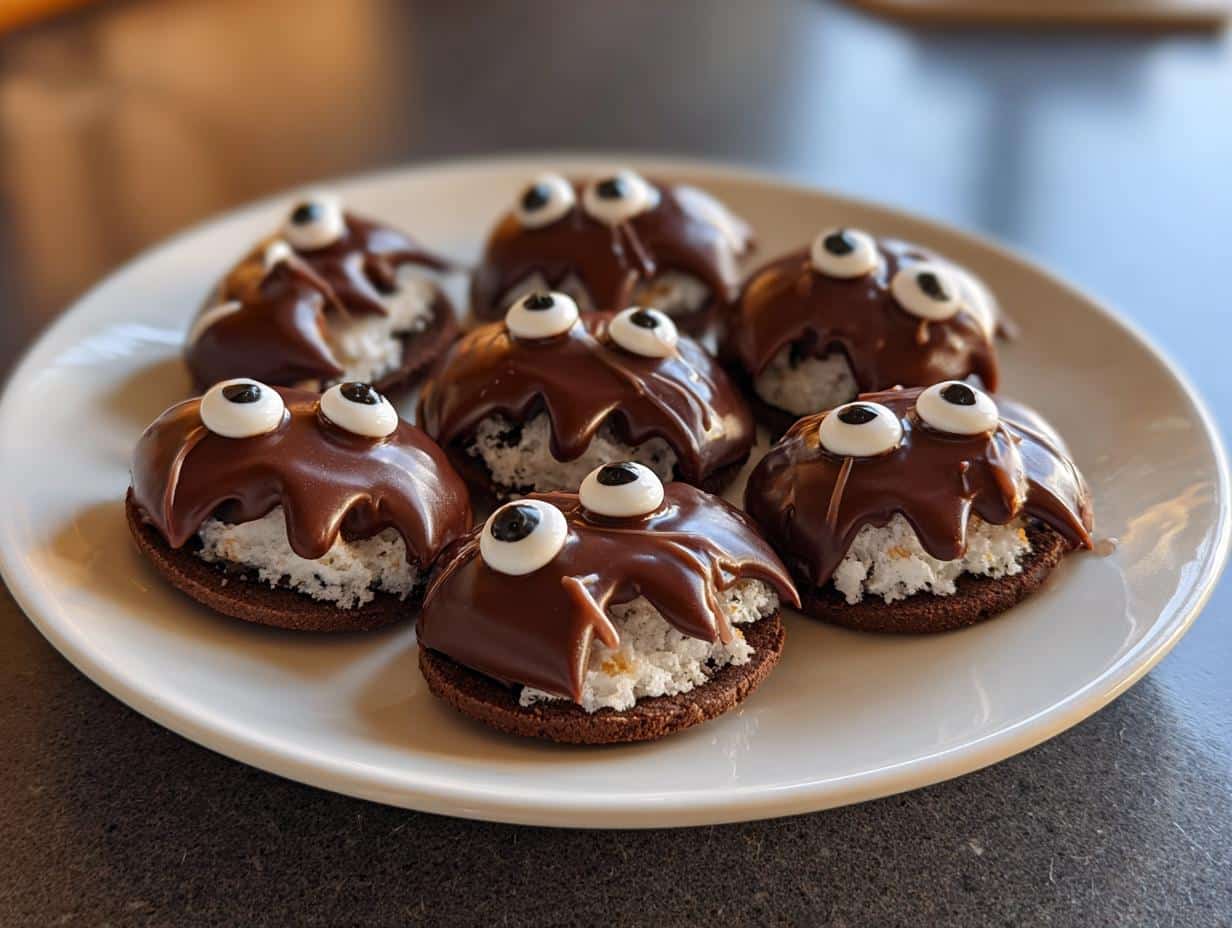
- Instant Halloween vibes: Those beady little eyes peeking through chocolate wings? Adorable AND just spooky enough.
Honestly, the hardest part is keeping tiny hands from snatching them before the chocolate sets!
Ingredients for Bat Oreos
Gather these simple ingredients – I promise you probably have most of them already! The beauty of this recipe is how few things you need to create something so delightfully spooky.
- 1 package Oreo cookies (the standard 14.3 oz size works perfectly – and yes, Double Stuf works too if you want extra cream filling!)
- 1 cup melted semi-sweet chocolate chips (about 6 oz by weight – but I often just eyeball it because more chocolate is never wrong)
- 1/2 cup candy eyes (those little round ones – you’ll need about 100 pieces total, but grab extra because some always mysteriously disappear)
That’s it! Three ingredients for the most adorable Halloween treats. Though I sometimes sneak in a fourth ingredient – patience while waiting for the chocolate to set (the hardest part!).
How to Make Bat Oreos
Okay, let’s make some spooky magic happen! I’ve made these little bat cookies more times than I can count (my kids request them year-round, not just at Halloween), and I’ve learned all the tricks to get them perfect every time.
Melting the Chocolate
First things first – let’s melt that chocolate without any disasters. I always use the microwave because it’s fastest, but you’ve got to be careful! Here’s my foolproof method:
- Dump your chocolate chips into a microwave-safe bowl (glass works best).
- Microwave for 30 seconds, then stop and stir. Repeat until about 90% melted – the residual heat will finish the job when you stir.
- If you see any stubborn unmelted bits, just keep stirring – they’ll melt from the heat of the already-melted chocolate.
Pro tip: If you accidentally overheat it and the chocolate seizes up, don’t panic! Add a tiny bit of vegetable oil (about 1/2 teaspoon) and stir vigorously – it usually comes right back to life.
Decorating the Oreos
Now for the fun part! This is where kids can really get involved (though I recommend having paper towels ready for chocolatey fingers).
- Hold an Oreo by one side and dip about halfway into the melted chocolate – this creates the bat wings.
- Let the excess chocolate drip off for a few seconds (I usually count to 5 in my head).
- While the chocolate is still wet, press two candy eyes onto the undipped side, right above where the chocolate starts.
- Place on a parchment-lined baking sheet to set.
My kids love making some bats with eyes close together (for a cute look) and some with eyes far apart (for a silly look). There’s no wrong way to do it!

Setting and Serving
Now comes the hardest part – waiting for the chocolate to set. Here’s what I’ve learned:
- At room temperature, they’ll be ready in about 30 minutes.
- If you’re in a hurry, pop them in the fridge for 10 minutes (but let them come to room temp before serving).
- Store in an airtight container at room temperature with parchment between layers if stacking.
They’ll keep for about 3 days – if they last that long! I always make extra because these disappear faster than Halloween candy at a kids’ party.
Tips for Perfect Bat Oreos
After making approximately a zillion of these little bat cookies (okay, maybe just a few dozen batches), I’ve picked up some handy tricks:
- Parchment is your BFF: Line your baking sheet or they’ll stick like glue. Wax paper works in a pinch, but parchment’s non-stick magic is unbeatable.
- The tap-tap trick: After dipping, gently tap your wrist to shake off excess chocolate – this prevents messy drips and gives cleaner “wings.”
- Double the spooky: For extra flair, drizzle some white chocolate over the set bats to make ghostly veins in the wings.
- Tweezers to the rescue: Those tiny candy eyes are slippery! I keep clean tweezers handy for perfect placement every time.
- Chill out: If your kitchen’s warm, chill the undipped Oreos for 10 minutes first – the chocolate sets faster on cold cookies.
Trust me, once you make these once, you’ll be the bat Oreo master in no time!
Bat Oreos Variations
One of my favorite things about this recipe is how easily you can mix it up! Here are some fun twists we’ve tried over the years – some born out of necessity (whoops, ran out of candy eyes again!), others just because we wanted to get creative:
- Gluten-free bat attack: Use gluten-free Oreos (yes, they exist!) for friends with dietary needs. They work just as beautifully.
- Vampire vision: Swap regular candy eyes for red ones to create “vampire bats” – my son’s personal favorite variation.
- White chocolate ghosts: Use white chocolate instead of dark for an eerie white bat effect. Bonus points if you drizzle a tiny bit of dark chocolate for “veins.”
- Double trouble: Golden Oreos make fantastic “blonde bats” – just use milk chocolate for dipping instead of dark.
- Nut-free option: Some candy eyes contain nuts, so check labels carefully for allergies. No eyes? Get creative with mini chocolate chips or M&Ms!
- Minty monsters: Mint Oreos dipped in chocolate taste like thin mints – perfect for a chilly Halloween night.
Last year, my daughter insisted on making “rainbow bats” using colored candy melts – they were ridiculously bright and completely adorable. The moral? There are no rules when it comes to Halloween treats! Whatever ingredients you have or dietary needs to accommodate, you can make these bat Oreos work for you.
Storing and Serving Bat Oreos
Here’s the good news – these little bat treats actually get better after sitting for a bit! The chocolate fully sets and the flavors meld together beautifully. But you’ll want to store them right to keep that perfect texture.
My go-to method? A simple airtight container at room temperature with parchment paper between layers if you’re stacking them. The parchment prevents any chocolate-to-chocolate sticking disasters (we’ve all been there – peeling apart Oreos is heartbreaking!). They’ll stay fresh and delicious for about 3 days this way.
If your kitchen runs warm (or if you’re making these ahead for a party), you can pop them in the fridge for longer storage – just be sure to let them come back to room temperature before serving. Cold chocolate loses some of its snap and flavor, in my opinion.
Pro tip from experience: Resist the urge to cover them while the chocolate is still wet! I learned this the hard way when I once put the lid on too soon and ended up with condensation spots on my beautiful bat wings. Now I always wait until the chocolate is completely set before sealing them up.
For serving, I love arranging them on a spooky platter with some fake spiderwebs or autumn leaves. They look especially cute peeking out from a cupcake stand at Halloween parties. Just be prepared – these bats tend to fly off the plate faster than you can say “trick or treat!”
Bat Oreos Nutrition Information
Now, let’s be real – we’re not making these adorable bat cookies for their health benefits! But since I know some folks like to keep track (or have dietary needs to consider), here’s the scoop on nutrition info.
Remember, these values can vary depending on the specific brands of Oreos, chocolate, and candy eyes you use. The numbers might shift if you go for Double Stuf Oreos or swap in white chocolate instead of semi-sweet. Even the size of your candy eyes can make a tiny difference!
I always tell my kids these are “sometimes treats” – perfect for Halloween parties or special occasions. The joy of making them together and seeing their excited faces when the bats come to life? That’s priceless nutrition right there!
As with any homemade treat, if you have specific dietary concerns, definitely check the labels on all your ingredients. Some candy eyes contain allergens like nuts or dairy, and Oreos have their own ingredient list to consider.
Frequently Asked Questions
Over the years, I’ve gotten tons of questions about these adorable bat cookies – here are the ones that pop up most often!
Can I use milk chocolate instead of semi-sweet?
Absolutely! Milk chocolate works beautifully – it’s actually what my kids prefer because it’s sweeter. Just be aware it might take slightly longer to set than semi-sweet chocolate. White chocolate works too for a ghostly bat effect!
How long do Bat Oreos stay fresh?
They’re best within 3 days when stored properly in an airtight container at room temperature. After that, the Oreos might start to get a bit soft. Though honestly? They rarely last more than a day in my house!
What if I can’t find candy eyes?
No worries – get creative! Mini chocolate chips (pointy side in) make great eyes, or you can use tiny dabs of white frosting with mini M&Ms. One year I even used edible marker dots when I was completely out of options!
Can I make these ahead for a party?
Yes! They actually hold up great if made 1-2 days in advance. Just wait until the chocolate is completely set before storing (trust me – learned this the messy way). If your kitchen is warm, the fridge helps them keep longer.
Do gluten-free Oreos work for this recipe?
They work perfectly! I’ve used gluten-free Oreos many times for friends with dietary needs. Just follow the same steps – the chocolate coating hides any texture differences beautifully.
Final Thoughts
Well, there you have it – my family’s favorite no-fuss Halloween treat that’s sure to be a hit at your next spooky gathering! Honestly, what could be better than adorable cookies that take just minutes to make? I still remember the first time we tried this recipe – my kids’ faces lit up brighter than a jack-o’-lantern when they saw those little bat wings take shape.
Here’s my challenge to you: grab some Oreos and chocolate this weekend and give these bat cookies a whirl. Trust me, once you see how easy and fun they are to make, you’ll be hooked. And if you do try them (or put your own spin on them), I’d love to hear about it! Snap a photo of your creepy-cute creations and share them with friends – these little bats deserve to spread their wings far and wide. You can find more fun recipes on our Pinterest page!

Happy haunting – I mean, baking! May your chocolate be perfectly melted and your candy eyes stay put (mostly). Now go make some magic – and try not to eat all the decorations before they make it onto the cookies!
Print
15-Minute Bat Oreos: Spooky Fun That’s So Easy & Delicious
- Total Time: 15 minutes
- Yield: 24 cookies
- Diet: Vegetarian
Description
A simple recipe for Bat Oreos, perfect for Halloween treats.
Ingredients
- 1 package Oreo cookies
- 1 cup melted chocolate
- 1/2 cup candy eyes
Instructions
- Melt the chocolate in a microwave-safe bowl.
- Dip half of each Oreo into the melted chocolate.
- Attach candy eyes to the chocolate-dipped side.
- Let the chocolate set before serving.
Notes
- Use white chocolate for a spookier effect.
- Store in an airtight container to keep fresh.
- Prep Time: 10 minutes
- Cook Time: 5 minutes
- Category: Dessert
- Method: No-Bake
- Cuisine: American


