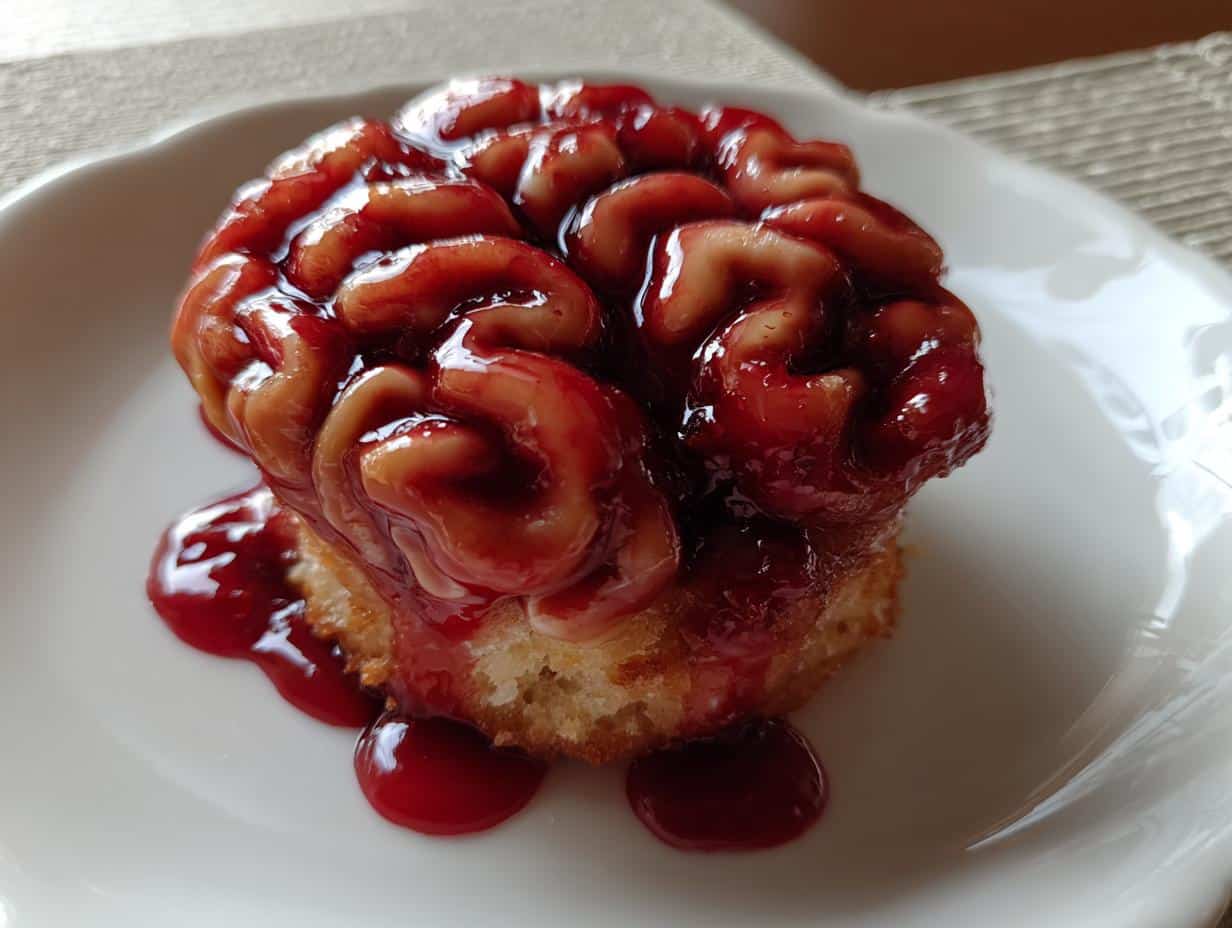
You know that moment when you bite into a warm cinnamon roll, and the gooey cinnamon filling just melts in your mouth? Now imagine that feeling but with a spooky Halloween twist! These Easy Halloween Cinnamon Roll Brains are my absolute favorite way to freak out (and delight) party guests. Last year, my niece nearly screamed when she saw them until she took a bite and realized they were just as delicious as they were creepy. The best part? They take barely any effort just unroll, twist, bake, and add a bloody glaze. Perfect for Halloween morning or a last-minute party snack that’ll have everyone talking.
Table of Contents
Why You’ll Love These Easy Halloween Cinnamon Rolls: Cinnamon Roll Brains
Trust me, these cinnamon roll brains are about to become your new Halloween tradition—and here’s why:
- Super quick: Start with store-bought dough—no mixing, no waiting for dough to rise. Just unroll, shape, and bake!
- Kid-approved: Little hands love helping twist the dough into creepy brain shapes (and licking the glaze bowl after).
- Spooky but sweet: The bloody glaze looks terrifying, but underneath? Pure cinnamon-sugar comfort.
- Party hit: They’ll steal the show on any Halloween dessert table—bonus points if you serve them with plastic “scalpel” forks!
- Customizable: Go full gore with extra red glaze or keep it mild for nervous eaters.
Ingredients for Easy Halloween Cinnamon Rolls: Cinnamon Roll Brains
Here’s the beautiful part—you only need a handful of simple ingredients to make these creepy-cute cinnamon roll brains. I’ve made this recipe dozens of times (my kids beg for them every October!), and here’s exactly what works best:
- 1 can (16 oz) refrigerated cinnamon roll dough – Look for the classic “pull-apart” kind with 8 rolls. The pre-cut slices make shaping brains so much easier!
- Red food coloring (gel works best) – Gel gives that rich, bloody red color without thinning out your glaze. I use about 1/2 teaspoon, but add more if you want it darker!
- 1 tablespoon water – Just enough to thin the food coloring into a brushable glaze.
- 1 tablespoon light corn syrup (optional) – My secret weapon! This makes the “blood” glaze shiny and slightly sticky—perfect for that fresh-from-the-lab look.
Pro tip: If you really want to go all-out, grab some black food coloring too. A tiny drop mixed into parts of the red glaze creates amazing “vein” effects when you drizzle it!
How to Make Easy Halloween Cinnamon Rolls: Cinnamon Roll Brains
Okay, here’s where the magic happens—turning ordinary cinnamon rolls into creepy, delicious brains! Don’t worry if your first attempt looks more like a blob than a brain. Mine did too! After a few tries, you’ll be shaping them like a mad scientist.
Shaping the Brains
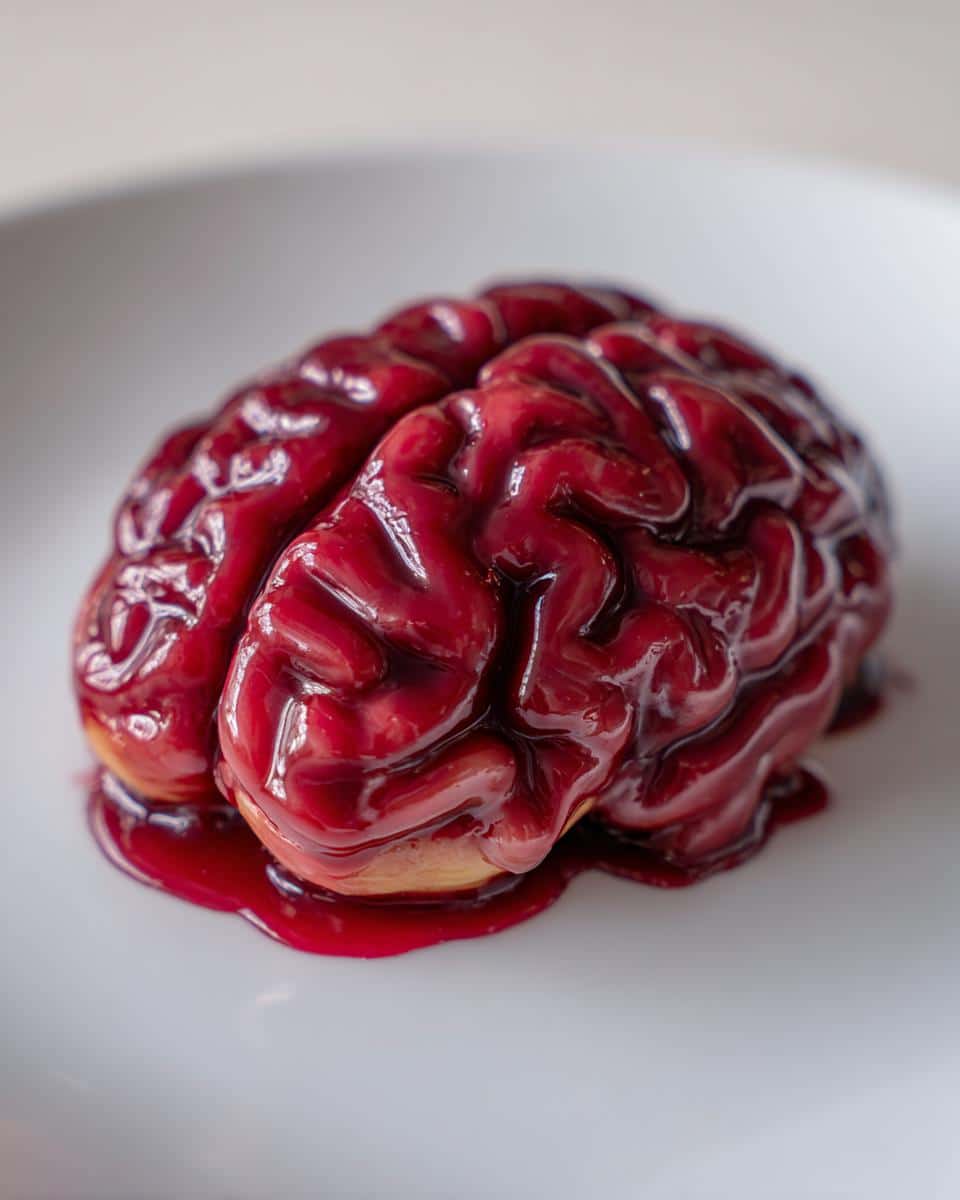
First, preheat your oven to whatever temperature the cinnamon roll package says (usually 375°F). While that heats up, unroll those cinnamon rolls on a clean surface. Now comes the fun part—stretch each one slightly with your fingers until it’s about 1.5 times its original length. Here’s my trick: twist the dough loosely like you’re wringing out a towel, then coil it into an S-shape. Use your fingertips to press little grooves and ridges into the surface—real brains aren’t smooth, so don’t be afraid to get messy! If the dough sticks, a tiny bit of flour on your fingers helps.
Applying the Glaze
Once your brain-shaped rolls are golden brown and smelling amazing (bake time is usually 12-15 minutes), let them cool just enough so you can handle them. Mix your red food coloring with water (and corn syrup if using) until it looks like fake blood—I like mine slightly translucent so it drips eerily down the sides. Use a pastry brush to dab it on, focusing on the grooves you made earlier. Want that fresh “crime scene” look? Let some glaze pool at the base of each roll!
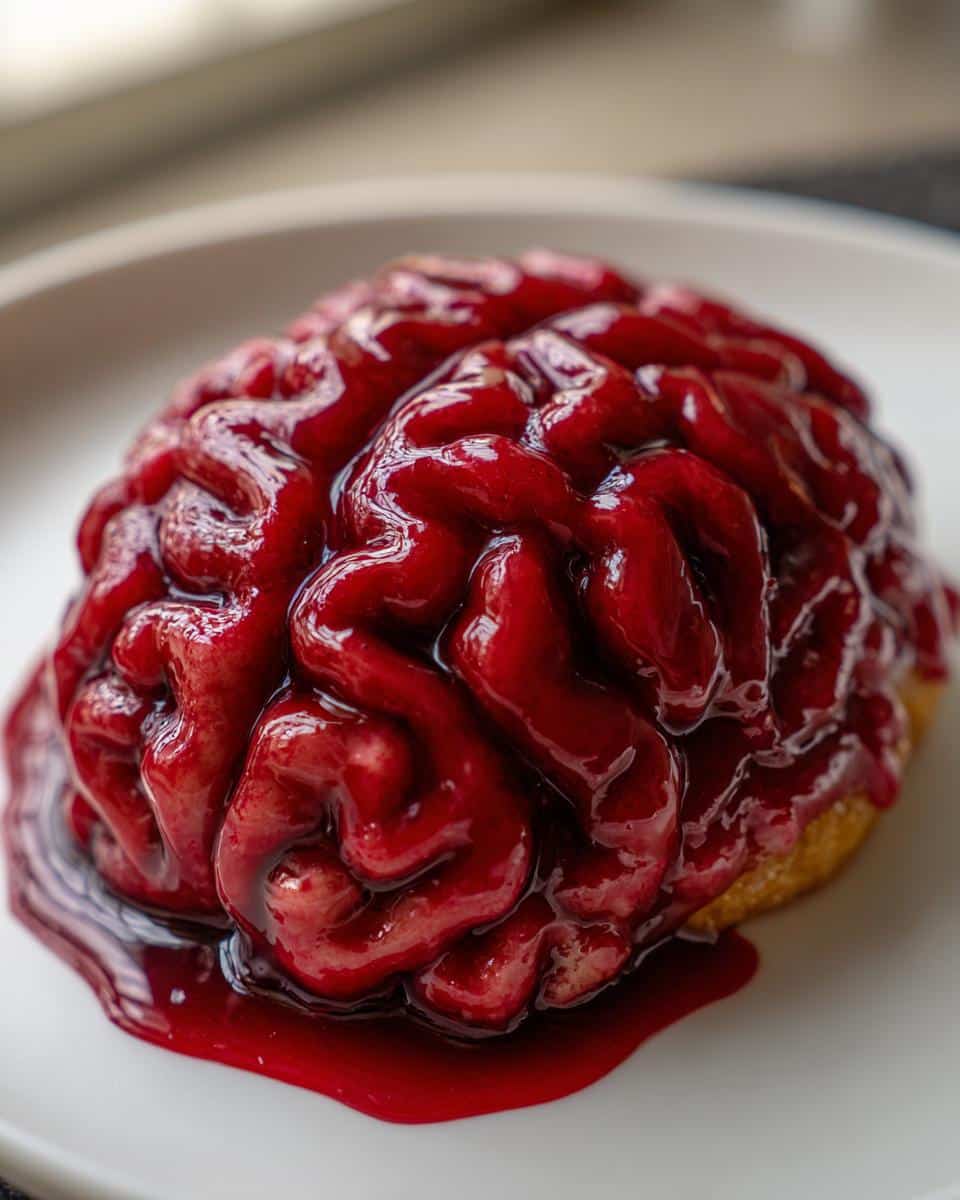
Pro tip: For extra realism, wait 2 minutes after the first glaze coat, then add a second darker layer in just a few spots—it creates awesome shadow effects!
Tips for Perfect Easy Halloween Cinnamon Rolls: Cinnamon Roll Brains
After making these brainy treats more times than I can count (and yes, there were some “failed experiments” along the way), I’ve learned a few tricks to take them from good to gruesomely great:
- Gel food coloring is your best friend: Liquid dye works in a pinch, but gel gives that deep, bloody red without watering down your glaze. I use a toothpick to swirl it in—start with a little, you can always add more!
- Make those grooves deep: When shaping, really press your fingertips into the dough to create pronounced ridges. The deeper the crevices, the more the red glaze will pool for that juicy “brain” effect.
- Let kids go wild with black detailing: Mix a drop of black food coloring with a teaspoon of your red glaze and give the kids toothpicks to paint on “veins.” They’ll feel like mad scientists, and the contrast looks amazing.
- Warm glaze sticks better: If your glaze starts thickening, pop it in the microwave for 5 seconds—just enough to make it brushable again. Cold glaze tends to slide right off!
One year I got fancy and added a sprinkle of edible silver dust for a “zombie cyber-brain” look—the possibilities are endless! Just remember: even the messiest “brains” still taste incredible.
Ingredient Substitutions for Easy Halloween Cinnamon Rolls: Cinnamon Roll Brains
Okay, confession time—I’ve tried making these brainy treats with just about every dough variation imaginable! While the refrigerated cinnamon rolls are definitely the easiest route, here’s how to adapt the recipe when you need to swap ingredients:
Out of canned dough? No problem! My homemade cinnamon roll dough works beautifully—just roll it out into ropes instead of slices before shaping. The texture will be slightly denser, but still delicious. Pro tip: Add an extra tablespoon of butter to your dough—it makes the “brain” folds hold their shape better during baking.
Need vegan cinnamon roll brains? Look for refrigerated vegan cinnamon rolls (some brands even come with cream cheese icing packets you can dye red!). For homemade, use plant-based butter and milk in your dough. The glaze? Mix powdered sugar with almond milk and red dye—it won’t be as shiny as corn syrup, but still gloriously gory.
No corn syrup? Honey works in a pinch (though it’ll taste sweeter), or just skip it! Your glaze will dry more matte, which honestly looks pretty cool—like dried blood. If you want shine without corn syrup, a tiny bit of vegetable oil mixed into the food coloring works too.
Allergic to red dye? Try blending a few tablespoons of raspberry or strawberry jam with a teaspoon of water—it gives a natural reddish-pink “blood” effect. Not quite as vibrant, but still creepy-cute!
Remember: however you adapt these, the most important thing is that they taste amazing. Even if your “brains” end up looking more like abstract art than anatomy, they’ll still disappear fast at any Halloween party!
Serving and Storing Easy Halloween Cinnamon Rolls: Cinnamon Roll Brains
Oh, you’ve gotta serve these cinnamon roll brains warm—that’s when they’re at their terrifyingly tasty best! The glaze gets all drippy, the cinnamon filling oozes slightly when you pull them apart, and the whole kitchen smells like Halloween magic. I like to arrange mine on a surgical tray (a baking sheet works too!) with plastic “scalpel” forks for maximum mad scientist vibes.
Had some leftovers? (Unlikely, but it happens!) Let them cool completely, then tuck them into an airtight container at room temperature. They’ll stay delicious for about 2 days—though the glaze might lose some of its shine. When you’re ready for round two, just zap one in the microwave for 10 seconds. It brings back that fresh-baked softness perfectly!
Pro tip: If you’re making these ahead for a party, bake and shape the rolls the night before, then add the glaze right before serving. Nothing beats that freshly-bloodied look!
Nutritional Information for Easy Halloween Cinnamon Rolls: Cinnamon Roll Brains
Now, let’s be real—these cinnamon roll brains are a treat, not health food! But since we all like to know what we’re eating (even when it’s shaped like an organ), here’s the scoop. Keep in mind, these numbers can vary depending on which brand of dough you use—I checked a few popular ones to get you in the ballpark.
Per cinnamon roll brain (approx):
- Calories: 180
- Sugar: 12g (that sweet, sweet cinnamon filling!)
- Fat: 6g
- Carbs: 28g
The glaze adds barely any extra calories—it’s mostly just food coloring with a tiny bit of corn syrup. If you’re watching sugar, you could always skip it… but where’s the Halloween fun in that? My philosophy? Enjoy one or two of these spooky treats, then balance it out with some roasted pumpkin seeds later!
Frequently Asked Questions
I get so many questions about these cinnamon roll brains every Halloween—here are the ones that pop up most often with my tried-and-true answers!
Can I make the cinnamon roll brains ahead of time?
Absolutely! Bake the shaped rolls up to a day in advance, then just add the blood glaze right before serving. The glaze stays vibrantly red if you wait to apply it—plus, that way you get those gloriously fresh “dripping” effects!
Help! My glaze is too runny/thick—how do I fix it?
Too thin? Add a pinch of powdered sugar. Too thick? A few drops of water or milk will thin it out. I like mine just thick enough to cling to the brain ridges but still drip menacingly down the sides!
Can I use homemade cinnamon roll dough?
You bet! Just roll your dough into long ropes before shaping. Homemade dough gives you more control over the size—perfect for creating a whole tray of different-sized “brains” for your mad scientist lab setup.
Will these scare little kids?
Honestly? Maybe at first glance—but in that fun Halloween way! My nephew shrieked with delighted horror when he saw them last year, then promptly ate three. The cinnamon scent always gives away that they’re sweet treats in disguise.
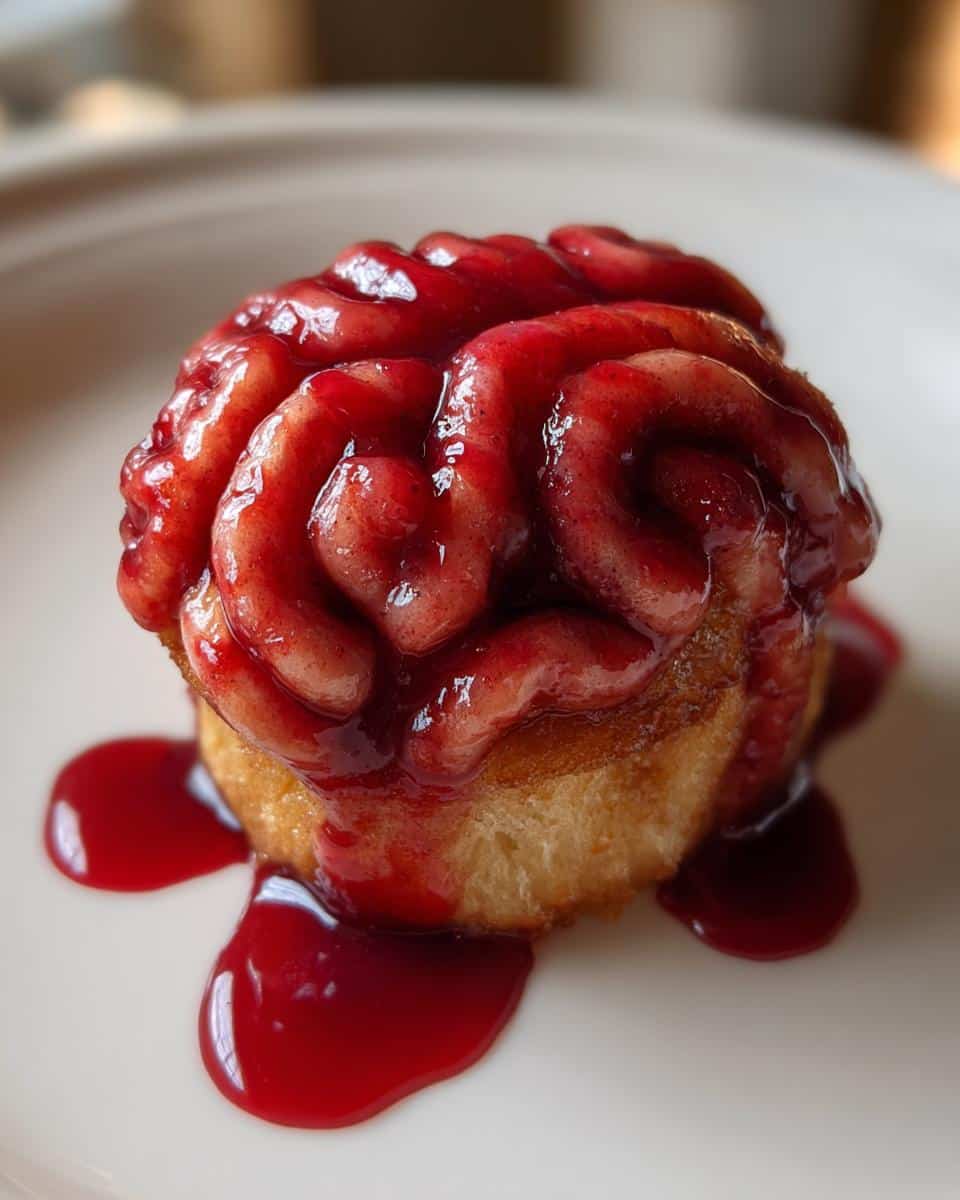
For more spooky inspiration, check out our Pinterest page!
Print
Spooky Easy Halloween Cinnamon Roll Brains That Wow Guests
- Total Time: 30 minutes
- Yield: 8 cinnamon roll brains
- Diet: Vegetarian
Description
Easy Halloween cinnamon rolls shaped like brains for a spooky treat. Perfect for Halloween parties and fun baking with kids.
Ingredients
- 1 can (16 oz) refrigerated cinnamon roll dough
- Red food coloring (gel or liquid)
- 1 tbsp water
- 1 tbsp corn syrup (optional, for shine)
Instructions
- Preheat oven to temperature specified on cinnamon roll package.
- Unroll cinnamon rolls and stretch them slightly.
- Twist and shape each roll to resemble a brain, creating folds and ridges.
- Place on a baking sheet lined with parchment paper.
- Bake according to package instructions until golden brown.
- Mix red food coloring with water (and corn syrup if using) to make a glaze.
- Brush the glaze over the warm cinnamon rolls to give a bloody effect.
- Let cool slightly before serving.
Notes
- Use gel food coloring for a more vibrant red color.
- For extra realism, add a few drops of black food coloring to darken some areas.
- Kids can help with shaping and glazing.
- Prep Time: 15 minutes
- Cook Time: 15 minutes
- Category: Dessert
- Method: Baking
- Cuisine: American
