You know those nights when you need something sweet, but the oven feels like too much effort? That’s when my no-bake cheesecake cups become my secret weapon. I discovered this trick when my book club surprised me with a last-minute “bring dessert” request. Twenty minutes of prep, a couple hours in the fridge, and voilà – individual cheesecakes that look fancy but couldn’t be simpler.
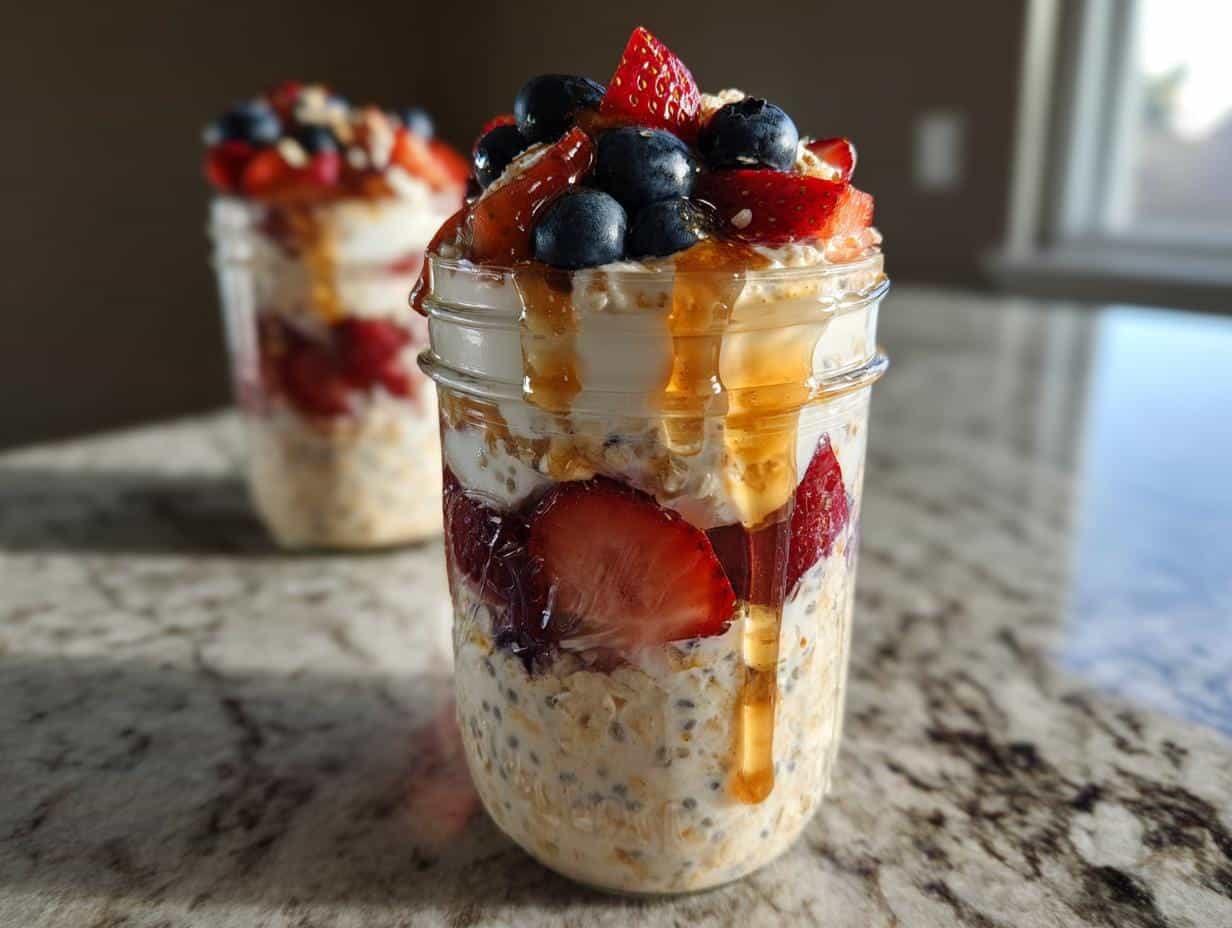
What I love most is how adaptable these little cups are. Use whatever toppings you have – fresh berries, chocolate shavings, or even just a drizzle of caramel. The graham cracker crust gives that classic cheesecake feel without any baking, and the creamy filling comes together with just a bowl and spoon. Perfect for summer when you don’t want to heat up the kitchen, or anytime you need a quick dessert that still feels special.

Ingredients for No-Bake Cheesecake Cups
Let’s talk ingredients – because using the right stuff makes all the difference here. First, grab your graham crackers. I like to crush mine fresh (it’s therapeutic!), but store-bought crumbs work just fine in a pinch. Just make sure to pack them lightly when measuring – we want that crust to hold together.
Now for the star players: your cream cheese must be softened. I leave mine out for a good hour before starting. Trying to beat cold cream cheese is like wrestling with a brick – not fun! The whipped topping gives that dreamy light texture, but here’s my secret: fold it in gently at the end so it stays fluffy.
- 1 cup graham cracker crumbs (packed lightly)
- 4 tbsp melted butter (unsalted works best)
- 8 oz cream cheese (full-fat, softened)
- 1/2 cup granulated sugar
- 1 tsp pure vanilla extract
- 1 cup whipped topping (thawed if frozen)
See? Nothing fancy – just six simple ingredients that magically transform into the creamiest, dreamiest cheesecake cups you’ll ever taste!
How to Make No-Bake Cheesecake Cups
Okay, let’s get mixing! The beauty of these cheesecake cups is how fast they come together. I like to line up all my ingredients first – it makes the process feel like a fun little assembly line. Trust me, you’ll be done before you know it!
Step 1: Prepare the Crust
First things first – that buttery graham cracker base! Mix your crumbs with melted butter until it looks like wet sand. Now here’s my trick: press about 2 tablespoons firmly into each cup using the back of a spoon or your fingers. Really pack it in there – we want a crust that holds together when you take that first glorious bite!
Step 2: Make the Cheesecake Filling
Now for the creamy magic. Beat that softened cream cheese until it’s completely smooth – no lumps allowed! Add sugar and vanilla, then keep mixing until it’s silky. This step is crucial – lumpy filling means lumpy cheesecake cups, and nobody wants that. The mixture should be smooth enough to drip slowly off your beaters.
Step 3: Layer and Chill
Time to bring it all together! Gently fold in the whipped topping – I do this by hand with a rubber spatula to keep it light and airy. Spoon the filling over your crusts, then pop them in the fridge for at least 2 hours (though overnight is even better). The wait is the hardest part, but that chilling time is what gives these their perfect cheesecake texture!

Tips for Perfect No-Bake Cheesecake Cups
After making these cheesecake cups more times than I can count, I’ve picked up some tricks worth sharing! First – that cream cheese temperature is everything. If you forget to soften it, here’s my emergency fix: microwave it for 10-second bursts until just pliable, but not melted. You’ll thank me later!
When folding in the whipped topping, think “gentle hug” not “bear squeeze.” Overmixing will deflate all that lovely fluffiness. And here’s a game-changer – use an ice cream scoop to portion the filling. Perfect layers every time, with zero mess. Oh, and if your cups are disappearing too fast? Double the batch next time – they freeze beautifully for up to a month!
Variations for No-Bake Cheesecake Cups
One of my favorite things about these cheesecake cups is how easy it is to mix things up! Fresh berries like strawberries or blueberries are a classic topping – just slice them thin so they sit pretty. For chocolate lovers, a quick drizzle of melted chocolate or a sprinkle of cocoa powder works wonders.
Feeling adventurous? Swap the vanilla extract for almond or lemon – just a teaspoon adds so much flavor. And if you’re short on time, a dollop of store-bought fruit preserves is a sweet shortcut. The possibilities are endless – just have fun with it!
Serving No-Bake Cheesecake Cups
These little beauties are perfect for dressing up or keeping simple! Right before serving, I love adding fresh berries or a mint leaf on top – makes them look so fancy. They’re my go-to for book club nights, potlucks, or when friends pop over unexpectedly. Just pull them out of the fridge and watch smiles appear!
Storing No-Bake Cheesecake Cups
Here’s the best part – these cheesecake cups actually get better after chilling! Cover them tightly with plastic wrap or store in an airtight container in the fridge for up to 4 days. Want to save some for later? They freeze beautifully for about a month – just thaw overnight in the fridge before serving. Perfect for satisfying sudden cheesecake cravings!
Nutritional Info for No-Bake Cheesecake Cups
Just so you know, these numbers are estimates based on my exact ingredients. Each delightful cup packs about 320 calories – not bad for such a creamy treat! Remember, using different brands or add-ons will change things slightly.
FAQs About No-Bake Cheesecake Cups
Got questions? I’ve got answers! These are the ones I get asked the most when I make these cheesecake cups for friends and family. Trust me, they’re all things I wondered about too when I first started making them.
Can I use low-fat cream cheese?
You can, but here’s the deal: low-fat cream cheese will give you a slightly less creamy texture. It’s still delicious, but full-fat cream cheese is what gives that rich, dreamy consistency. If you’re okay with a trade-off, go for it!
How long do they last in the fridge?
These cheesecake cups stay fresh in the fridge for about 3–4 days, as long as they’re covered tightly. Honestly, though, they rarely last that long in my house. They’re just too tempting!
Can I freeze these cheesecake cups?
Absolutely! They freeze beautifully for up to a month. Just pop them in an airtight container, and when you’re ready, thaw them overnight in the fridge. They’ll taste just as good as the day you made them.
Share Your No-Bake Cheesecake Cups
I’d love to see your cheesecake cup creations! Tag me or leave a comment with your favorite variations – did you try chocolate drizzle? Fresh fruit? Your photos might just inspire my next batch!


Irresistible 20-Minute No-Bake Cheesecake Cups You’ll Love
- Total Time: 2 hours 15 minutes
- Yield: 6 servings
- Diet: Vegetarian
Description
Easy no-bake cheesecake cups perfect for quick desserts.
Ingredients
- 1 cup graham cracker crumbs
- 4 tbsp melted butter
- 8 oz cream cheese, softened
- 1/2 cup sugar
- 1 tsp vanilla extract
- 1 cup whipped topping
Instructions
- Mix graham cracker crumbs and melted butter.
- Press the mixture into the bottom of cups.
- Beat cream cheese, sugar, and vanilla until smooth.
- Fold in whipped topping.
- Spoon the mixture over the crust.
- Refrigerate for at least 2 hours before serving.
Notes
- Use store-bought graham cracker crumbs for convenience.
- Add fruit toppings for extra flavor.
- Prep Time: 15 minutes
- Cook Time: 0 minutes
- Category: Dessert
- Method: No-Bake
- Cuisine: American