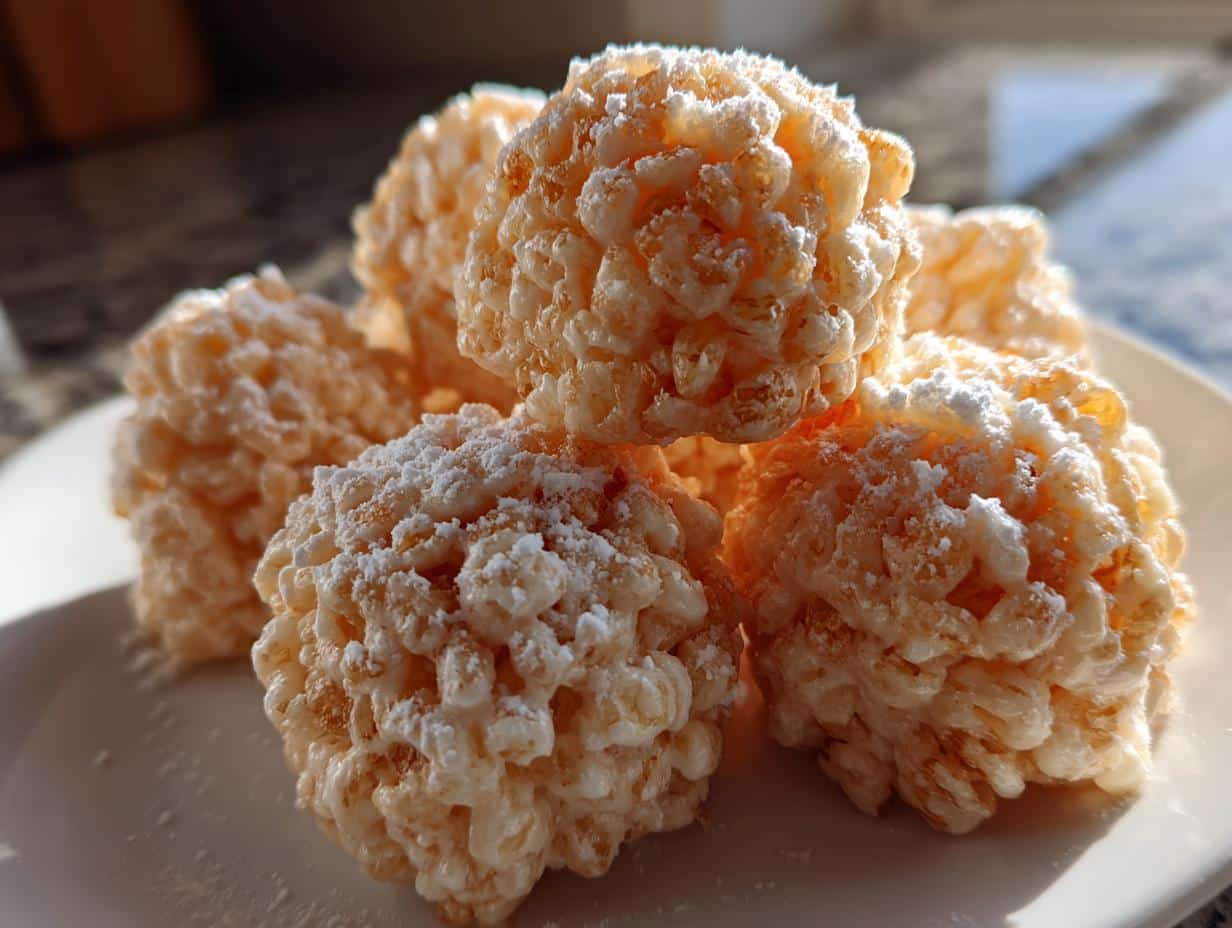
Oh my gosh, do I have a treat for you! These Marshmallow Rice Krispie Bubbles are my all-time favorite no-bake snack—crispy, sweet, and so much fun to make. I’ve been obsessed with them since I was a kid, back when my mom and I would whip up a batch for every sleepover or school party. There’s just something magical about that combination of melted marshmallows and crunchy cereal, all rolled into adorable little bite-sized bubbles.
What I love most is how easy they are to throw together. Seriously, you’re just 15 minutes away from the most crowd-pleasing treat ever. No oven, no fancy equipment—just butter, marshmallows, and Rice Krispies doing their thing in a pot. And the best part? You can customize them however you want! Add some sprinkles for birthdays, a drizzle of chocolate for something fancy, or even a dash of cinnamon for fall. These little guys never disappoint.
Trust me, once you make these once, they’ll become your go-to for every potluck, bake sale, or “I need something sweet right now” moment. The recipe is foolproof, the ingredients are pantry staples, and the result is pure nostalgia in every bite. Let’s get bubbling!
Why You’ll Love These Marshmallow Rice Krispie Bubbles
Let me count the ways these little treats will steal your heart (and probably become your new obsession):
- Lightning fast – From pantry to plate in under 15 minutes flat
- No oven required – Perfect for summer days when you can’t bear to turn on the heat
- Kid magnet – Little hands love helping shape these bubbly bites
- Endless possibilities – Change up colors, flavors, and mix-ins for every occasion
- Party superstar – Always the first treat to disappear from dessert tables
Seriously, I’ve never met anyone who didn’t go crazy for these. They’re like edible happiness in perfect little packages!
Ingredients for Marshmallow Rice Krispie Bubbles
Alright, let’s talk ingredients! The magic of these bubbly treats comes down to just a few simple things—but quality matters. I’ve learned through many batches that using the right stuff makes all the difference between “good” and “oh-my-gosh-I-need-another-one” amazing.
Here’s what you’ll need:
- 3 tablespoons butter – Real, salted butter please! It gives that rich flavor you can’t get from margarine. And yes, I measure it exactly—too much makes them greasy, too little and they won’t hold shape.
- 4 cups mini marshmallows – These melt faster than big ones, and give the perfect gooey texture. Pro tip: Keep an extra bag handy because someone (maybe me) always eats a handful while cooking.
- 6 cups Rice Krispies cereal – Freshness matters here! Stale cereal won’t give you that signature “snap” we all love.
- 1 teaspoon vanilla extract (optional) – My secret weapon! It adds depth to the sweetness. Use the good stuff—pure vanilla, not imitation.
Oh! And you’ll want to have some extra butter or cooking spray nearby for greasing your hands when shaping. Trust me, you do NOT want to learn the hard way how sticky melted marshmallow can be (ask me how I know). A little prep goes a long way here!
How to Make Marshmallow Rice Krispie Bubbles
Okay, let’s get to the fun part! Making these bubbly treats is seriously easy, but I’ve got some tricks to make sure yours turn out perfect every time. Follow these steps and you’ll be snacking in no time!
Step 1: Melt the Butter and Marshmallows
First things first – grab your biggest saucepan (trust me, you’ll need the space) and melt the butter over low heat. I can’t stress this enough – low and slow is the way to go! Once the butter’s melted, toss in those mini marshmallows and keep stirring. You’ll see them go from fluffy clouds to a smooth, glossy river of gooey goodness. Don’t walk away – marshmallows can burn faster than you’d think!
Step 2: Mix in Vanilla and Cereal
Now take the pot off the heat and stir in your vanilla extract if you’re using it. Then comes the Rice Krispies! Dump them in all at once and start folding gently with a rubber spatula. You want every single crispy piece coated in that marshmallow magic, but don’t go crazy – overmixing will crush your cereal. The mixture should look like a sparkly, sticky snowstorm!
Step 3: Shape the Bubbles
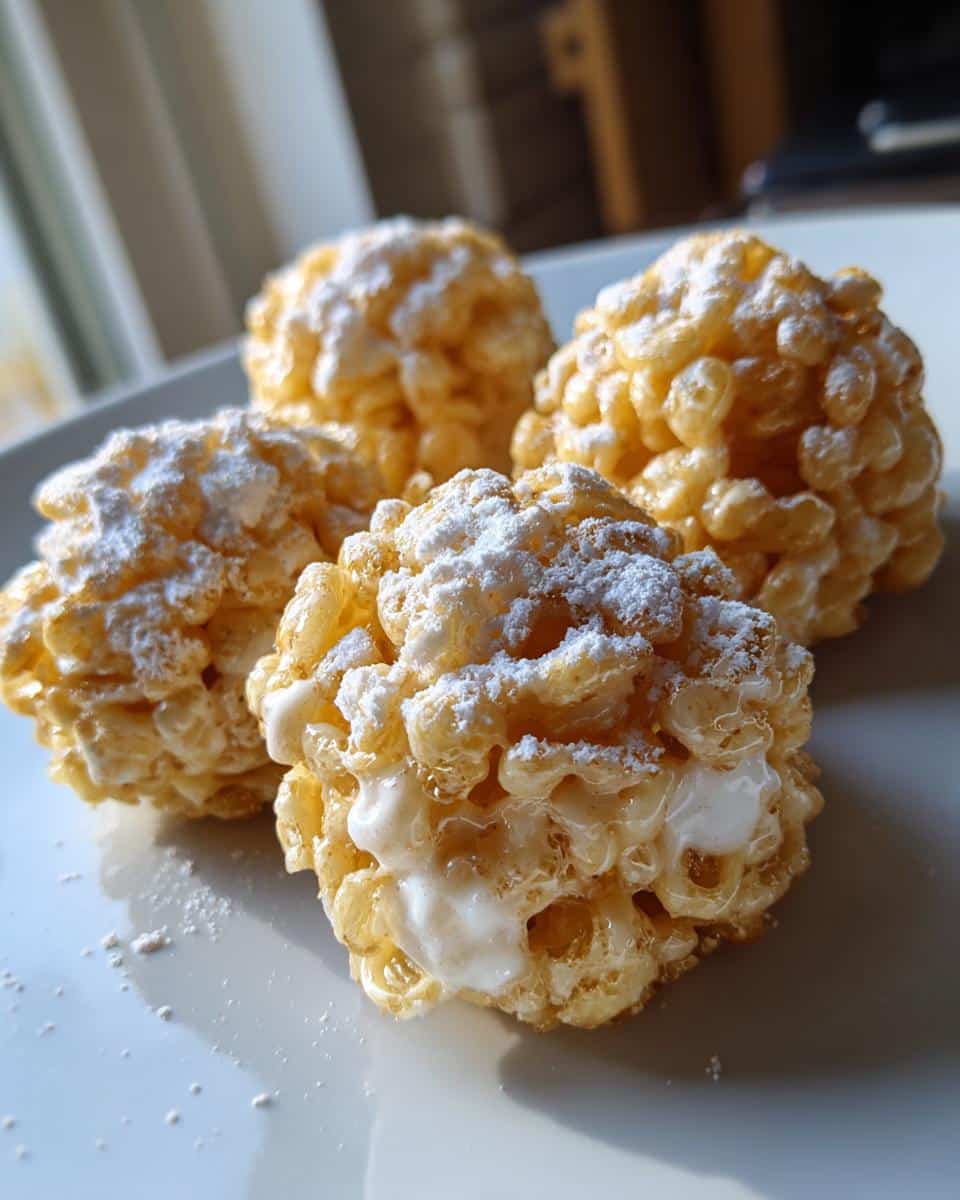
Here’s where things get hands-on! Lightly grease your palms with butter or cooking spray (seriously, don’t skip this!) and start scooping out golf ball-sized portions. Roll them quickly between your hands – the mixture sets fast! If it starts sticking too much, just re-grease your hands. Place each bubble on parchment paper to cool. Pro tip: Work in batches if needed – the warmth makes shaping easier!
And that’s it! In about 10 minutes, you’ll have a whole army of these adorable, crispy-sweet bubbles ready to devour. Easy peasy, right?
Tips for Perfect Marshmallow Rice Krispie Bubbles
After making hundreds (okay, maybe thousands) of these bubbles, I’ve picked up some tricks that’ll make yours absolutely foolproof:
- Move fast! That marshmallow mixture sets quicker than you’d think. Have everything prepped before you start melting.
- Color them happy – A few drops of food coloring transforms plain bubbles into festive party treats!
- Seal tight – Store in an airtight container ASAP to keep them crisp. Stale bubbles are sad bubbles.
Follow these simple tips and you’ll be the Marshmallow Rice Krispie Bubble master in no time!
Variations for Marshmallow Rice Krispie Bubbles
The beauty of these treats? You can dress them up a million ways! My favorites:
- Birthday style – Mix in rainbow sprinkles while the marshmallow’s still warm
- Chocolate lovers – Drizzle melted chocolate over cooled bubbles
- Flavor twists – Swap vanilla for almond or peppermint extract
See? Endless ways to make them your own!
Serving and Storing Marshmallow Rice Krispie Bubbles
Now that you’ve made these adorable little bubbles, let’s talk about keeping them perfect! Here’s my tried-and-true method for serving and storing – learned through many happy (and a few sticky) experiences.
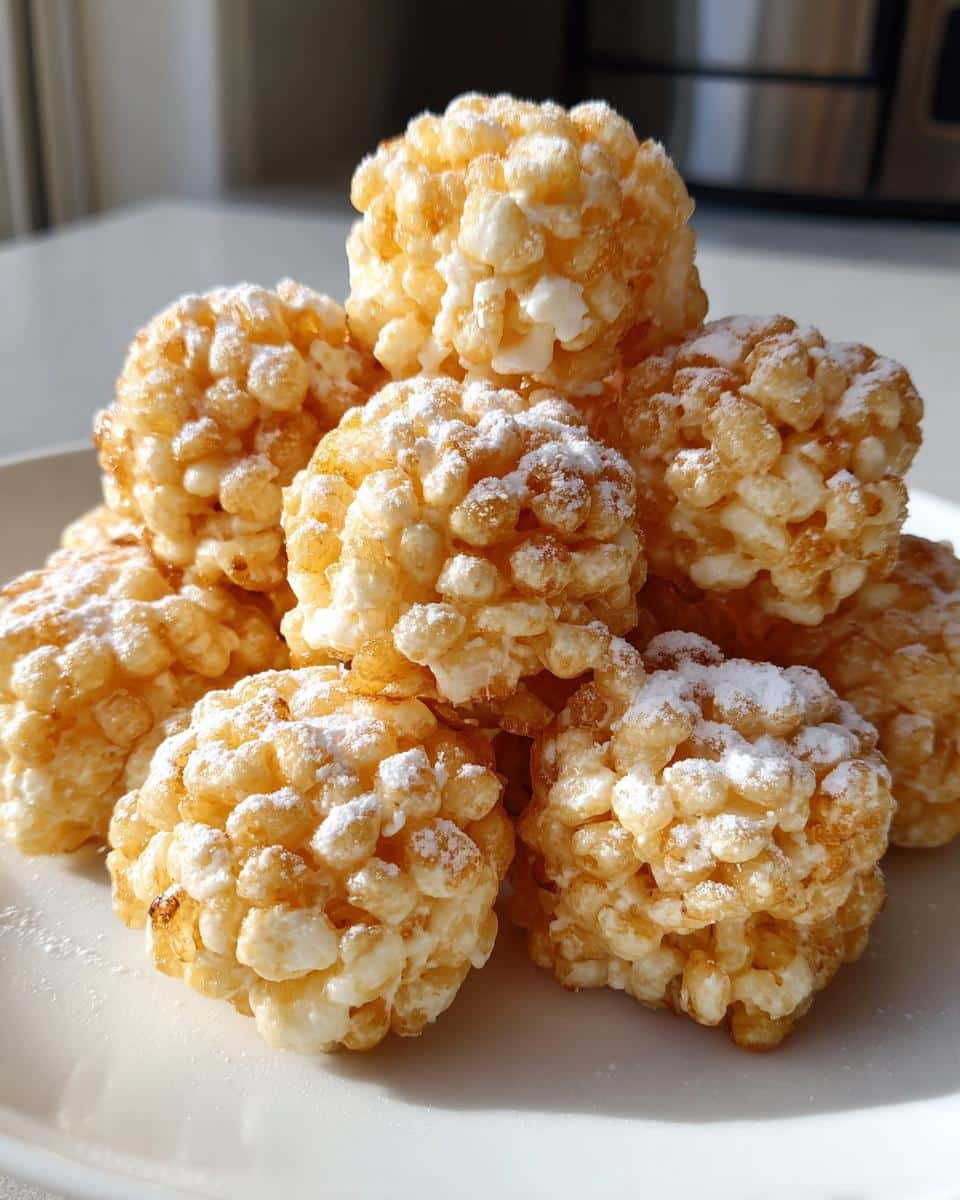
First, let them cool completely on the parchment paper – about 20 minutes should do it. I know it’s tempting to sneak one early, but trust me, waiting makes all the difference in texture. Once cooled, pile them high on a cute plate or in a bowl for serving. They look especially fun in clear glass containers where you can see all those bubbly shapes!
For storage, grab an airtight container – I’m partial to cookie tins for nostalgia, but any plastic or glass container with a tight seal works. Layer them between sheets of parchment or wax paper so they don’t stick together. They’ll stay fresh and crispy for up to 3 days at room temperature (if they last that long!).
Important note: No reheating needed! These are meant to be enjoyed at room temp. If they somehow get a bit stale (rare in my house), just know they still taste amazing – just with a slightly chewier texture. But honestly? They never last long enough to find out!
Marshmallow Rice Krispie Bubbles Nutritional Info
Okay, let’s be real – we’re not eating these adorable bubbles for their health benefits! But I know some folks like to keep track, so here’s the scoop on what’s in each tasty bite. Just remember – these numbers can change depending on your exact ingredients and how big you make your bubbles.
For an average-sized bubble (about the size of a golf ball), you’re looking at roughly:
- 80 calories – Perfect little sweet treat without going overboard
- 15g carbohydrates – Mostly from that magical marshmallow sweetness
- 2g fat – Thank you, butter, for making everything delicious
Now, if you’re adding extras like chocolate drizzle or sprinkles (and why wouldn’t you?), just know those will bump up the numbers a bit. My philosophy? Life’s too short to stress over every calorie when you’re enjoying something this fun and nostalgic! Just savor each bubbly bite.
FAQs About Marshmallow Rice Krispie Bubbles
Can I use regular marshmallows instead of mini ones?
Absolutely! Regular marshmallows work fine – just chop them into smaller pieces first so they melt evenly. You’ll need about 40 large marshmallows to equal 4 cups of minis. The melting might take an extra minute or two, but the result tastes just as amazing!
How do I prevent the mixture from sticking everywhere?
Grease, grease, grease! I can’t stress this enough – butter your hands really well before shaping, and keep a little extra nearby to reapply. Using parchment paper instead of wax paper helps too – the wax can sometimes make things stickier. If all else fails? Lick your fingers – it’s part of the fun!
Can I freeze these for later?
You can, but I don’t recommend it. Freezing changes the texture, making the cereal lose its crispness when thawed. They’re so quick to make fresh that I always whip up a new batch instead. If you must freeze, do it in a single layer first, then transfer to an airtight container – they’ll keep about 2 weeks.
Share Your Marshmallow Rice Krispie Bubbles!
I’d love to see your bubbly creations! Tag me @bubblequeen on Instagram with your Marshmallow Rice Krispie Bubbles – I’ll feature my favorites! Happy bubbling!
For more recipe inspiration, check out our Pinterest page!
Print
15-Minute Marshmallow Rice Krispie Bubbles – Irresistible!
- Total Time: 15 mins
- Yield: 24 bubbles
- Diet: Vegetarian
Description
A fun and easy treat combining marshmallows and Rice Krispies to create light, crispy bubbles.
Ingredients
- 3 tablespoons butter
- 4 cups mini marshmallows
- 6 cups Rice Krispies cereal
- 1 teaspoon vanilla extract (optional)
Instructions
- Melt butter in a large saucepan over low heat.
- Add marshmallows and stir until fully melted.
- Remove from heat and mix in vanilla extract if using.
- Fold in Rice Krispies until evenly coated.
- Grease your hands lightly and shape mixture into small balls.
- Let cool on parchment paper before serving.
Notes
- Work quickly while shaping to prevent mixture from hardening.
- Add food coloring for festive variations.
- Store airtight to maintain crispness.
- Prep Time: 10 mins
- Cook Time: 5 mins
- Category: Dessert
- Method: No-Bake
- Cuisine: American
