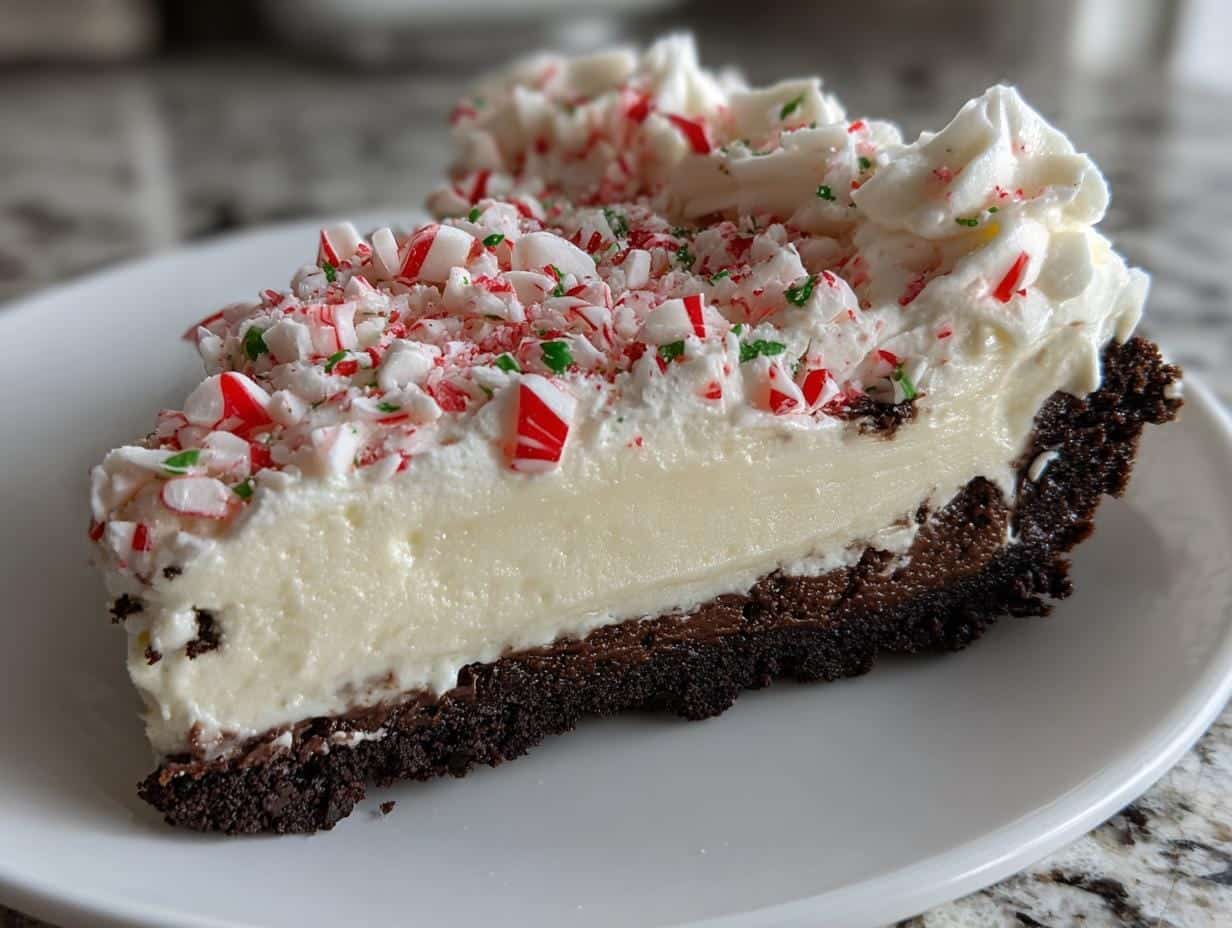
Nothing says holiday magic like the first bite of my peppermint cheesecake – that perfect blend of cool, creamy filling and refreshing peppermint crunch. I still remember the Christmas Eve I first made this for my in-laws (who swore they didn’t like cheesecake!). The way that velvety texture melts on your tongue with just the right kiss of peppermint… well, let’s just say it’s been our family’s must-have dessert ever since. This peppermint cheesecake turns any gathering into something special with its festive flavors and showstopper looks.
Why You’ll Love This Peppermint Cheesecake
This isn’t just any cheesecake – it’s the dessert that’ll have everyone begging for seconds! Here’s why it’s my go-to holiday showstopper:
- Creamy dreamy texture: That velvety smooth filling practically melts on your tongue
- Festive flavor explosion: The perfect balance of rich cream cheese and refreshing peppermint
- Surprisingly simple: Looks fancy but comes together with basic mixing and baking
- Total crowd-pleaser: Even my “I don’t like mint” uncle sneaks second slices!
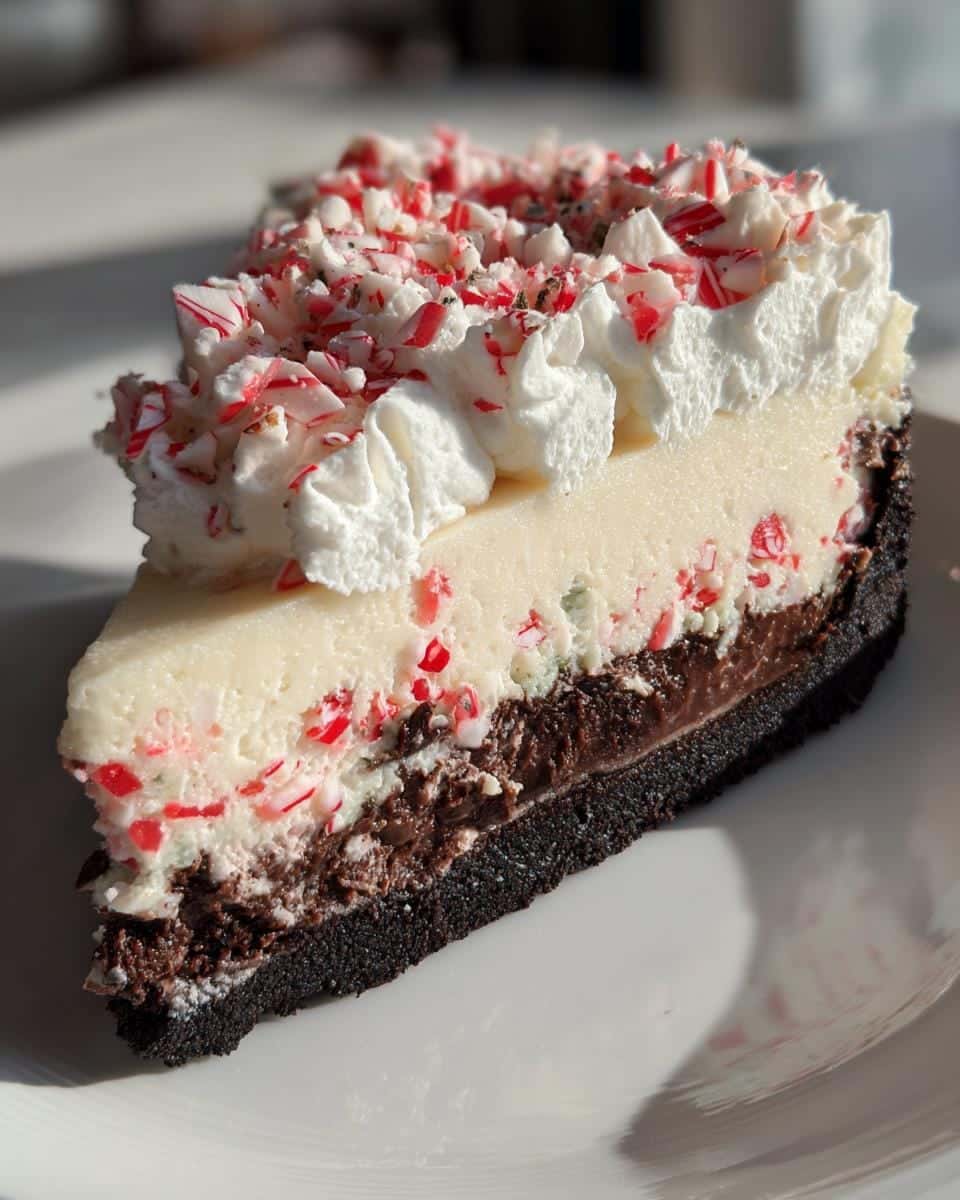
The crushed candy cane topping makes it look like it came from a bakery, but trust me – it’s way better when homemade.
Ingredients for Peppermint Cheesecake
Gathering the right ingredients is half the magic! Here’s exactly what you’ll need to make this holiday showstopper:
For the Crust:
- 2 cups chocolate cookie crumbs (about 20 Oreos or similar cookies – I just toss whole cookies in my food processor)
- 1/4 cup melted butter (salted or unsalted both work, but I prefer salted for that sweet-salty contrast)
For the Filling:
- 24 oz cream cheese, softened (that’s 3 standard packages – leave them on the counter for at least 2 hours)
- 1 cup granulated sugar (don’t pack it – just scoop and level)
- 3 large eggs (room temperature helps them incorporate smoothly)
- 1 tsp pure vanilla extract (the good stuff makes a difference!)
- 1/2 tsp peppermint extract (measure carefully – this stuff is potent!)
For the Topping:
- 1 cup heavy cream (cold straight from the fridge)
- 1/2 cup crushed peppermint candies or candy canes, plus extra for garnish (I put them in a ziplock and whack with a rolling pin)
Ingredient Substitutions
No stress if you need to swap things! Gluten-free cookies work great for the crust. Low-fat cream cheese will do in a pinch (though the texture won’t be quite as rich). Can’t find candy canes? Starlight mints or peppermint bark pieces work too. Warning: Peppermint oil is way stronger than extract – if using, start with just 1/4 tsp!
Equipment You’ll Need
- 9-inch springform pan (the clamp is your best friend for clean slices!)
- Stand mixer or electric hand mixer (your arm will thank you)
- Rubber spatula (for scraping every last bit of that delicious batter)
- Measuring cups and spoons (no eyeballing the peppermint extract!)
- Food processor or ziplock bag + rolling pin (for crushing those candies)
- Mixing bowls (one for crust, one for filling)
- Piping bag with star tip (if you want to get fancy with the whipped cream)
How to Make Peppermint Cheesecake
Okay, here’s where the magic happens! I’ve made this peppermint cheesecake so many times I could do it in my sleep, but I’ll walk you through each step carefully. The secret is taking your time – good cheesecakes can’t be rushed. Oh, and don’t forget to preheat your oven to 325°F before you start (I’ve forgotten that step more times than I’d like to admit!).
Step 1: Prepare the Crust
First, take that gorgeous chocolate cookie crumb mixture and press it firmly into your 9-inch springform pan. I mean really press it – use the bottom of a measuring cup or glass to get it nice and compact. You want it to go about halfway up the sides of the pan too, not just the bottom. This crust is what holds everything together, so don’t be shy with it! Once it’s pressed in, pop it into the fridge to set while you make the filling – about 15 minutes does the trick.
Step 2: Make the Filling
Now for the good stuff! Here’s where room-temperature cream cheese comes in clutch – cold cream cheese will leave lumps no matter how long you beat it. Beat the cream cheese and sugar together until it’s completely smooth (about 2-3 minutes on medium speed). Then add those eggs one at a time, mixing just until combined after each one. Important: Don’t overmix once the eggs are in! Too much air causes cracks. Finally, gently stir in the vanilla and peppermint extracts. The batter should be creamy and dreamy, like the best cheesecake batter you’ve ever tasted.
Step 3: Bake and Cool
Pour that beautiful filling over your chilled crust and smooth the top. Bake for 45-50 minutes – the edges should be set but the center will still jiggle slightly when you gently shake the pan. This is totally normal! Turn off the oven and crack the door open slightly, letting the cheesecake cool gradually for about an hour. This slow cooling helps prevent cracks. Then transfer it to the fridge to chill completely – at least 4 hours, but overnight is even better. I know it’s tempting to skip this step, but trust me, it’s worth the wait!
Step 4: Add Toppings
The fun part! Whip that heavy cream until stiff peaks form (about 3-4 minutes on high speed). You can either spread it over the cheesecake or pipe little swirls around the edges with a star tip for extra holiday flair. Then sprinkle generously with those crushed peppermint candies – I like to save some bigger pieces for the center. The contrast of creamy white whipped cream and bright red candy pieces makes it look like a winter wonderland! Slice with a hot knife (just run it under hot water and dry between cuts) for perfect, clean pieces.
Tips for the Best Peppermint Cheesecake
After making this peppermint cheesecake dozens of times (and learning from my mistakes!), here are my can’t-miss tips for perfect results every time:
- Patience is key – Letting it cool slowly in the oven then chill overnight gives you that perfect firm-yet-creamy texture
- Crush candies finely – Big chunks look pretty but can make slicing messy (I use a rolling pin for uniform pieces)
- Room temp ingredients – Cold cream cheese = lumpy filling, cold eggs = overmixing = cracks
- Don’t peek! That blast of cold air from opening the oven door can make your cheesecake fall
- Water bath trick – For extra insurance against cracks, bake your springform pan in a larger pan with hot water
Follow these simple tricks, and you’ll have a peppermint cheesecake so perfect, no one will believe it’s homemade!
Serving and Storing Peppermint Cheesecake
Here’s how to keep your peppermint cheesecake looking and tasting its best! Always slice it with a hot knife – just run your knife under hot water and wipe dry between cuts for those picture-perfect slices. Leftovers? Cover tightly and refrigerate for up to 5 days (if it lasts that long!). One important note: don’t freeze this cheesecake – the texture changes completely and you’ll lose that dreamy creaminess we worked so hard for.
Peppermint Cheesecake Variations
Once you’ve mastered the classic version, try these fun twists! Swirl in a few drops of red food coloring for a festive candy cane effect. Swap the chocolate crust for white chocolate cookie crumbs if you prefer something sweeter. Feeling extra decadent? Mix 2 tablespoons cocoa powder into the filling for a chocolate-peppermint combo that’ll knock everyone’s socks off. My niece loves when I sprinkle mini chocolate chips between the whipped cream and peppermint topping – it’s like Christmas in every bite!
Nutritional Information
Okay, let’s be real – we’re not eating cheesecake for the health benefits! But since you asked, here’s the scoop on what’s in each heavenly slice. Important note: These numbers can vary based on your exact ingredients (I calculated using full-fat cream cheese and regular Oreo cookies).
Per serving (that’s 1 slice out of 10, if you can stop at just one!):
- Calories: 420 (worth every single one!)
- Fat: 28g (hello, creamy goodness)
- Saturated Fat: 16g (that rich cream cheese at work)
- Carbohydrates: 38g (mostly from that irresistible cookie crust)
- Sugar: 30g (it’s a dessert, people!)
- Protein: 6g (who knew cheesecake had protein?)
Now, if you’re watching your intake, you could use low-fat cream cheese or sugar alternatives – but I’ll be honest, the texture won’t be quite as divine. My philosophy? Life’s too short not to enjoy the real thing, especially during the holidays! Just savor each bite slowly (if you can resist gobbling it down).
Frequently Asked Questions
Can I make this peppermint cheesecake ahead?
Absolutely! In fact, I often bake mine 2 days before serving – the flavor actually improves as it chills. Just hold off on the whipped cream and candy topping until right before you’re ready to serve. Keep it covered in the fridge, then add your festive finishing touches when it’s showtime!
How do I prevent cracks?
Oh honey, I’ve battled those pesky cracks more times than I can count! Here’s what works: First, don’t overmix once the eggs are added – too much air is the enemy. Second, cool it slowly in the oven with the door slightly ajar for about an hour. And if you really want insurance? Bake it in a water bath. These little tricks will give you that smooth, perfect top every time.
Can I use peppermint oil instead of extract?
Whoa there – put down that peppermint oil! It’s about four times stronger than extract, and I learned this the hard way (let’s just say my first attempt tasted like toothpaste!). If you must use oil, only use 1/4 teaspoon max. But honestly? Stick with extract – it gives you that perfect holiday flavor without overwhelming the whole cheesecake.
Print
Irresistible Peppermint Cheesecake Recipe in 4 Easy Steps
- Total Time: 5 hours 10 minutes (includes chilling)
- Yield: 10 servings
- Diet: Vegetarian
Description
A creamy and refreshing peppermint cheesecake with a chocolate crust, perfect for holidays or special occasions.
Ingredients
- 2 cups chocolate cookie crumbs
- 1/4 cup melted butter
- 24 oz cream cheese, softened
- 1 cup sugar
- 3 eggs
- 1 tsp vanilla extract
- 1/2 tsp peppermint extract
- 1/2 cup crushed peppermint candies
- 1 cup heavy cream
Instructions
- Preheat oven to 325°F.
- Mix cookie crumbs with melted butter and press into a springform pan.
- Beat cream cheese and sugar until smooth.
- Add eggs one at a time, then mix in vanilla and peppermint extract.
- Pour filling over crust and bake for 45-50 minutes.
- Let cool, then refrigerate for at least 4 hours.
- Whip heavy cream and spread over cheesecake. Top with crushed peppermint candies.
Notes
- Use room-temperature cream cheese for smoother texture.
- For a stronger peppermint flavor, add an extra 1/4 tsp extract.
- Store leftovers in the refrigerator.
- Prep Time: 20 minutes
- Cook Time: 50 minutes
- Category: Dessert
- Method: Baking
- Cuisine: American
