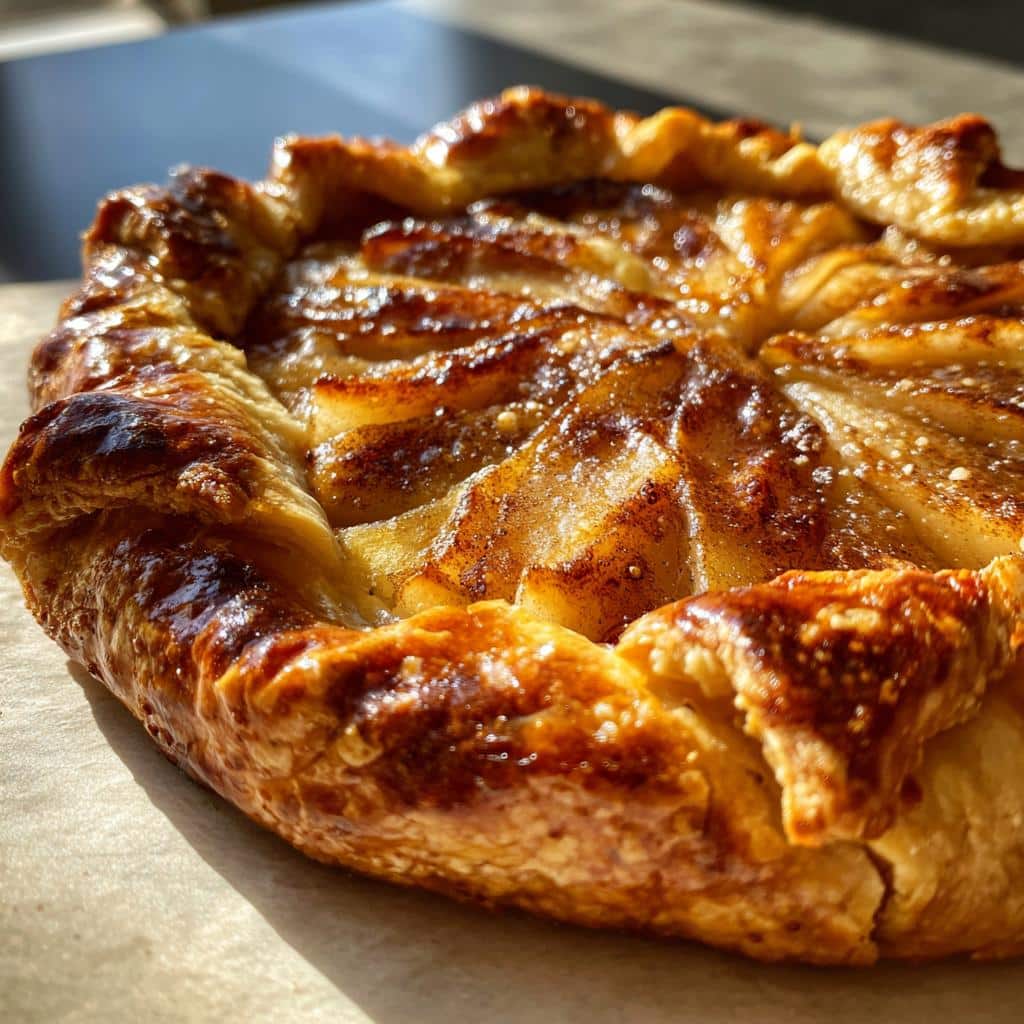
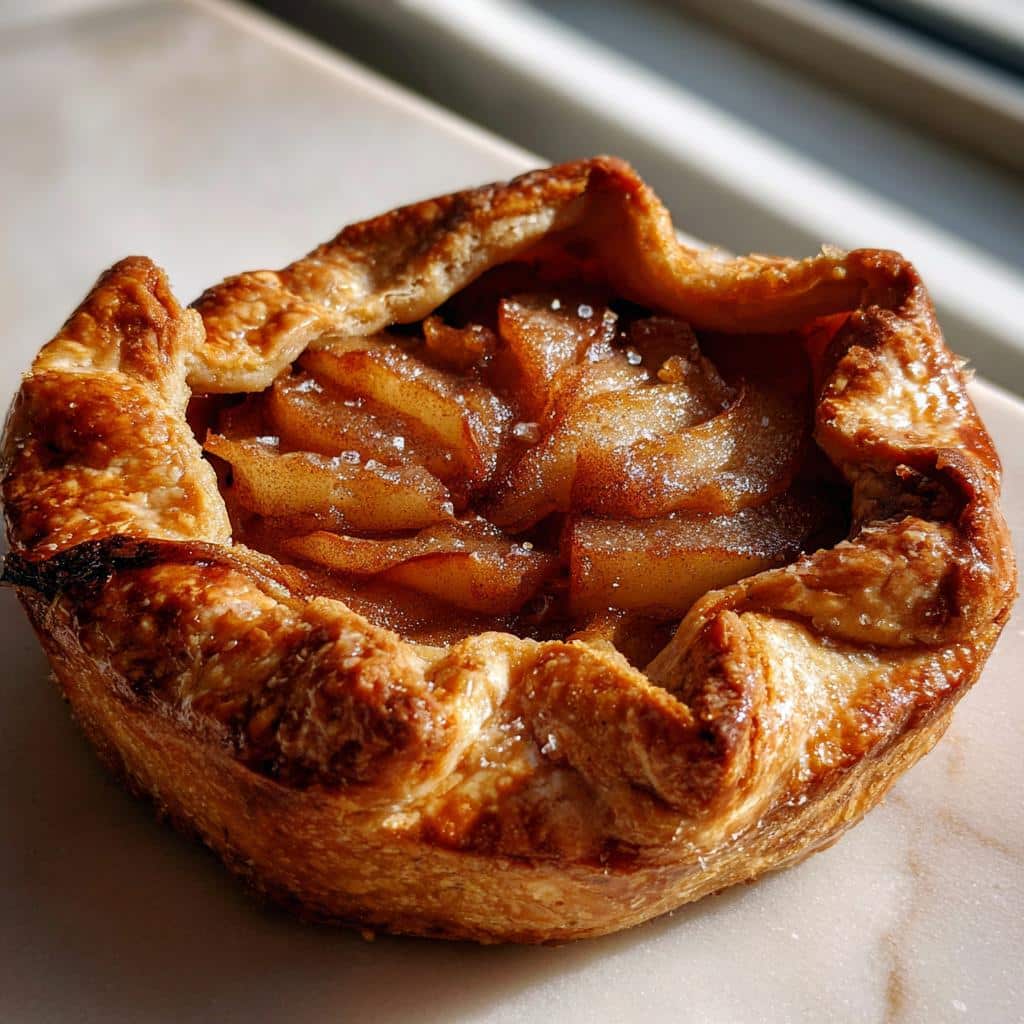
Let me tell you about my favorite lazy baker’s secret – the rustic pear crostata. It’s the dessert I make when I want all the cozy vibes of pie without fussing with fancy latticework or perfect crimping. I’ve been baking these free-form tarts for years, ever since my Italian neighbor showed me how her nonna would throw them together with whatever fruit was in season. There’s something magical about how those juicy pears bubble up through the flaky crust, and how the edges bake up golden and crisp. Trust me, once you try this pear crostata, you’ll wonder why you ever stressed over perfect pie crusts!
Why You’ll Love This Rustic Pear Crostata
This pear crostata is my go-to dessert for so many reasons! Let me tell you why it’s always a hit:
- No perfection needed – the messy, folded edges are part of the charm
- That buttery crust stays flaky even when I’m feeling lazy
- Pears caramelize into jammy perfection while baking
- Takes half the time of a traditional pie
- Works with whatever fruit you’ve got – apples, berries, you name it
Seriously, it’s foolproof and always looks (and tastes!) like you tried way harder than you actually did.
Ingredients for Rustic Pear Crostata
Here’s everything you’ll need to make the most deliciously imperfect pear crostata – I’ve made this enough times to know these measurements work like a charm:
- 1 1/2 cups all-purpose flour (I sometimes swap in a 1/4 cup of whole wheat for extra nuttiness)
- 1/4 teaspoon salt – just enough to make the flavors pop
- 1/2 cup cold unsalted butter, cubed (keep it in the fridge until the last second – cold is key!)
- 3-4 tablespoons ice water – I keep a glass of water with ice cubes ready
- 3 ripe but firm pears, peeled and sliced about 1/4-inch thick (Bartlett or Anjou work beautifully)
- 2 tablespoons granulated sugar – more if your pears aren’t super sweet
- 1 tablespoon lemon juice to keep those pears from browning
- 1 teaspoon cinnamon for that warm, cozy flavor
- 1 egg, beaten – this gives our crust that gorgeous golden shine
How to Make Rustic Pear Crostata
Okay, let’s get to the fun part! Making this pear crostata is easier than you think, but I’ve got some little tricks that’ll make it extra special. Follow these steps, and you’ll have a gorgeous golden tart that looks like it came from a fancy bakery (but we’ll know the truth – it’s totally approachable!).
Prepare the Dough
First things first – get that butter cold! I pop my mixing bowl in the freezer for 5 minutes while I gather my ingredients. Then whisk together the flour and salt (I use a fork – no need for fancy tools here). Now for the magic: work in those cold butter cubes with your fingers until the mixture looks like coarse crumbs with some pea-sized butter pieces remaining. This is what gives our crust those dreamy flaky layers.
Here’s my secret: sprinkle the ice water one tablespoon at a time, mixing lightly with a fork just until the dough comes together. You want it to hold when you pinch it, but not be wet. Overworking makes tough crust – we’re going for tender!
Assemble the Rustic Pear Crostata
Roll the dough out on a floured surface into about a 12-inch circle (don’t stress about perfect rounds – rustic is the name of the game!). Transfer it to a parchment-lined baking sheet – this part always feels like magic to me. Now toss those beautiful pear slices with sugar, lemon juice, and cinnamon until they’re all coated and glistening.
Arrange the pears in the center, leaving a good 2-inch border all around. This is where the fun begins! Fold that border up over the filling, pleating as you go – no need to be precise. I like to leave some gaps where the pears peek through. Brush the folded edges with that beaten egg for maximum golden brown glory.
Bake to Golden Perfection
Pop that beauty into your preheated 375°F oven and let the magic happen. After about 20 minutes, I start peeking – you’re looking for the crust to turn a deep golden brown and those pear juices to bubble happily. Usually takes 30-35 minutes total in my oven.
Pro tip: if the edges brown too quickly, just tent some aluminum foil over them. When it’s done, let it cool for at least 15 minutes – I know it’s hard to wait, but those pear juices need time to set up. Then slice and enjoy that perfect balance of flaky crust and jammy pears!
Tips for the Best Rustic Pear Crostata
After making this pear crostata more times than I can count, here are my can’t-live-without tips for perfection:
- Butter must be cold! I freeze mine for 15 minutes before using – warm butter makes tough crust
- Taste your pears first – super sweet ones need less sugar, tart ones might need an extra tablespoon
- Don’t skip the egg wash – it’s what gives that gorgeous golden crust
- Let it cool before slicing (I know it’s hard!) so the juices don’t run everywhere
- Parchment paper is your friend – no stuck crust disasters
Trust me, these little tricks make all the difference between good and “wow!”
Serving Suggestions
Oh, let me tell you how I love to serve this pear crostata – warm from the oven with a big scoop of vanilla ice cream melting over the top! The contrast of cold creaminess with the warm, jammy pears is absolute perfection. For an extra special touch, I’ll sometimes drizzle caramel sauce or sprinkle toasted walnuts on top. My family goes wild when I bring this to the table with a dollop of freshly whipped cream and a dusting of powdered sugar. It’s heavenly with afternoon tea too – just let it cool completely for a less messy slice!
Storing and Reheating Rustic Pear Crostata
Here’s the beautiful thing about this pear crostata – it keeps like a dream! I usually just cover mine loosely with foil and leave it at room temperature for up to 2 days (if it lasts that long in your house). For longer storage, wrap individual slices tightly in plastic and freeze for up to a month – perfect for surprise dessert emergencies!
When you’re ready to enjoy leftovers, skip the microwave (soggy crust alert!). Instead, pop slices on a baking sheet in a 350°F oven for about 8 minutes. That crisp crust comes right back to life, and the pears get all warm and gooey again – just like fresh from the oven!
Rustic Pear Crostata Variations
One of my favorite things about this recipe is how easily it adapts to whatever fruit or flavors I’m craving! When pears aren’t in season, I’ll swap in thinly sliced apples (toss them with an extra pinch of cinnamon – so cozy). Sometimes I’ll scatter sliced almonds over the pears before folding the crust for a lovely crunch. My neighbor swears by adding a handful of dried cranberries to the pear filling during the holidays – the tartness cuts through the sweetness beautifully. Once I even spread a thin layer of frangipane under the pears for an almond twist that had everyone begging for the recipe. The possibilities are endless – just keep that flaky crust, and you really can’t go wrong!
Nutritional Information
Here’s the estimated nutrition per slice of my pear crostata (remember, exact amounts vary based on your ingredients and serving size): about 280 calories, 14g fat, and 3g fiber. The pears pack vitamin C, and that buttery crust? Pure happiness in every bite!
Common Questions About Rustic Pear Crostata
After years of making this pear crostata, I’ve gotten all the questions – here are the ones that come up most often with my tried-and-true answers:
Can I make the dough ahead of time?
Absolutely! I often make the dough the night before, wrap it tightly in plastic, and refrigerate it. Just let it sit at room temperature for 10 minutes before rolling so it’s easier to work with. You can even freeze the dough for up to 3 months – just thaw overnight in the fridge when you’re ready to bake.
What are the best pears for crostata?
My go-tos are Bartlett or Anjou pears – they hold their shape beautifully when baked. Bosc pears work too, but they’re firmer so I slice them thinner. Avoid super juicy varieties like Comice unless you don’t mind a runnier filling (still delicious though!). The key is using pears that are ripe but still firm.
Why did my crust turn out tough?
Probably from overworking the dough or using warm butter. Remember – handle it as little as possible! And if your kitchen’s warm, I’ll sometimes chill the rolled-out crust for 10 minutes before adding filling. That extra cold time makes all the difference for flakiness.
Can I use frozen pears?
You can, but thaw and drain them well first – frozen pears release more juice. I’ll often toss them with an extra teaspoon of flour to soak up excess moisture. Fresh is best, but frozen works in a pinch!
Final Thoughts
There you have it – my foolproof pear crostata that never fails to impress, even when I’m baking in my pajamas! I hope you’ll give this recipe a try and discover just how magical simple desserts can be. When you do, tag me – I’d love to see your beautiful rustic creations! Nothing makes me happier than knowing someone’s kitchen smells like warm pears and cinnamon because of this recipe. Happy baking, friends!
Print
Irresistible 3-Ingredient Rustic Pear Crostata That Melts Hearts
- Total Time: 55 minutes
- Yield: 6 servings
- Diet: Vegetarian
Description
A rustic pear crostata is a simple, free-form tart with a flaky crust and sweet pear filling.
Ingredients
- 1 1/2 cups all-purpose flour
- 1/4 teaspoon salt
- 1/2 cup cold unsalted butter, cubed
- 3-4 tablespoons ice water
- 3 ripe pears, peeled and sliced
- 2 tablespoons granulated sugar
- 1 tablespoon lemon juice
- 1 teaspoon cinnamon
- 1 egg, beaten (for egg wash)
Instructions
- Preheat oven to 375°F (190°C).
- Mix flour and salt in a bowl. Cut in butter until crumbly.
- Add ice water, 1 tablespoon at a time, until dough forms.
- Roll dough into a circle on a floured surface.
- Toss pears with sugar, lemon juice, and cinnamon.
- Arrange pears in the center of the dough, leaving a 2-inch border.
- Fold edges over the filling, pleating as needed.
- Brush crust with egg wash.
- Bake for 30-35 minutes until golden brown.
- Cool slightly before serving.
Notes
- Use cold butter for a flaky crust.
- Adjust sugar based on pear sweetness.
- Serve warm with vanilla ice cream.
- Prep Time: 20 minutes
- Cook Time: 35 minutes
- Category: Dessert
- Method: Baking
- Cuisine: Italian
