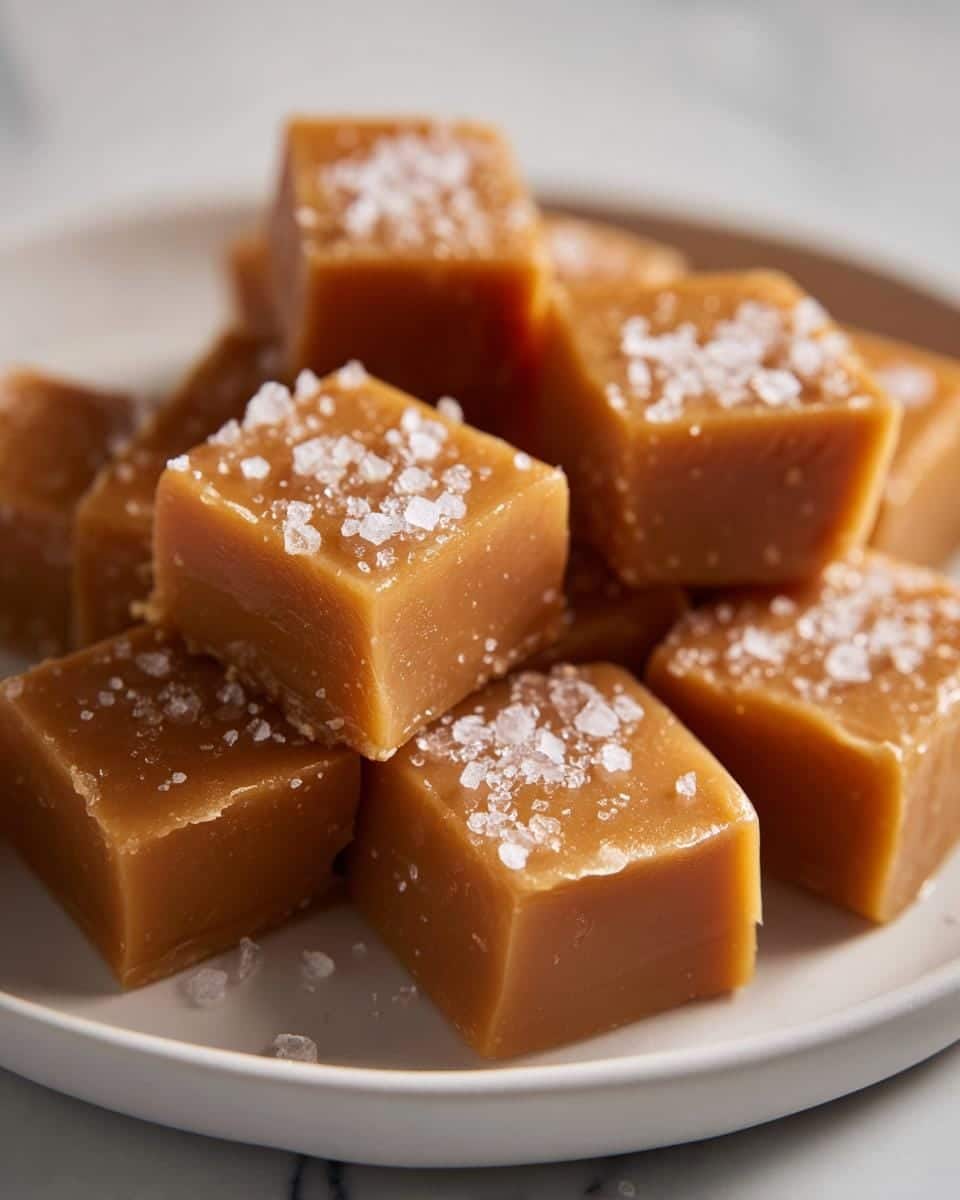
There’s something magical about biting into a homemade salted vanilla caramel – that moment when rich, buttery sweetness melts on your tongue, followed by that perfect little salty crunch. I still remember my first attempt at making these years ago (let’s just say I learned the hard way about hot sugar burns!), but once you get the hang of it, these caramels are surprisingly simple to whip up with just a few pantry staples. What makes my salted vanilla caramels special? That heavenly balance – the deep vanilla flavor playing off the sea salt, the way the chewy texture gives just enough resistance before dissolving into pure bliss. Trust me, once you taste these, store-bought caramels will never compare.
Why You'll Love These Salted Vanilla Caramels
Let me tell you why these salted vanilla caramels have become my go-to treat (and why friends keep begging me to make more!):
- That perfect sweet-salty balance – the rich caramel gets a flavor boost from flaky sea salt that makes you crave “just one more” every time
- Dreamy texture – firm enough to hold shape but melts luxuriously in your mouth (no tooth-sticking here!)
- Simple ingredients – just pantry staples transformed into something extraordinary
- Gift-worthy treats – wrap them in pretty paper and watch people's faces light up (I've converted many caramel skeptics this way)
- Foolproof method – once you master the sugar stage (and I'll walk you through it), you'll feel like a candy-making pro
Honestly? The hardest part is waiting for them to cool before digging in!
Ingredients for Salted Vanilla Caramels
Gathering your ingredients is the first step to caramel heaven! Here’s exactly what you’ll need (and why each one matters):
- 1 cup granulated sugar – the backbone of our caramel, creating that deep amber color and rich flavor
- 1/4 cup light corn syrup – prevents crystallization (trust me, you don’t want grainy caramels!)
- 1/4 cup water – helps dissolve the sugar evenly at the start
- 1/2 cup heavy cream – makes the caramel luxuriously smooth (don’t substitute milk – it won’t give the same richness)
- 6 tbsp unsalted butter, cubed – use cold cubes for easier mixing, and unsalted lets us control the salt level
- 1 tsp vanilla extract – adds that warm, aromatic note (use the good stuff!)
- 1/2 tsp flaky sea salt – Maldon’s my favorite for those perfect salty bursts
See? Nothing fancy – just quality ingredients that work magic together.
Equipment You'll Need
Before we dive into making these salted vanilla caramels, let’s gather your kitchen essentials – nothing too fancy, just a few trusty tools:
- Heavy-bottomed saucepan – prevents hot spots that could burn your precious caramel
- Candy thermometer – your best friend for hitting that perfect 245°F
- Silicone spatula or wooden spoon – for stirring without scratching your pan
- Parchment paper – makes removing and cutting the caramels a breeze
- 8×8-inch baking pan – gives your caramels the ideal thickness
That’s it! You’re now fully equipped for caramel-making success.
How to Make Salted Vanilla Caramels
Ready to make magic happen? Let’s dive into the step-by-step process for creating these irresistible salted vanilla caramels. I’ll walk you through each stage – and yes, I’ll share all my hard-earned tips to avoid common mishaps!
Preparing the Sugar Mixture
First things first – line your 8×8 pan with parchment paper (trust me, you’ll thank me later when the caramels pop right out). Now, grab that heavy-bottomed saucepan and combine the sugar, corn syrup, and water over medium heat. Here’s the important part: stir just until the sugar dissolves, then stop! Resist the urge to keep stirring – this can cause crystallization. Let the mixture bubble away untouched until it turns a beautiful amber color (about 10 minutes). It’ll smell incredible, but be careful – that sugar is crazy hot!
Adding Cream and Butter
Okay, deep breath – this is where things get exciting! Remove the pan from heat and carefully (I mean carefully) whisk in the heavy cream and butter cubes. It’ll bubble up dramatically – that’s normal! Just keep whisking until smooth. Return it to medium heat and attach your candy thermometer. Now we wait for that magic number – 245°F (firm ball stage). This usually takes about 5-7 minutes. The moment it hits temp, take it off the heat immediately – overcooked caramel is heartbreaking!
Finishing with Vanilla and Salt
Now for the flavor magic! Stir in the vanilla and 1/4 teaspoon of your flaky sea salt (save the rest for topping). Pour the gorgeous golden liquid into your prepared pan – work quickly before it sets. Sprinkle the remaining salt evenly over the top. Here comes the hardest part: walk away and let it cool completely (about 2 hours). I know, I know – the waiting is torture! Once cool, lift the parchment to remove the caramel slab and cut into squares with a sharp, lightly oiled knife. Pro tip: wipe the knife between cuts for clean edges.
Tips for Perfect Salted Vanilla Caramels
After years of caramel-making mishaps (oh, the grainy batches I’ve tossed!), I’ve learned these foolproof tricks for salted vanilla caramel success:
- Prevent crystallization – Never stir after the sugar dissolves, and make sure your saucepan sides stay clean (a damp pastry brush helps)
- Trust your thermometer – That 245°F is non-negotiable for perfect chewiness (but calibrate it first!)
- Work fast when pouring – The caramel sets quickly, so have your prepared pan ready to go
- Storage is key – Layer wax paper between caramels in an airtight container to prevent sticking
- Salt timing matters – Sprinkle the remaining salt just after pouring so it sticks beautifully
Follow these, and you’ll have caramels worthy of a fancy chocolatier!
Variations and Substitutions
Want to put your own spin on these salted vanilla caramels? Here are my favorite twists after countless test batches:
- Dark brown sugar – Swap half the white sugar for deeper molasses notes (my winter favorite!)
- Bourbon vanilla – Replace extract with bourbon-infused vanilla for grown-up sophistication
- Espresso powder – Just 1/2 tsp adds a lovely coffee undertone without overpowering
- Dairy-free option – Coconut cream works beautifully instead of heavy cream
- Smoked salt – Try this instead of sea salt for an intriguing savory edge
The basic recipe is forgiving – have fun experimenting once you’ve mastered the original!
Storing and Serving Salted Vanilla Caramels
Here’s the beautiful thing about these salted vanilla caramels – they actually get better after a day or two as the flavors meld! Store them in an airtight container at room temperature with parchment between layers (no sticky mess). They’ll keep beautifully for 2 weeks – if they last that long! For gifting, I love wrapping them in wax paper twists or tiny boxes tied with twine. Tuck a few into holiday tins or pair with coffee beans for a thoughtful homemade present. Just be warned – recipients might start placing standing orders!
Nutritional Information
Let’s be real – we’re not eating salted vanilla caramels for their health benefits! But since you’re curious, here’s the scoop: each little square of caramel goodness comes in at about 60 calories. The nutritional values are estimates and will vary based on the exact ingredients you use (like that extra pinch of sea salt you couldn’t resist adding). I always say life’s too short to stress over numbers when it comes to homemade treats – just enjoy every buttery, vanilla-kissed bite!
FAQs About Salted Vanilla Caramels
Over the years, I’ve gotten all sorts of questions about my salted vanilla caramels – here are the ones that pop up most often with my tried-and-true answers:
Why did my caramels turn out grainy?
This is usually from sugar crystals forming – either from stirring too much after the sugar dissolves or sugar sticking to the pan’s sides. Next time, use a damp pastry brush to wipe down the pan sides and resist stirring once the sugar’s dissolved. That corn syrup is there to help prevent this!
Can I use salted butter instead?
I don’t recommend it – unsalted butter lets you control the salt level perfectly. With salted butter, you might end up with overly salty caramels (though if that’s your thing, go for it!).
How long do these caramels stay fresh?
Stored properly in an airtight container with parchment between layers, they’ll keep their perfect texture for about 2 weeks at room temperature. Though honestly? Mine never last that long!
What if I don’t have a candy thermometer?
You can do the cold water test – drop a bit of caramel into ice water. If it forms a firm but pliable ball, it’s ready. But really, a thermometer is worth the small investment for consistent results. Learn more about candy thermometers.
Can I freeze salted vanilla caramels?
Absolutely! Wrap them well in wax paper and freeze for up to 3 months. Thaw at room temperature – they’ll taste just as delicious.
Share Your Experience
I’d love to hear how your salted vanilla caramels turned out! Did you stick with the classic version or try one of the fun variations? Leave a comment below sharing your caramel adventures – the triumphs, the mishaps, and everything in between. Happy cooking!
Print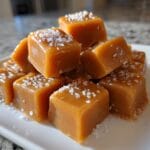
Irresistible Salted Vanilla Caramels in Just 30 Minutes
- Total Time: 30 mins
- Yield: 36 caramels
- Diet: Vegetarian
Description
Homemade salted vanilla caramels are rich, buttery, and perfectly balanced with a hint of sea salt. These easy-to-make treats are ideal for gifting or enjoying as a sweet indulgence.
Ingredients
- 1 cup granulated sugar
- 1/4 cup light corn syrup
- 1/4 cup water
- 1/2 cup heavy cream
- 6 tbsp unsalted butter, cubed
- 1 tsp vanilla extract
- 1/2 tsp flaky sea salt
Instructions
- Line an 8×8-inch baking pan with parchment paper.
- Combine sugar, corn syrup, and water in a medium saucepan over medium heat. Stir until sugar dissolves.
- Bring to a boil without stirring until the mixture turns amber (about 10 minutes).
- Remove from heat and carefully whisk in cream and butter (mixture will bubble).
- Return to heat and cook until a candy thermometer reads 245°F (firm ball stage).
- Remove from heat, stir in vanilla and 1/4 tsp salt.
- Pour into prepared pan, sprinkle remaining salt on top, and cool completely before cutting.
Notes
- Use a heavy-bottomed pan to prevent burning.
- Work carefully – hot sugar can cause severe burns.
- Store in an airtight container at room temperature for up to 2 weeks.
- Prep Time: 10 mins
- Cook Time: 20 mins
- Category: Candy
- Method: Stovetop
- Cuisine: American

