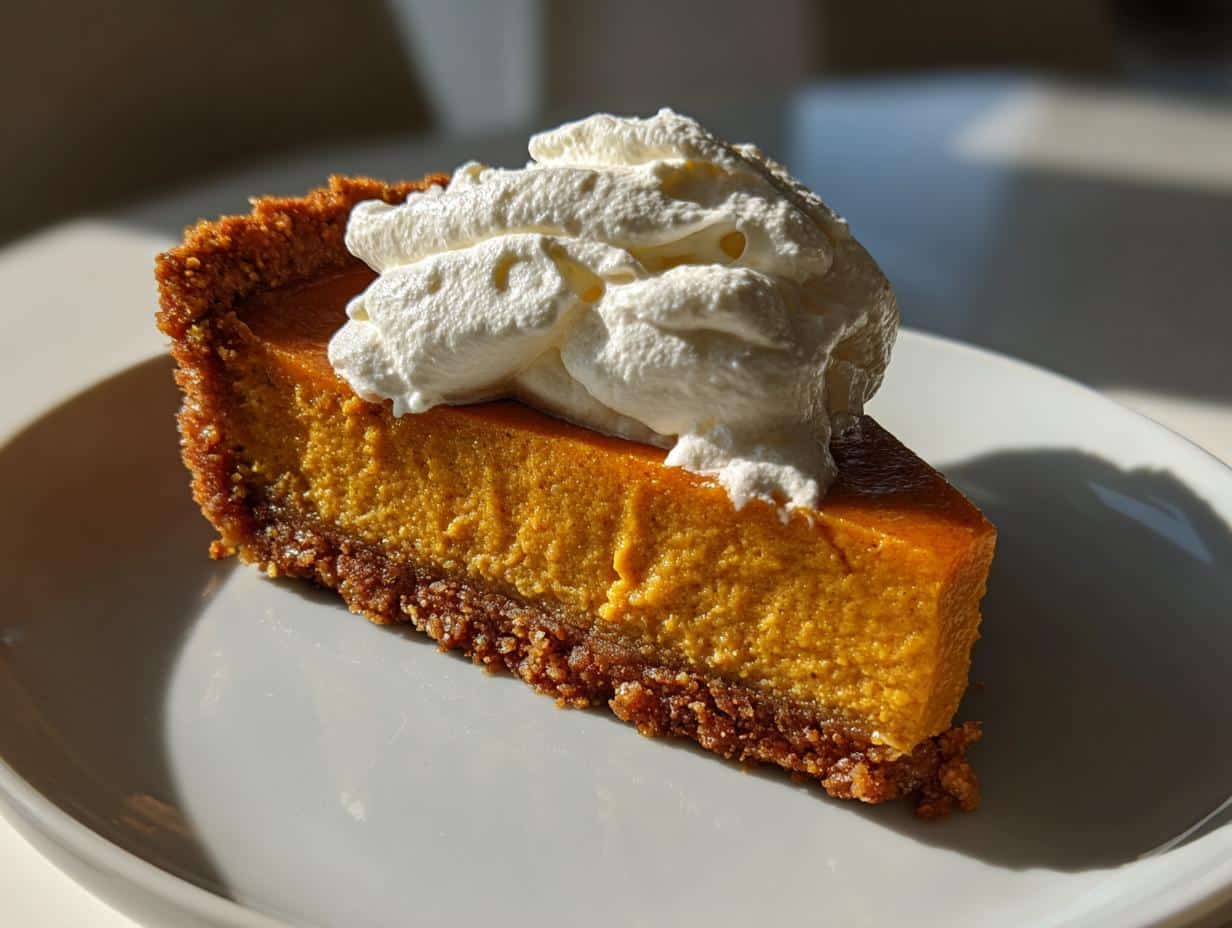
Nothing screams “holiday magic” quite like pulling a silky pumpkin pie with gingersnap crust from the oven – the spicy aroma of cinnamon and ginger fills the kitchen, and that first velvety bite feels like a warm hug. This isn’t just any pumpkin pie; it’s the one my grandma would make every Thanksgiving, where the gingersnap crumbs added this irresistible crunch against the creamy filling. The secret? Using heavy cream instead of evaporated milk (trust me, it makes ALL the difference) and baking it low and slow until it sets like custard. Top it with clouds of barely-sweetened whipped cream, and you’ve got dessert perfection that’ll have everyone begging for seconds.
Table of Contents
Ingredients for Silky Pumpkin Pie with Gingersnap Crust and Whipped Cream
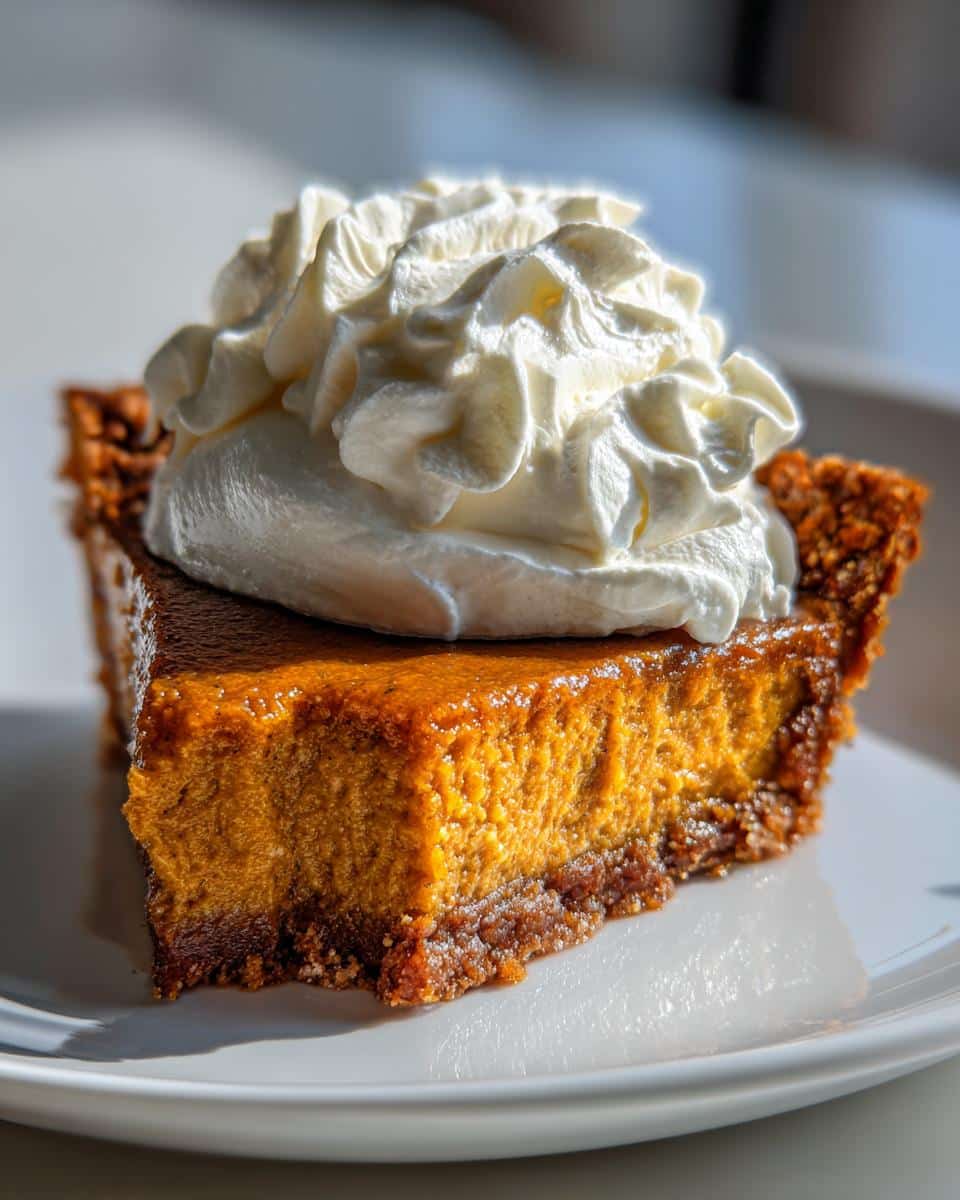
Let’s talk ingredients – because the magic starts with getting these just right! I’ve made this pie enough times to know exactly what works (and what doesn’t). Here’s everything you’ll need, with my little notes from years of tweaking:
- For the crust:
- 1 1/2 cups gingersnap cookie crumbs (about 25 cookies – I pulse mine in the food processor for even crumbs)
- 1/4 cup melted butter (unsalted is best here, and make sure it’s properly cooled)
- For the filling:
- 1 can (15 oz) pumpkin puree (NOT pumpkin pie filling – check that label!)
- 3/4 cup packed brown sugar (dark brown gives that caramel depth I love)
- 1 tsp cinnamon (use the good stuff – your spice drawer is your friend here)
- 1/2 tsp ground ginger (freshly grated is amazing if you have it)
- 1/4 tsp each: nutmeg and cloves (these are my secret flavor boosters)
- 1/2 tsp salt (balances all that sweetness perfectly)
- 2 large eggs (room temperature blends smoother)
- 1 cup heavy cream (chilled – this is what makes it silky)
- 1 tsp vanilla extract (pure vanilla makes a noticeable difference)
- For the whipped cream topping:
- 1/2 cup heavy cream (chilled – I pop my bowl in the freezer too)
- 1 tbsp powdered sugar (adjust to your sweetness preference)
A quick pro tip: Measure your gingersnap crumbs after processing – I’ve learned the hard way that cookie sizes vary! And please, please use full-fat heavy cream – this is not the time to skimp. That richness is what gives this pie its signature melt-in-your-mouth texture.
How to Make Silky Pumpkin Pie with Gingersnap Crust and Whipped Cream
Alright, let’s get baking! I promise this isn’t as fussy as it looks – just follow these steps (and my little tricks along the way), and you’ll have the creamiest, dreamiest pumpkin pie that’ll make you feel like a pastry pro. Here’s exactly how I do it:
Prepare the Gingersnap Crust
First things first: preheat that oven to 350°F (175°C). While it’s heating up, let’s tackle the crust – this gingersnap base is what makes the whole pie sing! Grab your food processor (or a zip-top bag and rolling pin if you’re feeling old-school) and pulse those cookies into fine crumbs. You want them sandy, not dusty – little bits add nice texture.
Now, drizzle in the cooled melted butter and mix until it looks like wet sand. Dump this into your pie dish and here’s my secret: use a flat-bottomed measuring cup to press the crumbs evenly up the sides first, then across the bottom. This gives you that perfect, sturdy crust that won’t crumble when slicing. Bake for just 8 minutes – you’ll smell the ginger getting toasty – then let it cool completely while you make the filling. No shortcuts here! A warm crust makes soggy bottoms, and nobody wants that.
Make the Pumpkin Filling
Time for the silky part! In a big bowl, whisk together the pumpkin puree and packed brown sugar until it looks like autumn in a bowl. Now add all those glorious spices – cinnamon, ginger, nutmeg, cloves – plus the salt. You’ll notice the color deepens beautifully. Crack in the eggs one at a time, whisking well after each (this prevents weird eggy streaks).
Here’s where the magic happens: slowly stream in the cold heavy cream while whisking constantly. Don’t rush this – we’re creating luxury here! Finally, stir in the vanilla. Now take a spatula and scrape down the sides and bottom of the bowl to catch any hidden pockets of unmixed ingredients. The filling should pour like thick paint when it’s ready. Pour it into your cooled crust – it’ll come right up to the edge, just how we want it.
Bake and Chill
Slide the pie onto the middle oven rack and set your timer for 45 minutes. When it goes off, do the jiggle test: gently shake the pie. The edges should look set, while the center moves like Jell-O – just a slight wobble, not a wave. If it’s still very jiggly, give it 5 more minutes. My grandma taught me that a perfect pumpkin pie continues cooking as it cools, so pull it when it’s *almost* done.
Let it cool completely on a rack (about 2 hours), then refrigerate for at least 2 more hours – overnight is even better. I know it’s hard to wait, but this chilling time is what gives that signature silky, sliceable texture. The filling firms up beautifully while the flavors deepen.
Add Whipped Cream Topping
Now for the crowning glory! Right before serving, whip that remaining heavy cream with powdered sugar until stiff peaks form. Pro tip: chill your bowl and beaters for 10 minutes first – cold tools make whipping faster. Spread it generously over the chilled pie, or pipe pretty swirls if you’re feeling fancy. The contrast of cool whipped cream against the spiced pie is absolute heaven.
Slice with a warm knife (run it under hot water and dry quickly) for perfect clean cuts. Then watch faces light up as they take that first creamy, spiced bite – pure holiday magic!
Why You’ll Love This Silky Pumpkin Pie
Okay, let me count the ways this pumpkin pie stole my heart (and probably will steal yours too)! It’s not just a dessert – it’s a whole experience, and here’s why:
- That melt-in-your-mouth texture: The heavy cream makes the filling luxuriously smooth, like pumpkin-flavored silk. No grainy or eggy bits here – just pure, velvety perfection that holds its shape when sliced but dissolves instantly on your tongue.
- Spices that sing: I spent years tweaking the blend until it was just right – enough cinnamon to warm you up, ginger for a little zing, and whispers of nutmeg and cloves that make people ask, “What’s that amazing flavor?” It’s balanced, not overwhelming.
- Make-ahead magic: This pie actually gets better after chilling overnight (shh…that’s my secret for stress-free holidays). Bake it Wednesday for Thanksgiving Thursday, and the flavors will have deepened beautifully while you’re free to enjoy your guests.
- The gingersnap crust difference: Forget boring pastry – those cookie crumbs add this irresistible crunch and caramelized spice that regular pie dough just can’t match. It’s like autumn in every bite.
- Whipped cream clouds: That barely-sweetened topping isn’t just pretty – it cuts through the richness perfectly. Plus, it lets everyone customize their slice (I won’t judge if you go back for extra).
- Crowd-pleaser status: From spice lovers to texture snobs, this pie wins over everyone. My picky nephew who “hates pumpkin pie” ate three slices last year. Enough said.
Honestly? This pie tastes like someone spent all day in the kitchen, but between us – it’s shockingly simple to make. The hardest part is waiting for it to chill!
Tips for Perfect Silky Pumpkin Pie with Gingersnap Crust
After years of pumpkin pie triumphs (and a few hilarious kitchen disasters), I’ve learned all the tricks to guarantee success every time. Here’s my hard-earned wisdom for avoiding common pitfalls and achieving pie perfection:
Avoiding cracks and achieving smooth texture
“Slow and steady wins the race,” my grandma always said about baking this pie. The number one mistake? Baking too hot and fast! If your oven runs hot, reduce the temperature by 25°F and add 10 extra minutes. Those cracks happen when the edges set before the center’s ready. If you do get a tiny crack (it happens to the best of us!), just cover it with whipped cream – instant fix!
Another pro tip: After the initial 45 minutes, check every 5 minutes. The pie’s done when the edges puff slightly and the center jiggles like set gelatin – think “wobbly not wiggly.” It’ll firm up while cooling. And please, please resist cutting into it warm – that cooling time is non-negotiable for that signature silky texture.
Preventing soggy crust disasters
Nothing worse than a crust that sticks or turns mushy! Here’s how I keep my gingersnap base crisp:
- Cool your crust completely before adding filling – I wait until I can touch the pan comfortably
- Brush melted butter on the baked crust for an extra moisture barrier (my secret weapon!)
- Place the pie dish on a preheated baking sheet – the extra heat helps crisp the bottom
- Store leftovers properly – a paper towel under the dome absorbs fridge moisture
The right way to mix (without overdoing it)
Overmixing is the silent killer of fluffy pumpkin pies! Here’s how to get it just right:
Whisk dry ingredients first, then add wet. When incorporating eggs, mix just until combined – no need to go crazy. Same with the cream: gentle folds prevent too much air (which causes bubbles) but still emulsifies everything beautifully. And always scrape that bowl bottom – hidden pockets of unmixed ingredients are sneaky!
Bonus whipped cream wisdom: Chill your bowl and beaters for 10 minutes before whipping. Cold tools = stiff peaks faster. And add powdered sugar gradually – you can always add more sweetness but can’t take it back!
Ingredient Substitutions & Notes
Okay, let’s talk swaps and must-know details – because sometimes you’re mid-recipe and realize you’re out of something, or maybe dietary needs mean tweaking is necessary. Here’s my tried-and-true guide to navigating substitutions without sacrificing that signature silky texture and spiced flavor we love:
Pumpkin puree vs. pumpkin pie filling – don’t confuse them!
This is SO important! That can labeled “pumpkin pie filling” already has sugar and spices added – using it here would make our pie cloyingly sweet and throw off all our carefully balanced flavors. What you want is 100% pure pumpkin puree (sometimes labeled “solid pack pumpkin”). Libby’s is my go-to brand, but any pure pumpkin works. In a pinch? Roast your own sugar pumpkin and blend the flesh until smooth – just drain any excess liquid first.
Dairy-free cream alternatives that actually work
If heavy cream isn’t an option, here are my tested substitutions:
- For the filling: Full-fat coconut cream (the thick part from chilled cans) mimics heavy cream’s richness beautifully. Just whisk well to eliminate lumps.
- For whipped topping: Chill a can of coconut milk overnight, scoop out the solidified cream, and whip with 1 tsp arrowroot powder for stability.
- Caution: Almond or oat milk won’t provide enough fat for the silky texture – the pie may set softer.
Sugar adjustments and alternatives
Sweetness preferences vary, so here’s how to tweak it:
- Less sweet: Reduce brown sugar to 1/2 cup – the spices will shine brighter.
- Maple syrup option: Replace brown sugar with 1/2 cup pure maple syrup (reduce cream by 2 tbsp to compensate for extra liquid).
- Coconut sugar: Works 1:1 but gives a deeper caramel note – perfect if you love that molasses vibe.
- Whipped cream sweetness: Powdered sugar dissolves best, but honey (1 tsp) or maple syrup (2 tsp) can substitute.
Gingersnap crust variations
No gingersnaps? Try these:
- Graham crackers + extra spice: Use 1 1/2 cups crumbs with 1/2 tsp ginger and 1/4 tsp cinnamon added.
- Biscoff cookies: Those speculoos cookies make an amazing caramelized crust.
- Nut allergy note: Check cookie labels – some brands contain tree nuts.
One last golden rule: Whatever substitutions you make, keep the ratios similar (dry for dry, wet for wet) and taste as you go. The pumpkin pie police won’t come knocking – but your taste buds will thank you for thoughtful tweaks!
Serving and Storing Silky Pumpkin Pie
Alright, let me share my pie wisdom so you can enjoy your masterpiece at its absolute best! First rule: that beautiful pie needs to come to room temperature for about 20 minutes before slicing. Straight-from-the-fridge pie is too firm and mutes all those gorgeous spice flavors. But here’s my little trick – take your serving knife, run it under hot water for 10 seconds, dry it quickly, and make your first cut. The warm blade glides through like butter, giving you those Instagram-worthy clean slices every time.
Now, about leftovers (if you’re lucky enough to have any!). Cover the pie tightly with plastic wrap or slide it into an airtight container. It’ll keep beautifully in the fridge for 3 days – honestly, I think it tastes even better on day two as the flavors really meld. Just one important note: if you’ve already added the whipped cream topping, store it uncovered so the cream doesn’t get soggy. Better yet, store leftover whipped cream separately in its own container and dollop it fresh when serving.
Freezing? Here’s the deal – you can freeze the plain pumpkin pie (without whipped cream) for up to 2 months. Wrap it in two layers of plastic wrap then foil. Thaw overnight in the fridge when ready to eat. But that fluffy whipped cream topping? It absolutely does NOT freeze well – turns grainy and weepy. Learned that the hard way one very sad Thanksgiving morning!
Pro tip for parties: I like to bake and chill the pie the day before, then add fresh whipped cream right before guests arrive. The pie stays perfect at room temp for about 4 hours – just keep it away from direct sunlight or heat sources. And if you want to get fancy, serve with extra gingersnap crumbs sprinkled on top for that extra crunch contrast. Trust me, your future self will thank you for these storage smarts when you’re enjoying perfect pie for days!
Nutritional Information
Now, let’s talk numbers – because I know some of you are curious (though between us, this pie is totally worth every delicious calorie!). Here’s the nutritional breakdown per slice, but keep in mind these are estimates based on standard ingredients. Your actual values might vary slightly depending on specific brands or slight measurement differences – that’s just how baking works!
- Calories: About 320 per slice (but who’s counting when it’s this good?)
- Fat: 18g (remember, we’re using real butter and cream – that’s where the magic happens!)
- Carbohydrates: 36g (mostly from those spiced gingersnaps and natural pumpkin sugars)
- Protein: 4g (those eggs do more than just bind – they pack protein too)
- Fiber: 2g (thank you, pumpkin!)
- Sugar: 22g (mostly from the brown sugar – reduce to 1/2 cup if you prefer less sweet)
A quick note about the whipped cream topping – these numbers include it, but if you’re watching your intake, you can always go lighter on the topping or skip it entirely (though I’d argue life’s too short not to enjoy the full experience!).
For anyone with dietary restrictions or specific health concerns, I always recommend consulting a nutritionist or using a trusted online calculator with your exact ingredients. But for most of us? This is holiday dessert – meant to be savored and enjoyed without too much math getting in the way of that first blissful bite!
FAQs About Silky Pumpkin Pie with Gingersnap Crust and Whipped Cream
Over the years, I’ve gotten so many questions about this pie – and honestly, I love chatting about it! Here are the answers to the ones that pop up most often, all based on my own trial-and-error (and yes, a few kitchen mishaps that taught me valuable lessons!).
Can I use graham crackers instead of gingersnaps?
Absolutely! While gingersnaps give that special spicy kick, graham crackers make a delicious crust too. Here’s my tweak: use 1 1/2 cups graham cracker crumbs mixed with 1/4 cup melted butter plus 1/2 tsp ground ginger and 1/4 tsp cinnamon. It won’t have quite the same zing, but it’ll still be wonderfully crisp and buttery. Bonus tip: Biscoff cookies work amazingly well too if you have those on hand!
Help! My filling came out runny – can I fix it?
First, don’t panic! If it’s still warm, let it cool completely – pumpkin pie continues setting as it chills. If after 4 hours in the fridge it’s still too soft, here’s my trick: pop it back in the oven at 325°F for 15-20 minutes. Next time, make sure your eggs are room temperature and fully incorporated, and bake until the center jiggles like set Jell-O. Runny filling usually means it needed more baking time.
What’s the best make-ahead timeline?
This pie is a dream for planners! Here’s my foolproof schedule:
- 3 days ahead: Bake and cool completely, then refrigerate uncovered
- 1 day ahead: Add whipped cream topping (if you must do it early, stabilize with 1/4 tsp cream of tartar)
Day of serving: Let sit at room temp 20 minutes before slicing
The flavors actually improve after 24 hours – it’s one of those rare desserts that gets better with time!
Can I freeze this pumpkin pie?
You can, but with conditions! Freeze only the baked pie without whipped cream. Wrap it tightly in plastic wrap, then foil, and freeze for up to 2 months. Thaw overnight in the fridge when ready to eat. But fair warning – the whipped cream topping doesn’t freeze well at all. It separates and gets watery – learned that lesson after one very sad dessert emergency!
Why did my crust edges burn?
Ah, the eternal pie dilemma! My solutions:
- Use a pie crust shield or foil rings for the last 15 minutes of baking
- Place the pie on the lower oven rack if your oven runs hot
- Try reducing oven temp to 325°F and baking 10 minutes longer
And here’s my grandma’s old trick: brush the edges with a little milk or egg wash before baking – it creates a protective barrier!
Got more questions? Drop them in the comments – I’m always happy to share more pie wisdom from my decades of baking (and eating!) this holiday favorite.
For more delicious recipes and baking inspiration, check out our Pinterest page!
Print
Silky Pumpkin Pie with Gingersnap Crust Recipe – 5 Secrets for Perfection
- Total Time: 3 hrs 10 mins (includes chilling)
- Yield: 8 servings
- Diet: Vegetarian
Description
A smooth and creamy pumpkin pie with a spiced gingersnap crust, topped with light whipped cream.
Ingredients
- 1 1/2 cups gingersnap cookie crumbs
- 1/4 cup melted butter
- 1 can (15 oz) pumpkin puree
- 3/4 cup brown sugar
- 1 tsp cinnamon
- 1/2 tsp ginger
- 1/4 tsp nutmeg
- 1/4 tsp cloves
- 1/2 tsp salt
- 2 large eggs
- 1 cup heavy cream
- 1 tsp vanilla extract
- 1/2 cup heavy cream (for topping)
- 1 tbsp powdered sugar (for topping)
Instructions
- Preheat oven to 350°F (175°C).
- Mix gingersnap crumbs with melted butter and press into a 9-inch pie dish.
- Bake crust for 8 minutes, then let cool.
- Whisk pumpkin puree, brown sugar, spices, salt, eggs, heavy cream, and vanilla until smooth.
- Pour filling into crust and bake for 45-50 minutes until set.
- Cool completely, then refrigerate for at least 2 hours.
- Whip remaining heavy cream with powdered sugar and spread over pie before serving.
Notes
- Use fresh pumpkin puree for best flavor.
- Chill pie thoroughly before slicing for clean cuts.
- Store leftovers covered in the refrigerator.
- Prep Time: 20 mins
- Cook Time: 50 mins
- Category: Dessert
- Method: Baking
- Cuisine: American
