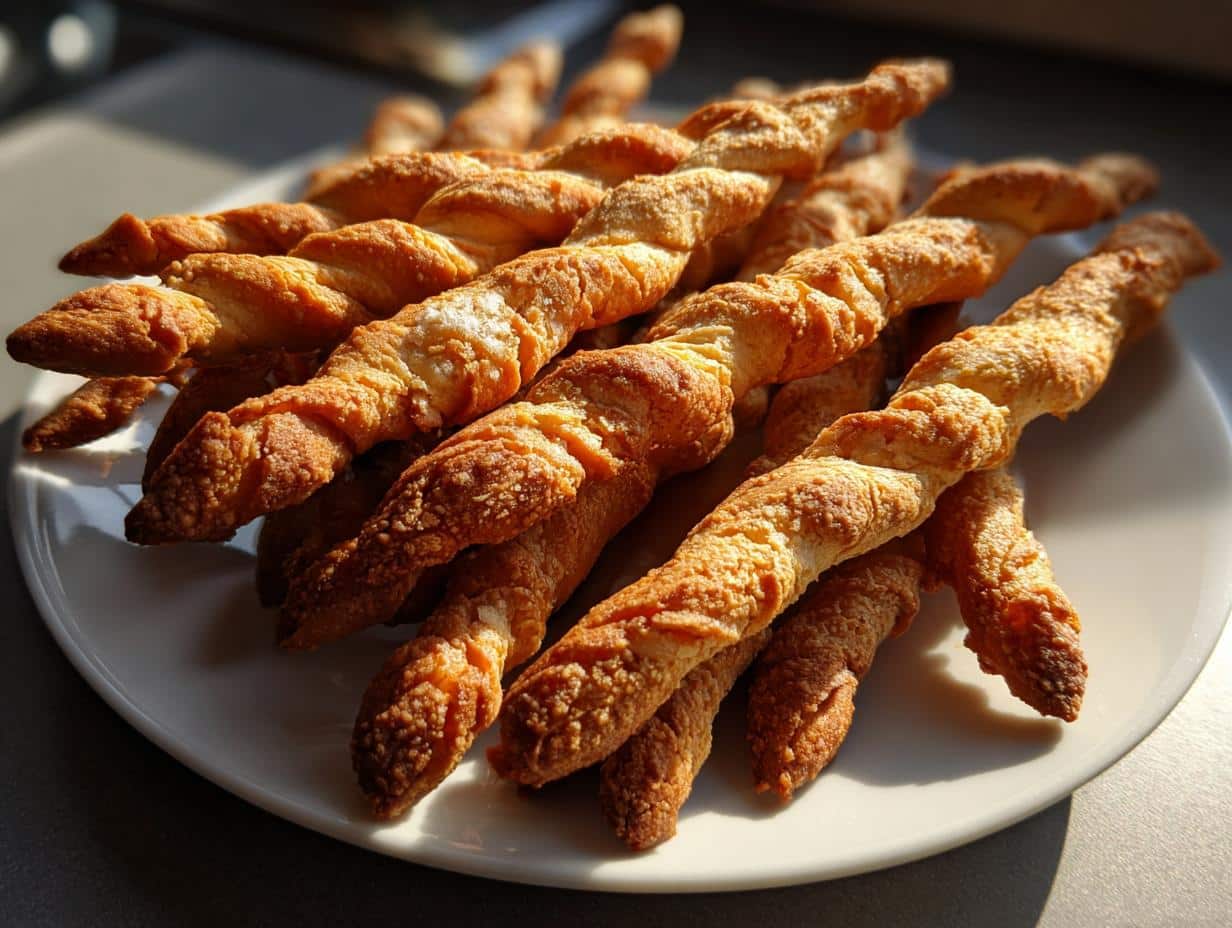
Oh my gosh, you have to try these Witch’s Fingers Breadsticks! They’re the perfect mix of spooky and delicious, with that crispy-on-the-outside, soft-on-the-inside texture that makes them impossible to resist. I first made these for my niece’s Halloween party last year, and the kids went wild for them – I caught one little witch (costume and all) sneaking them off the tray before dinner even started!
What I love most is how real they look – those creepy almond fingernails and knobby finger joints make everyone do a double take. But then they take a bite and discover that savory garlic-oregano flavor that makes these breadsticks way too tasty to be scary. Perfect for your Halloween spread or just to freak out your family on a cozy October night.
The best part? They’re seriously easy to make. Just some simple dough, a little shaping magic, and boom – you’ve got the most talked-about appetizer at any Halloween gathering. My husband still laughs about the year I arranged them all crawling out of a “bloody” (marinara) bowl – the looks on our friends’ faces were priceless!
Why You’ll Love These Witch’s Fingers Breadsticks
Listen, these creepy-crawly breadsticks are about to become your new Halloween obsession – and here’s why:
- They’re ridiculously easy – just basic dough ingredients you probably already have, plus that genius almond fingernail trick that makes everyone gasp
- Party showstoppers – I’ve never brought these to a Halloween gathering without at least three people asking for the recipe
- Totally customizable – swap the garlic and oregano for smoked paprika or add poppy seeds for “warts” if you’re feeling extra wicked
- Creepy meets delicious – that crispy exterior gives way to the softest, most flavorful breadstick center that’ll have people reaching for seconds (despite the icky appearance!)
Trust me, once you see how these Witch’s Fingers Breadsticks disappear at your next Halloween bash, you’ll be making them every October!
Witch’s Fingers Breadsticks Ingredients
Alright, let’s gather our magical supplies! Here’s everything you’ll need to whip up these delightfully creepy breadsticks. I promise, most of this stuff is already in your pantry – well, except maybe the almonds (but those are the fun part!).
- 2 cups all-purpose flour – the base of our spooky fingers
- 1 teaspoon salt – just enough to make the flavors pop
- 1 teaspoon sugar – to feed our yeast and add the tiniest hint of sweetness
- 1 teaspoon dried oregano – for that earthy witchy flavor
- 1 teaspoon garlic powder – because what’s a witch without a little bite?
- 1 packet (2 1/4 teaspoons) active dry yeast – our little magic makers to puff up those fingers
- 3/4 cup warm water (about 110°F) – not too hot or you’ll kill the yeast – aim for bathwater temperature
- 2 tablespoons olive oil – keeps our dough nice and supple
- 1 egg, beaten – for that glossy “just-dug-up” look (aka egg wash)
- 24 whole almonds – the perfect witchy fingernails (slivered almonds work too for daintier fingers)
Oh! And if you really want to gross people out, have some red food coloring on standby to make “bloody” fingernails – just mix a drop into the egg wash. So simple, yet so effective for Halloween!
How to Make Witch’s Fingers Breadsticks
Okay, time to work some magic! Making these spooky breadsticks is actually super straightforward, but I’ll walk you through each step so your witch fingers come out perfectly creepy and delicious. You’ll be amazed how simple dough transforms into something so wonderfully weird!
Preparing the Dough
First things first – let’s wake up that yeast! This is where the magic starts, friends.
- Mix your dry ingredients: In a big bowl, whisk together the flour, salt, sugar, oregano, and garlic powder. I like to pretend I’m mixing a witch’s potion as I do this – makes it more fun!
- Activate the yeast: Dissolve your yeast in the warm water (remember – bathwater warm, not hot!) and let it sit for about 5 minutes. You’ll know it’s ready when it gets all foamy on top like a little cauldron bubble.
- Bring it all together: Pour the yeasty water and olive oil into your dry ingredients. Mix until it forms a shaggy dough, then turn it out onto a lightly floured surface.
- Knead that dough: Now roll up your sleeves and knead for about 5-7 minutes until the dough becomes smooth and elastic. If it sticks too much, add just a sprinkle more flour. When it’s ready, it should feel like a witch’s spell – just the right balance of firm but yielding!
- Let it rise: Pop the dough back in the bowl, cover it with a clean kitchen towel (or if you’re like me and always misplace towels, plastic wrap works too), and let it rest in a warm spot for about an hour. It should double in size – perfect time to practice your cackle!
Shaping and Baking the Witch’s Fingers Breadsticks
Now for the fun part – transforming our dough into creepy fingers! Preheat your oven to 375°F (190°C) while you work.
- Divide the dough: Punch down the risen dough (so satisfying!) and divide it into 24 equal pieces. I use a bench scraper, but a knife works too.
- Shape those fingers: Roll each piece into a thin rope about 5-6 inches long. Don’t make them too perfect – real witch fingers have knuckles! Pinch little indentations along the “finger” to create joints. Pro tip: slightly taper one end to look like a fingertip.
- Add the nails: Press a whole almond into the tapered end of each finger to create a fingernail. Push it in just enough so it stays put during baking.
- Egg wash magic: Brush each finger with beaten egg (add a drop of red food coloring if you want bloody nails!). This gives them that perfect golden glow when baked.
- Bake to perfection: Arrange your fingers on a parchment-lined baking sheet (I like to curl some for extra creep factor) and bake for 15-20 minutes until beautifully golden brown. Your kitchen will smell amazing!
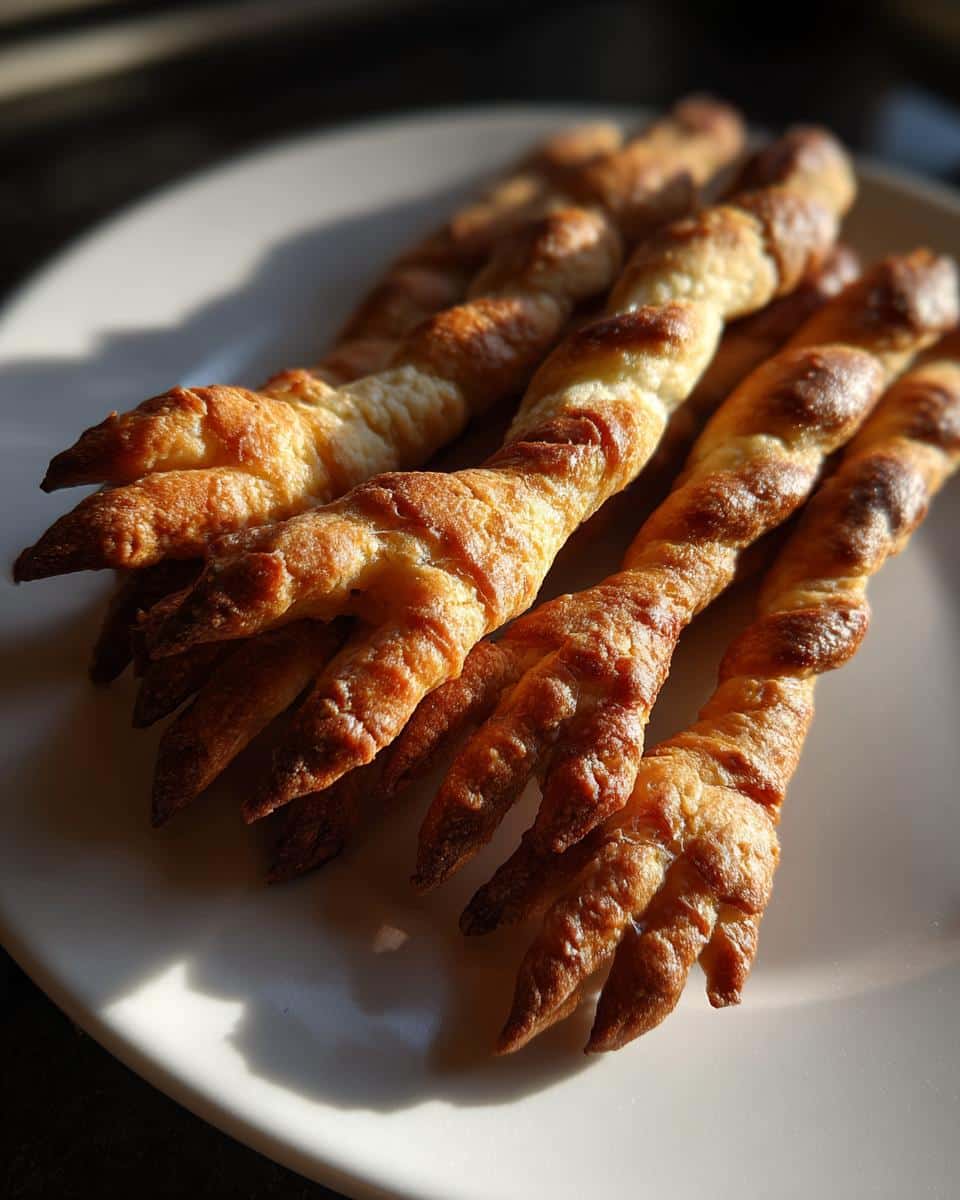
There you have it – from simple dough to seriously spooky Witch’s Fingers Breadsticks! Let them cool just enough that no one burns their tongue when they inevitably can’t resist grabbing one (or five).
Tips for Perfect Witch’s Fingers Breadsticks
After making these creepy-crawly breadsticks more times than I can count (much to my husband’s horror every October), I’ve picked up some tricks to make them extra terrifyingly tasty:
- Almond alternatives – If whole almonds look too bulky on your fingers, use slivered almonds instead. They give a more delicate, “ancient witch” look that’s just as creepy!
- Bloody brilliant – For that extra-gory touch, mix a drop or two of red food coloring into your egg wash. The “blood” pools around the almond nails in the most delightfully disgusting way.
- Texture tricks – Before baking, use a toothpick to make tiny lines across the “knuckles” for realistic wrinkles. My niece swears it makes them look like they’re actually moving!
- Double the drama – Arrange them crawling out of a bowl of marinara sauce (“blood”) or hummus (“witch’s brew”). The presentation always gets screams (of delight!) at parties.
Oh! One last pro tip – if your dough feels too sticky when shaping, dust your hands lightly with flour instead of the counter. This way you keep control without adding too much extra flour to the dough. Happy haunting… I mean baking!
Storing and Serving Suggestions
Okay, witchy bakers, let’s talk about keeping these creepy fingers fresh and how to serve them for maximum Halloween impact! First things first – if you somehow have leftovers (miracle of miracles!), pop them in an airtight container at room temperature. They’ll stay deliciously crispy for up to 3 days, though let’s be real – they never last that long in my house.
Now for the fun part – serving these bad boys! I always make a big production out of it at parties. Here are my favorite ways to freak out your guests:
- The “Graveyard Platter” – Arrange them like bony fingers crawling out from under a layer of spinach dip “dirt” with olive slice “eyeballs” peeking through
- “Witch’s Blood Bowl” – Stand them up in a tall glass filled with warm marinara sauce – the steam makes it look extra eerie!
- “Cauldron Creepers” – Pile them dramatically spilling out of a black cauldron (or any dark bowl) with hummus or black bean dip at the bottom
Pro tip from my many Halloween fails: if you’re transporting these to a party, pack the almonds separately and attach them right before serving. That way you avoid the dreaded “lost fingernail” situation in your Tupperware! And if you want to prep ahead, the shaped dough freezes beautifully – just add the almonds and egg wash right before baking.
Witch’s Fingers Breadsticks Variations
One of my favorite things about these creepy breadsticks is how easy they are to customize! Once you’ve mastered the basic recipe (which is always a hit), try these fun twists to keep your Halloween guests guessing. I’ve tested all of these variations over the years, and each one brings its own special kind of spooky charm.
- Smoky Witch Fingers – Swap the garlic powder for smoked paprika for deeper, more mysterious flavor. I call these my “cauldron smoke” edition – they pair perfectly with black bean dip!
- Warty Witches – Press a few black sesame seeds into each finger before baking to create realistic-looking warts. My kids think these are hysterical – just wait until you see people’s reactions!
- Zombie Edition – Add 1/2 teaspoon of turmeric to the dough for slightly greenish fingers. Brush with dark soy sauce after baking for that “undead” look. Perfect for your Walking Dead watch party!
The best part? You can mix and match these ideas. Last year I did smoky paprika fingers with warty sesame seeds, and they were the talk of the neighborhood Halloween party. Don’t be afraid to get creative – after all, every good witch has her own special recipe!
Witch’s Fingers Breadsticks FAQs
I get so many questions about these creepy-crawly breadsticks every Halloween! Here are the ones that pop up most often – plus all my hard-earned tips from years of terrifying (and delicious) trial and error.
Can I make Witch’s Fingers Breadsticks ahead of time?
Absolutely! The dough actually benefits from a slow rise in the fridge overnight. Just mix it up the day before, let it do its first rise at room temp for about an hour, then pop it in the fridge. Next day, shape and bake as usual. The cold dough is actually easier to work with for those delicate finger shapes!
Can I freeze these spooky breadsticks?
You bet – two ways to freeze them! Either freeze the shaped raw dough (without egg wash) on a tray first, then transfer to bags. Bake straight from frozen, adding 3-5 extra minutes. Or freeze baked fingers in airtight containers. To revive, pop them in a 350°F oven for 5 minutes – they’ll taste fresh-baked!
Help! My almond fingernails keep falling off!
Oh honey, I’ve been there! The trick is to press the almonds in firmly enough that they stay, but not so hard that they cut through the dough. If they still rebel, try brushing a tiny bit of egg wash where the almond will sit first – it acts like edible glue. Slivered almonds also tend to stay put better than whole ones.
What if I don’t have yeast?
No yeast? No problem! You can make a quick version with 2 cups self-rising flour instead of all-purpose. Skip the yeast and sugar, mix with 3/4 cup warm water + 2 tbsp oil, and proceed with shaping. The texture will be slightly different (more biscuit-like), but they’ll still look delightfully creepy!
Are these too scary for little kids?
Here’s my secret – kids LOVE being “grossed out” in a safe way! My preschool niece demands these every year now. If you’re worried, serve them with a silly backstory (“The nice witch dropped her fingers in our oven!”) or let kids decorate their own with safe food markers after baking. The giggles are guaranteed!
Nutritional Information
Okay, let’s be real – we’re not exactly counting calories when we’re eating witch fingers at a Halloween party! But for those who like to know (or need to know), here’s the breakdown per breadstick. Remember, these values are estimates and might change slightly depending on your exact ingredients.
- Calories: 80
- Fat: 2g (0.3g saturated)
- Carbohydrates: 12g
- Fiber: 0.5g
- Sugar: 0.5g
- Protein: 2g
- Sodium: 100mg
Now, if you’re like me and can’t stop at just one (or three) of these crispy, garlicky fingers, just remember – they’re made with simple, wholesome ingredients. That totally balances out any Halloween candy you might eat later, right? Right?!
Final Thoughts
There you have it – my favorite Halloween trick that’s really a treat! I’d love to hear how your Witch’s Fingers Breadsticks turn out. Tag me in your spooky creations or leave a comment below – nothing makes me happier than seeing all the creepy (and delicious) ways you bring this recipe to life!
For more spooky and delicious recipes, check out our Pinterest page!
Print
24 Witch’s Fingers Breadsticks That Taste Scarily Good
- Total Time: 1 hour 35 minutes
- Yield: 24 breadsticks
- Diet: Vegetarian
Description
A spooky Halloween treat that looks like witch’s fingers. These breadsticks are crispy, flavorful, and perfect for parties.
Ingredients
- 2 cups all-purpose flour
- 1 tsp salt
- 1 tsp sugar
- 1 tsp dried oregano
- 1 tsp garlic powder
- 1 packet (2 1/4 tsp) active dry yeast
- 3/4 cup warm water
- 2 tbsp olive oil
- 1 egg, beaten (for egg wash)
- 24 whole almonds (for fingernails)
Instructions
- Mix flour, salt, sugar, oregano, and garlic powder in a bowl.
- Dissolve yeast in warm water and let sit for 5 minutes until foamy.
- Add yeast mixture and olive oil to dry ingredients, knead into a smooth dough.
- Cover dough and let rise for 1 hour or until doubled in size.
- Preheat oven to 375°F (190°C).
- Divide dough into 24 pieces, roll each into a thin finger shape.
- Press an almond into one end to create a fingernail.
- Brush with egg wash and bake for 15-20 minutes until golden brown.
Notes
- Store in an airtight container for up to 3 days.
- For extra creepiness, add red food coloring to the egg wash.
- Use slivered almonds if whole almonds are too large.
- Prep Time: 1 hour 15 minutes
- Cook Time: 20 minutes
- Category: Appetizer
- Method: Baking
- Cuisine: American
