There’s nothing quite like the smell of corn fritters sizzling in the pan – that irresistible golden crust forming, pockets of melted cheese oozing out, and that first glorious bite of crispy-on-the-outside, tender-on-the-inside perfection. My Irresistibly Crispy Cheesy Corn Fritters Recipe has been my go-to crowd-pleaser for years, ever since I first made them for a chaotic family brunch where everyone kept sneaking them straight from the cooling rack.
The magic happens in minutes – fresh sweet corn kernels, sharp cheddar cheese, and just enough flour to hold everything together in these little golden nuggets of joy. What makes my version special? That perfect balance between crispy exterior and fluffy interior, achieved by not overmixing the batter (trust me, lumpy is good here) and getting the oil temperature just right. I’ve tweaked this recipe through countless summer barbecues and lazy Sunday mornings until it became what my niece calls “auntie’s magic corn cakes.”
Whether you serve them piping hot with a dollop of sour cream or pack them cold in lunchboxes (they’re surprisingly good at room temperature too), these fritters disappear faster than I can make them. The best part? They’re so simple that even my kitchen-phobic brother can whip up a batch when the craving hits.
Table of Contents
Why You’ll Love These Irresistibly Crispy Cheesy Corn Fritters
Once you try these corn fritters, you’ll understand why they’ve become my most-requested recipe. Here’s why they’re absolute magic:
- Lightning fast: From bowl to plate in under 20 minutes – perfect for those “I need a snack NOW” emergencies
- Texture heaven: That addictive contrast between the crispy outer crust and fluffy, cheesy center gets me every time
- Crowd hypnotizer: I’ve seen grown adults elbow each other out of the way to get the last one
- Shape-shifter: Fancy appetizer? Check. Quick breakfast? Check. Midnight snack? Oh yes
- Forgiving: Mess up the measurements? They still come out delicious (I’ve tested this… extensively)
The best part? You probably have all the ingredients sitting in your kitchen right now. Go on, give them a try – your future snack-attack self will thank you.
Ingredients for Irresistibly Crispy Cheesy Corn Fritters
Okay, here’s the beautiful part – you only need simple pantry staples to make these golden wonders! But trust me, the specifics matter:
- 1 cup corn kernels (fresh-cut from cob is heavenly, but drained canned works great too – just pat ’em dry!)
- 1/2 cup packed shredded cheddar (go for sharp – that tang cuts through the sweetness perfectly)
- 1/4 cup finely chopped onion (I like sweet Vidalia, but yellows work too – just no big chunks!)
- 1/4 cup all-purpose flour (spooned in lightly – we’re not making cement here)
- 1 large egg, lightly beaten (room temp blends smoother)
- 2 tbsp milk (whole milk makes them extra tender)
- 1/2 tsp baking powder (our little rising helper)
- 1/4 tsp each salt & black pepper (adjust to your taste – I often add an extra pinch)
- 2 tbsp neutral oil (for frying – I use grapeseed, but veggie works)
See? Nothing fancy – just real ingredients that come together magically. Pro tip: measure your cheese packed tight – we want every bite cheesy!
Essential Equipment for Perfect Corn Fritters
Listen, I’ve learned the hard way – the right tools make all the difference with these babies! Here’s what you’ll need:
- A good mixing bowl – wide enough to fold everything together without making a mess (ask me how I know)
- Non-stick skillet – key for that even browning without sticking disasters
- Thin-edged spatula – for flipping those delicate fritters without tearing
- Paper towels – to drain excess oil while keeping them crispy
The real secret? That skillet needs to distribute heat evenly – no hot spots! I swear by my cast-iron for perfect golden fritters every time.
How to Make Irresistibly Crispy Cheesy Corn Fritters
Alright, let’s get cooking! Making these fritters is easier than you think, but there are a few tricks I’ve learned over the years to get them absolutely perfect. Follow these steps, and you’ll be snacking on golden, crispy-cheesy perfection in no time.
Preparing the Batter
First things first – the batter. This isn’t rocket science, but there’s an art to getting it just right:
- Mix dry ingredients: In your big bowl, whisk together the flour, baking powder, salt, and pepper. Just a few turns to combine – no need to go crazy here.
- Add the good stuff: Toss in your corn, cheese, and onions. Use your hands if you want – I love feeling those cheese strands mix in with the corn!
- Wet ingredients: Make a little well in the center and pour in the beaten egg and milk. Now, here’s the important part – stir just until everything comes together. A few lumps are FINE. Overmixing makes tough fritters, and we want fluffy clouds of corny joy.
The perfect consistency? When you scoop some up with a spoon, it should hold its shape but still look a bit shaggy. If it’s too runny, add a sprinkle more flour. Too thick? A splash of milk. Easy!
Frying Technique for Maximum Crispiness
Now for the magic – turning that batter into crispy golden perfection:
- Heat the oil: Medium heat is your friend here. Too hot, and they’ll burn; too low, and they’ll soak up oil. Test with a tiny bit of batter – it should sizzle gently when it hits the oil.
- Scoop and drop: I use a heaping tablespoon per fritter. Don’t crowd the pan – leave space between them so they can crisp up properly. They’ll spread a bit as they cook.
- The flip: After about 2-3 minutes, peek underneath. When they’re golden brown with lacy edges, flip them! The second side usually cooks a bit faster, so keep an eye out.
- Drain: Transfer to paper towels immediately. This keeps them crispy instead of soggy – trust me, it makes all the difference!
Pro tip: If making multiple batches, keep your oven at 200°F to hold finished fritters warm. They’ll stay crispy while you cook the rest!
Pro Tips for Irresistibly Crispy Cheesy Corn Fritters
After making these fritters more times than I can count, I’ve picked up some game-changing tricks that’ll take yours from good to “can I have the recipe?” amazing:
- Dry those kernels! Whether using fresh or canned corn, pat it dry with paper towels first. Wet corn = soggy fritters, and we want that perfect crispiness.
- Test drive one fritter before committing to a full batch. It’ll tell you if your oil’s the right temp and if the batter needs adjusting.
- Cookie scoop for the win! Using a tablespoon or small ice cream scoop gives you perfectly even fritters that cook at the same rate.
- Let the batter rest 5 minutes before frying. This lets the flour hydrate properly for the best texture.
My golden rule? The first batch is always the tester – don’t stress if they’re not perfect. By batch two, you’ll be flipping them like a pro!
Serving Suggestions for Corn Fritters
Now for the best part – eating these crispy little beauties! I’ve served them every which way, but here are my absolute favorite combinations:
- Classic: A big dollop of cool sour cream with a sprinkle of chives – the tangy creaminess against that crispy crust is heaven
- Fiesta style: Topped with fresh salsa and a squeeze of lime – perfect for summer gatherings
- Brunch star: Alongside scrambled eggs and bacon – my nephew calls this “breakfast dessert”
- Appetizer magic: On a platter with avocado crema and hot sauce for dipping – disappears faster than you can say “party!”
Pro tip: They’re shockingly good cold too – I pack them in lunches with a little container of ranch for dipping!
Storing and Reheating Corn Fritters
So you’ve got leftovers? (Unlikely, but it happens!) Here’s how to keep that crispy magic going:
- Fridge storage: Let them cool completely, then tuck them into an airtight container with paper towels between layers. They’ll stay fresh for 3 days – though good luck keeping them that long!
- Reheating: Skip the microwave unless you like soggy fritters. Instead, pop them in a 350°F oven or air fryer for 4-5 minutes until they’re crispy and hot all through. They’ll taste nearly fresh-made!
Pro tip: You can freeze them too! Just lay them out on a baking sheet to freeze solid first, then transfer to freezer bags. Reheat straight from frozen – easy peasy.
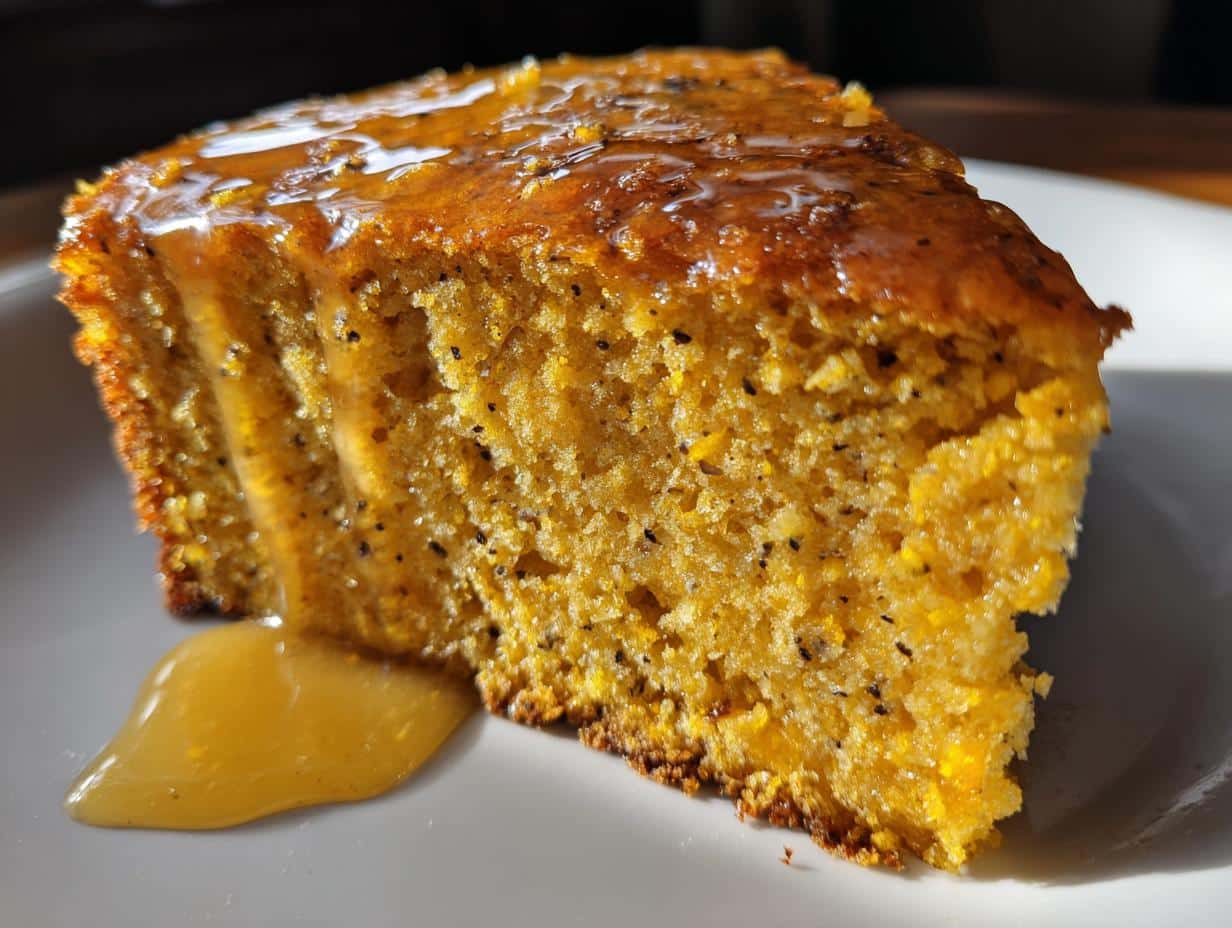
Craving More Corn?
Try this comforting Easy Cowboy Cornbread Casserole, or go creative with Cornbread Waffle Bites with Honey Butter Syrup for a sweet-savory combo.
Love Cheesy Snacks?
These fritters are in good company with the indulgent One Pan Cheesy Ranch Potatoes and Sausage or the air-fried delight of Crispy Zucchini Chips.
Nutritional Information
Here’s the scoop on what’s in these crispy corn fritters (per 2 fritters serving):
- 180 calories – perfect little energy boost
- 10g fat (3g saturated) – hello, melty cheese goodness
- 15g carbs – sweet corn does its thing
- 6g protein – egg and cheese teaming up
Remember folks, these values are estimates based on my exact ingredients. Your nutrition may do a little dance if you make substitutions – and that’s okay! Cooking should be fun, not a math test.
Frequently Asked Questions
Over the years, I’ve gotten the same excited questions about these crispy corn fritters from friends and family (usually while they’re stealing bites from the serving plate). Here are the answers to the big ones:
Can I freeze these cheesy corn fritters?
Absolutely! They freeze like a dream. Just cool them completely, then lay them in a single layer on a baking sheet to freeze solid before transferring to freezer bags. When the craving hits, pop them straight into a 375°F oven or air fryer for about 8 minutes – they’ll come out crispy as the day you made them!
What can I substitute for all-purpose flour?
No flour? No problem! I’ve had great results with:
- Gluten-free 1:1 baking flour (my celiac friend swears by this version)
- Fine cornmeal for extra crunch (use 3 tbsp instead of 1/4 cup)
- Almond flour for low-carb (they’ll be more delicate – flip carefully!)
Any make-ahead tips for parties?
You bet! Here’s my party-saving trick:
- Make the batter up to 2 hours ahead and keep it covered in the fridge
- Fry them just before serving (the smell alone will draw people to the kitchen)
- Or fry ahead and reheat on a rack in the oven – they’ll crisp right back up!
The best part? These fritters are seriously forgiving. Don’t stress about perfection – messy ones taste just as delicious!
Share Your Experience
I’d love to hear how your crispy corn fritters turned out! Did you add any fun twists? Maybe some jalapeños for heat or swap the cheddar for pepper jack? Drop a comment below with your modifications and rate the recipe – your tips might just help the next home cook create their perfect batch!
For more inspiration follow me on Pinterest
Print
17-Minute Irresistibly Crispy Cheesy Corn Fritters Heaven
- Total Time: 20 minutes
- Yield: 10-12 fritters
- Diet: Vegetarian
Description
Deliciously crispy corn fritters loaded with cheese, perfect for a quick snack or side dish.
Ingredients
- 1 cup corn kernels (fresh or canned)
- 1/2 cup shredded cheddar cheese
- 1/4 cup finely chopped onion
- 1/4 cup all-purpose flour
- 1 egg, lightly beaten
- 2 tbsp milk
- 1/2 tsp baking powder
- 1/4 tsp salt
- 1/4 tsp black pepper
- 2 tbsp oil for frying
Instructions
- In a bowl, mix corn, cheese, onion, flour, egg, milk, baking powder, salt, and pepper.
- Heat oil in a pan over medium heat.
- Drop spoonfuls of batter into the pan.
- Cook for 2-3 minutes per side until golden brown.
- Drain on paper towels and serve warm.
Notes
- Use fresh corn for better texture.
- Adjust salt and pepper to taste.
- Serve with sour cream or dipping sauce.
- Prep Time: 10 minutes
- Cook Time: 10 minutes
- Category: Snack
- Method: Frying
- Cuisine: American