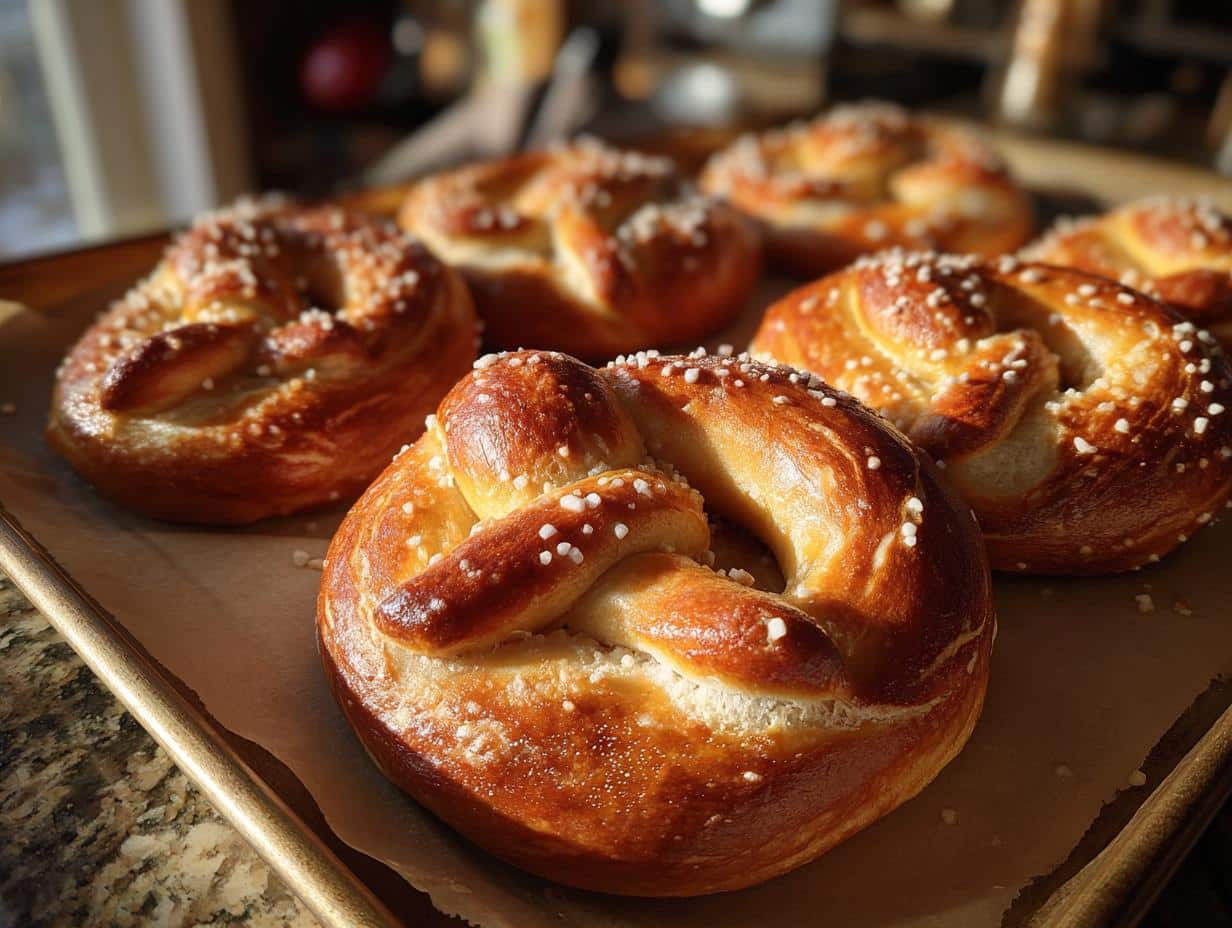
There’s something magical about pulling fresh, golden-brown homemade soft pretzels from the oven – that irresistible aroma takes me right back to childhood visits to our local German bakery. I’d press my nose against the glass, watching the bakers twist dough into perfect knots before dunking them in that mysterious bubbling bath. My version keeps things simple, just like those bakers did, using basic pantry ingredients to create chewy, salty perfection every time. Trust me, once you taste warm pretzels straight from your own oven, you’ll never settle for store-bought again!
Ingredients for Homemade Soft Pretzels
Gathering your ingredients is the first step to pretzel perfection! I’ve made this recipe dozens of times, and here’s exactly what you’ll need to create that signature chewy texture and golden crust. Measure carefully – these amounts are tried and true.
- 1 1/2 cups warm water (110°F) – This temperature wakes up the yeast without killing it. Test it like I do – it should feel like warm bath water.
- 1 tablespoon granulated sugar – Just enough sweetness to feed the yeast and balance the salt.
- 2 teaspoons fine salt – Mixes right into the dough for flavor throughout.
- 1 packet (2 1/4 tsp) active dry yeast – Your dough’s best friend! Make sure it’s fresh for maximum rise.
- 4 1/2 cups all-purpose flour, spooned and leveled – The foundation of your pretzels. I scoop lightly with a spoon into my measuring cup.
- 2 tablespoons unsalted butter, melted – Adds richness and helps create that tender bite.
For the magic pretzel bath and finish:
- 10 cups water – Enough for the baking soda to work its crust-forming magic.
- 2/3 cup baking soda – This creates that distinctive pretzel crust when boiled.
- 1 egg yolk, lightly beaten – Gives that gorgeous shiny finish.
- Coarse salt for topping – The big flakes add that perfect salty crunch.
How to Make Homemade Soft Pretzels
Ready to transform that simple dough into golden, chewy pretzels? Follow these steps exactly like I do – they may look fancy, but they’re actually super fun to make once you get the hang of it!
Preparing the Dough
First things first – wake up that yeast! I always use my favorite big mixing bowl for this part. Pour in your warm water (remember – bathwater warm, not hot!), then sprinkle in the sugar and yeast. Give it a quick stir and walk away for 5 minutes. When you come back, it should look foamy and smell slightly sweet – that’s how you know your yeast is alive and ready to work its magic!
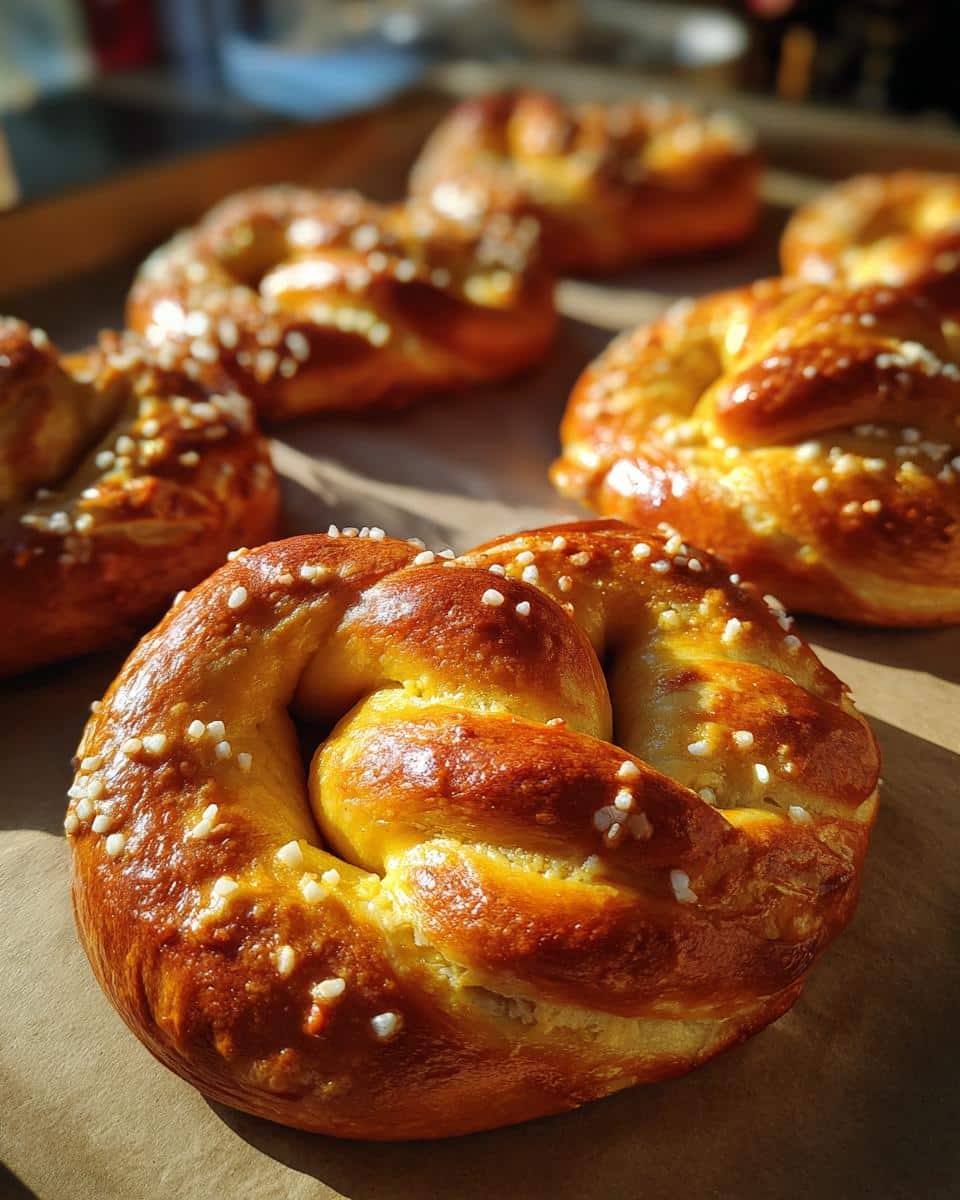
Now add the flour, salt, and melted butter. I start mixing with a wooden spoon, then get my hands in there when it gets too thick. Turn the shaggy dough out onto a lightly floured surface and knead for 5-7 minutes. You’ll know it’s ready when it transforms from sticky to smooth and elastic – it should spring back when you poke it gently. Pop it back in the bowl, cover with a damp towel, and let it rise in a warm spot for about an hour. It should double in size – perfect timing to clean up and prep your other ingredients!
Shaping and Boiling the Pretzels
This is where the fun really begins! Punch down that fluffy dough and divide it into 12 equal pieces (I use a kitchen scale to be precise, but eyeballing works too). Roll each piece into a long rope about 20-24 inches long. Here’s my trick: start from the middle and roll outward, using gentle pressure to stretch it evenly.
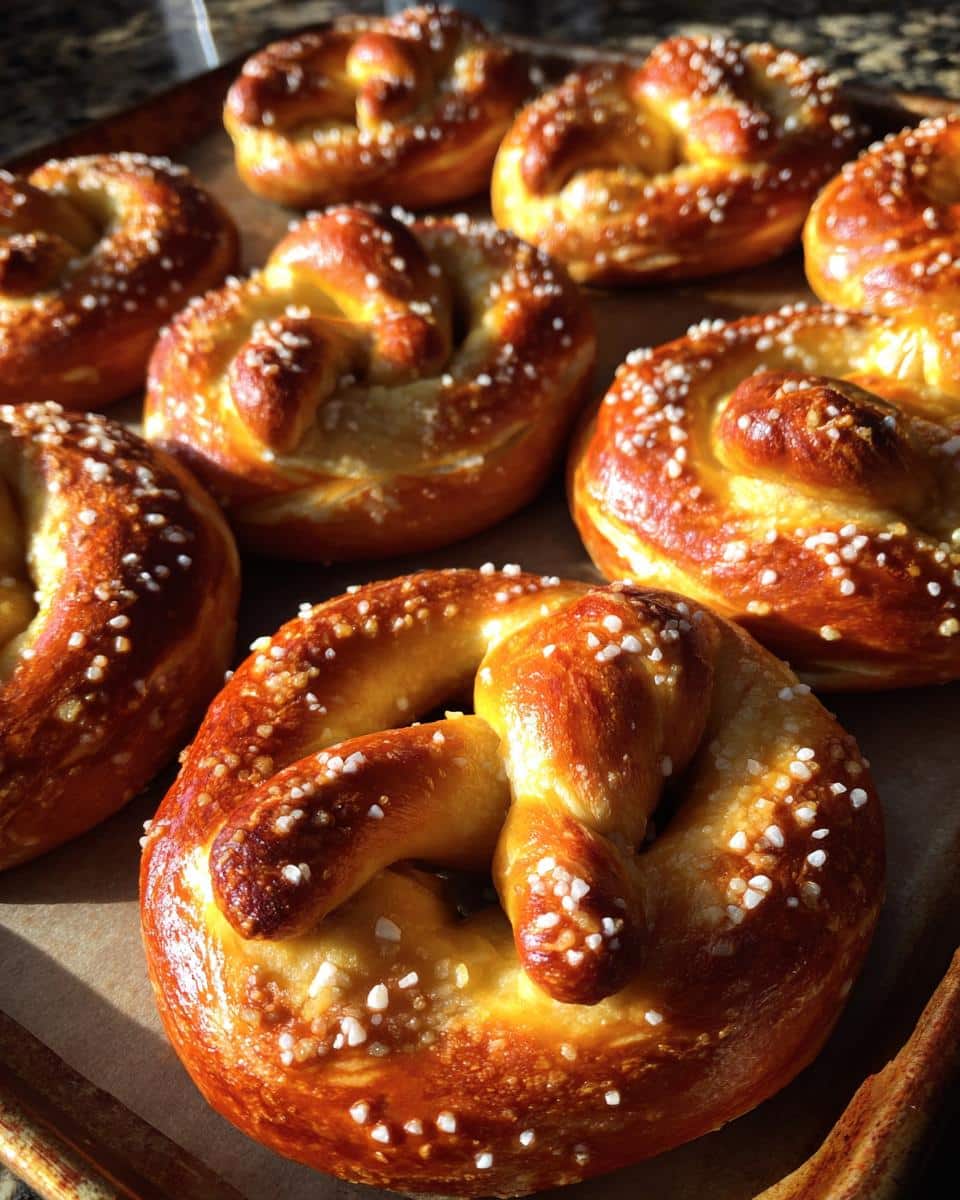
To shape the pretzels, form a U-shape with your rope. Cross the ends over each other twice about 3 inches from the tips, then fold them down to meet the bottom of the U. Press gently to seal – don’t worry if they’re not perfect, rustic-looking pretzels have charm too!
Now for the magic bath: bring your 10 cups of water to a rolling boil, then carefully whisk in the baking soda (it’ll bubble up dramatically – so exciting!). Working in batches, use a slotted spoon to gently lower 2-3 pretzels at a time into the boiling water. They’ll float almost immediately – let them bob happily for exactly 30 seconds, then flip and do another 30 seconds. This quick dip gives them that classic pretzel crust and chewy texture.
Baking the Homemade Soft Pretzels
Preheat your oven to 450°F while you’re boiling – you want it nice and hot! Line two baking sheets with parchment paper (trust me, this prevents sticking disasters). Transfer your boiled pretzels to the sheets using that slotted spoon, leaving about 2 inches between them.
Now for the finishing touches: lightly beat your egg yolk with a tablespoon of water and brush it generously over each pretzel. This gives them that beautiful golden shine. Sprinkle with coarse salt while the egg wash is still wet – I like to be generous, but you do you!
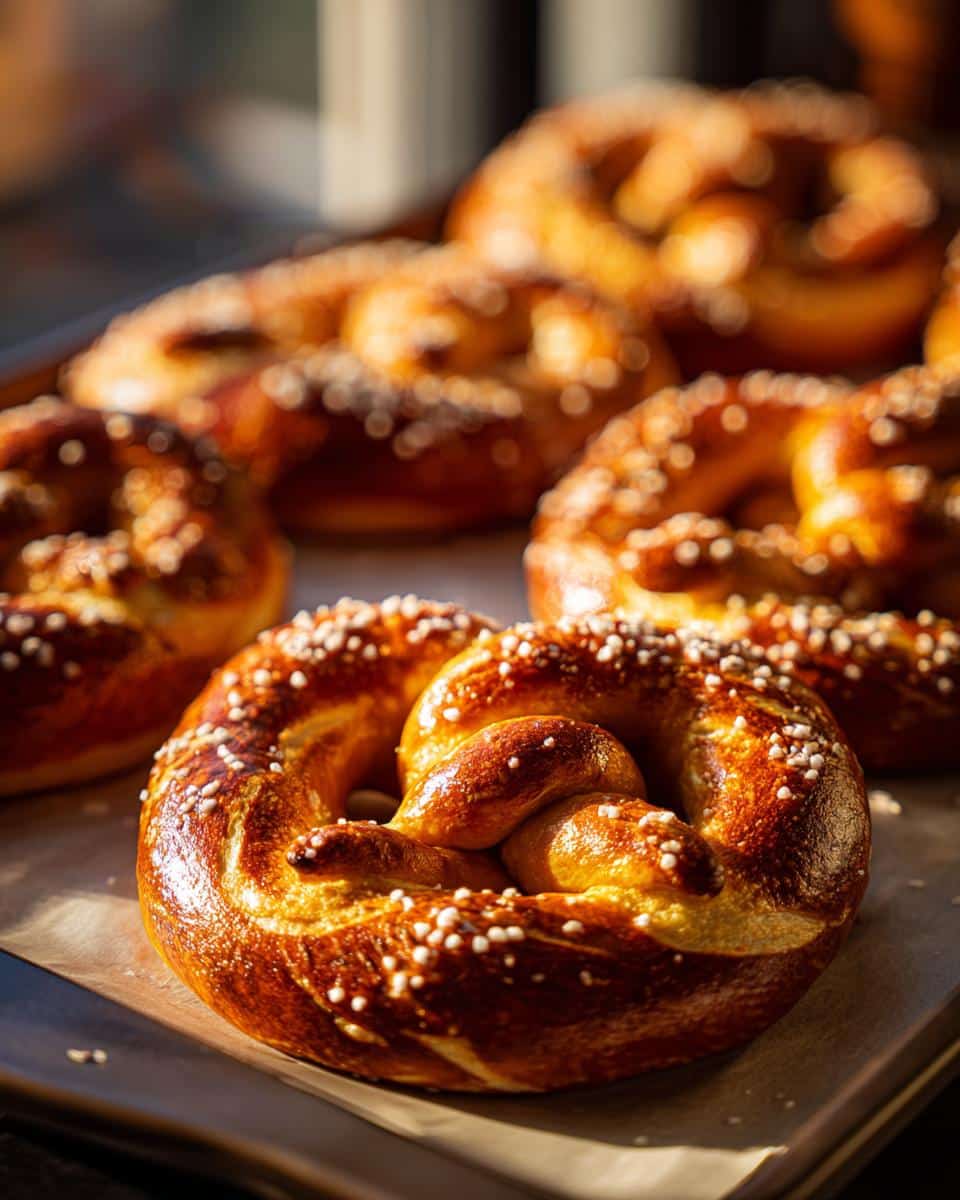
Bake for 12-15 minutes, rotating the pans halfway through, until they’re a deep golden brown. Your kitchen will smell AMAZING! Let them cool just enough so you don’t burn your tongue, then dig in while they’re still warm. That first bite of chewy, salty perfection makes all the work so worth it!
Tips for Perfect Homemade Soft Pretzels
After countless batches (and a few learning experiences!), I’ve gathered my best tips to help you nail these pretzels every single time. These little tricks make all the difference between good and knock-your-socks-off amazing!
- Watch that water temperature – Too hot and you’ll kill the yeast; too cold and it won’t activate. I test with my wrist – it should feel comfortably warm, not hot.
- Don’t rush the rise – Let that dough double in size, even if it takes longer than an hour. Cold kitchen? Put it in the oven with just the light on for a cozy proofing spot.
- Roll with confidence – When shaping ropes, if the dough keeps springing back, let it rest for 5 minutes. The gluten just needs a quick breather!
- Boiling is key – but don’t overdo it – Stick to 30 seconds per side. Any longer and they can get tough instead of chewy.
- Parchment is your friend – That baking soda bath makes them sticky, so line those pans well. I’ve learned this the hard way!
- Egg wash generously – Missed spots won’t brown as nicely. Get into all those nooks and crannies for that perfect shine.
- Eat them fresh – They’re absolute heaven warm from the oven. If you must store them, refresh in a 350°F oven for 5 minutes before serving.
Remember – even “ugly” pretzels taste incredible, so don’t stress about perfection. The more you make them, the better you’ll get at shaping! My first batch looked more like abstract art than pretzels, but they disappeared just as fast.
Ingredient Substitutions and Notes
I’ve experimented with tons of variations on these homemade soft pretzels over the years, so let me share what works (and what doesn’t) when you need to make substitutions. Trust me, I’ve learned most of these the hard way!
Sweetener Swaps
Out of granulated sugar? No problem! You can use an equal amount of honey or maple syrup to feed the yeast. Just warm it slightly so it dissolves easily in the water. Brown sugar works too, though it’ll give your pretzels a subtle molasses flavor – not traditional, but still delicious.
Flour Options
For gluten-free pretzels, I’ve had great success with a 1:1 gluten-free baking flour blend. The texture will be slightly more delicate, so handle the dough gently. Whole wheat flour works too – substitute up to half of the all-purpose flour for a heartier pretzel. Just know they won’t be quite as soft and chewy.
Yeast Questions Answered
If your yeast mixture doesn’t foam after 5 minutes, it might be too old or the water was too hot/cold. I always check the expiration date before starting! You can use instant yeast instead of active dry – just mix it right in with the flour and skip the initial foaming step.
Butter Alternatives
While I love the richness butter adds, you can substitute vegetable oil in a pinch. Use the same amount (2 tablespoons), but the flavor won’t be quite as rich. Margarine works too, though I don’t recommend it if you can avoid it.
Baking Soda Warning
That baking soda bath is non-negotiable for authentic pretzel flavor and texture. I tried skipping it once – big mistake! The pretzels came out tasting like bland bread. If you’re worried about the sodium, just rinse them briefly after boiling before applying the egg wash.
Remember, baking is part science and part art. While these substitutions work, your first batch should follow the original recipe so you know what “right” tastes like. Then have fun experimenting! Some of my favorite pretzel variations came from happy accidents in the kitchen.
Serving and Storing Homemade Soft Pretzels
Oh, that magical moment when your homemade soft pretzels come out of the oven all golden and shiny! I always burn my fingers because I can’t resist tearing into one immediately – that first warm, chewy bite with the perfect salty crunch is pure heaven. Here’s how I like to serve and keep these beauties tasting their absolute best.
Serving suggestions that’ll make you feel like a pro:
- Classic mustard duo – I keep both yellow mustard and spicy brown on hand. The tang cuts through the richness perfectly.
- Creamy cheese sauce – My quick version? Melt 2 tbsp butter, whisk in 2 tbsp flour, then slowly add 1 cup warm milk and a handful of shredded cheddar. So good you’ll want to drink it!
- Cinnamon sugar – For a sweet twist, brush warm pretzels with melted butter and roll in cinnamon sugar. Kid (and adult) approved!
- Pretzel dogs – Wrap dough around hot dogs before boiling and baking for the ultimate game day snack.
Keeping them fresh (if you have leftovers!):
- Day-of: Leave them uncovered on the counter – that perfect crust stays crisp this way.
- Next day: Pop them in an airtight container (they’ll soften slightly, but still delicious).
- Reviving magic: 5 minutes in a 350°F oven brings back that fresh-from-the-oven goodness. I do this even for pretzels that are just an hour old!
- Freezing: Cool completely, then freeze in a single layer before transferring to a freezer bag. They’ll keep for a month – toast straight from frozen when the craving hits.
One of my favorite things about these pretzels? They’re incredibly versatile. I’ve served them as appetizers with beer cheese at parties, packed them in lunchboxes with mustard packets, and even made mini versions for snacks. No matter how you serve them, that first bite of warm, chewy pretzel will have you hooked!
Homemade Soft Pretzels Nutritional Information
Okay, let’s be real – when you’re sinking your teeth into a warm, salty homemade soft pretzel, nutrition facts are probably the last thing on your mind! But I know some of you like to track these things (or need to for dietary reasons), so here’s the breakdown per pretzel. Remember, these are estimates – your actual numbers might vary slightly depending on the exact brands of ingredients you use and how generously you apply that egg wash!
- Calories: 180 – Perfectly reasonable for such a satisfying snack!
- Carbohydrates: 34g – That chewy texture comes from good old-fashioned flour power.
- Protein: 5g – Not bad for something so delicious!
- Fat: 2.5g – Mostly from that bit of butter and egg yolk.
- Sugar: 2g – Just enough to feed the yeast and balance flavors.
- Sodium: 480mg – That baking soda bath and coarse salt topping add up.
A few nutrition notes from my kitchen experiments:
- Using whole wheat flour instead of all-purpose adds about 1g more fiber per pretzel
- Skipping the egg wash saves about 15 calories and reduces fat slightly
- Going light on the coarse salt topping can cut sodium by nearly 100mg
My philosophy? Enjoy these pretzels mindfully – savor each bite rather than inhaling three in a row (though I won’t judge if you do!). They’re homemade with simple ingredients, which already makes them better than most processed snacks out there. Everything in moderation, right?
Frequently Asked Questions
Over the years, I’ve gotten tons of questions about my homemade soft pretzels (and made plenty of mistakes myself!). Here are the most common things people wonder – along with the hard-won wisdom from my own kitchen adventures!
Can I use instant yeast instead of active dry yeast?
Absolutely! Instant yeast is actually my backup when I’m out of active dry. Just skip the initial foaming step – mix it right in with your flour instead. Use the same amount (2 1/4 teaspoons), and your pretzels will rise just as beautifully. The only difference is you might not wait the full hour for the first rise – keep an eye on the dough rather than the clock!
Why do we boil pretzels in baking soda water?
This is the magic step that gives pretzels their signature chewy texture and that distinctive slightly tangy flavor. The alkaline bath (science talk for baking soda water) changes the pH of the dough’s surface, helping it brown better in the oven. It’s what creates that deep golden crust while keeping the inside soft and pillowy. I tried skipping it once – never again! The result was basically sad, bland bread sticks.
My dough keeps springing back when I try to roll it. Help!
Oh, I’ve battled this frustration so many times! Here’s what works for me: after dividing your dough, let the pieces rest for 5-10 minutes covered with a damp towel. This relaxes the gluten so it won’t fight you as much. When rolling, start from the middle and work outward with steady pressure. If it still resists, walk away for another 5 minutes – patience pays off with perfect ropes!
Can I make the dough ahead of time?
You sure can! After the first rise, punch down the dough, wrap tightly in plastic, and refrigerate overnight. The cold slows the yeast way down. When ready to bake, let it sit at room temp for about 30 minutes before shaping – this takes the chill off so it’s easier to work with. I love doing this for brunch pretzels – fresh-baked with minimal morning effort!
Why are my pretzels pale instead of golden brown?
This usually happens when the egg wash is too thin or not applied generously enough. Make sure to beat your egg yolk with just 1 tablespoon of water (not more!), and really brush it into all the nooks and crannies. Also check your oven temp – if it’s running low, they won’t brown properly. An oven thermometer is a cheap but game-changing tool!
Still have questions? Drop them in the comments below – I read every one and love helping troubleshoot your pretzel adventures. After all, we’re all learning together in this delicious journey of homemade bread magic!
I’d absolutely love to hear how your homemade soft pretzel adventure turns out! Did they puff up beautifully? Maybe you discovered a genius new dipping sauce? Whatever your experience, sharing it helps all of us become better bakers together. Here’s how you can keep the pretzel love going:
- Rate the recipe – Those little stars aren’t just pretty! Your honest rating helps other bakers know what to expect.
- Leave a comment – Tell me about your triumphs, your funny shaping fails (we’ve all been there!), or any clever twists you tried.
- Share your photos – Tag me on social media with your golden-brown masterpieces. Nothing makes me happier than seeing your kitchen victories!
Your feedback isn’t just appreciated – it’s what keeps me testing, tweaking, and creating more recipes to share. Now grab a warm pretzel (you’ve earned it!), and let’s keep this delicious conversation going. Happy baking, my fellow pretzel enthusiasts!
Print
Homemade Soft Pretzels: 5 Secrets for Perfect Chewy Bliss
- Total Time: 1 hour 15 minutes
- Yield: 12 pretzels
- Diet: Vegetarian
Description
Make delicious homemade soft pretzels with simple ingredients. Perfect for snacks or parties.
Ingredients
- 1 1/2 cups warm water
- 1 tbsp sugar
- 2 tsp salt
- 1 packet active dry yeast
- 4 1/2 cups all-purpose flour
- 2 tbsp unsalted butter, melted
- 10 cups water
- 2/3 cup baking soda
- 1 egg yolk, beaten
- Coarse salt for topping
Instructions
- Dissolve sugar and yeast in warm water. Let sit for 5 minutes.
- Mix in flour, salt, and melted butter to form a dough.
- Knead dough on floured surface for 5-7 minutes.
- Divide dough into 12 pieces. Roll into ropes and shape into pretzels.
- Boil water and baking soda. Dip pretzels for 30 seconds.
- Place on baking sheet, brush with egg yolk, and sprinkle salt.
- Bake at 450°F for 12-15 minutes until golden brown.
Notes
- Let dough rise until doubled in size for best texture.
- Use parchment paper to prevent sticking.
- Store in airtight container for up to 3 days.
- Prep Time: 1 hour
- Cook Time: 15 minutes
- Category: Snack
- Method: Baking
- Cuisine: German
