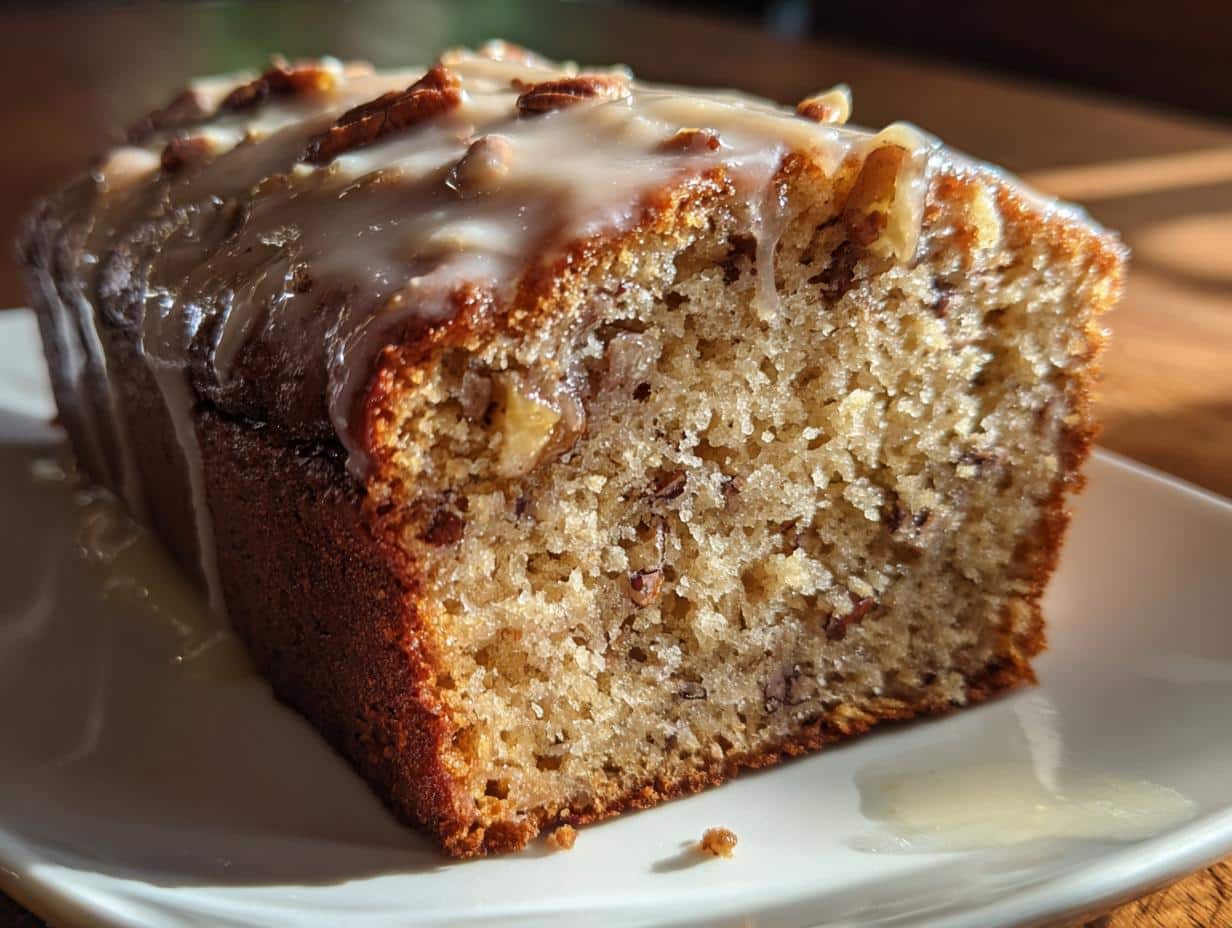
There’s something magical about the smell of maple and toasted walnuts filling your kitchen, isn’t there? My maple walnut loaf cake has been my go-to comfort bake for years—it’s the recipe I pull out when I need something cozy, effortless, and downright delicious. The first time I made it, my neighbor actually knocked on the door to ask what was baking because the aroma was too good to ignore! What I love most is how the maple syrup makes it perfectly moist (no dry cake here), while the walnuts add that satisfying crunch. It’s simple enough for a lazy Sunday morning but special enough to serve guests. Trust me, once you try this, you’ll understand why it’s never lasted more than a day in my house!
Why You’ll Love This Maple Walnut Loaf Cake
Listen, I’ve baked my fair share of loaf cakes, but this maple walnut version? It’s the one that always gets stolen off the cooling rack before it’s even ready. Here’s why it’s such a winner:
- That perfect crumb: Thanks to the maple syrup, every bite stays moist for days—if it lasts that long. No sad, dry slices here!
- Flavor that hugs you: Real maple syrup gives it that cozy, caramel-like depth, while the toasted walnuts add just the right earthy crunch. (Pro tip: toss the walnuts in the batter and sprinkle some on top for extra texture.)
- Easy as… well, cake: One bowl, no fancy techniques. Just cream, mix, pour, and bake. Even my 10-year-old nephew can make this without setting off the smoke alarm.
- Smells like heaven: Your kitchen will smell like a Vermont sugar shack while this bakes. Fair warning—it might attract neighbors.
- Versatile superstar: Breakfast? Yes. Afternoon snack? Obviously. Midnight treat? Absolutely. It’s basically acceptable to eat this any time of day.
Seriously, this cake’s like your favorite sweater—comforting, reliable, and always there when you need it. And did I mention it tastes even better the next day? (If you can wait that long.)
Ingredients for Maple Walnut Loaf Cake
Okay, let’s talk ingredients – and I mean the good stuff. This isn’t one of those recipes where substitutions work well (I learned that the hard way when I tried using pancake syrup once – big mistake!). Here’s exactly what you’ll need to make this maple walnut loaf cake sing:
- 1 1/2 cups all-purpose flour – Spoon and level it, don’t scoop! We want light, fluffy cake, not a dense brick.
- 1/2 cup granulated sugar – Just enough to balance the maple without overpowering it.
- 1/2 cup pure maple syrup – Grade A dark amber is my go-to for that deep flavor. Don’t even think about the fake stuff!
- 1/2 cup unsalted butter, softened – Real butter only, please. Leave it out for about an hour – when you can make a dent with your pinky, it’s ready.
- 2 large eggs – Room temperature eggs mix in so much better. Just pop them in warm water for 5 minutes if you forgot to take them out.
- 1/2 cup whole milk – The fat content makes all the difference in texture. I’ve tried lower fat versions and… just don’t.
- 1 tsp vanilla extract – The good stuff! It enhances the maple flavor beautifully.
- 1 tsp baking powder + 1/2 tsp baking soda – Our rising dream team. Make sure they’re fresh – test them if they’ve been in your pantry forever.
- 1/4 tsp salt – Just a pinch to balance the sweetness.
- 1/2 cup chopped walnuts – Toast them first if you’re feeling fancy – it brings out their oils and makes them extra crunchy.
See? Nothing too crazy – just honest ingredients that work together like best friends. Now let’s get baking!
How to Make Maple Walnut Loaf Cake
Alright, let’s get to the fun part! Making this maple walnut loaf cake is as easy as 1-2-3, but I’ve got a few tricks up my sleeve to make sure it turns out perfect every time. Follow these steps, and you’ll have a cake that’ll make your whole house smell like a cozy autumn morning.
1. Prep Like a Pro
First things first – preheat that oven to 350°F (175°C). While it’s heating up, grab your loaf pan and grease it really well. I like to use butter and a light dusting of flour, but if you’re lazy like me sometimes, baking spray works too. Just make sure you get into all the corners!
2. Creaming Magic
Now, in a big mixing bowl, cream together that softened butter and sugar until it’s light and fluffy. This is where the magic starts! It should take about 2-3 minutes with a hand mixer – you’ll know it’s ready when the mixture turns pale and almost doubles in volume. Don’t rush this step – it’s what gives our cake that perfect texture.
3. Eggcellent Addition
Add your eggs one at a time, mixing well after each one. I crack mine into a small bowl first to avoid any shell surprises. The batter might look a bit curdled after adding the eggs – don’t panic! It’ll all come together when we add the dry ingredients.
4. Liquid Gold
Now pour in that gorgeous maple syrup, milk, and vanilla. Mix just until combined. Oh, and take a moment to smell that batter – heavenly, right? The maple scent should be making your mouth water already.
5. Dry Team Assemble
In another bowl, whisk together your flour, baking powder, baking soda, and salt. I like to sift mine to avoid lumps, but a good whisking works too. Gradually add this to your wet ingredients, mixing just until you don’t see any more flour streaks. Overmixing is the enemy here – a few small lumps are totally fine!
6. Nutty Business
Gently fold in those chopped walnuts. If you’re feeling extra, reserve a handful to sprinkle on top before baking – it makes for a beautiful presentation and extra crunch.
7. Into the Oven
Pour your batter into the prepared loaf pan and smooth the top with a spatula. Pop it in the oven and set your timer for 45 minutes. But here’s the thing – ovens lie! Start checking at 40 minutes by inserting a toothpick near the center. If it comes out with just a few moist crumbs (not wet batter), it’s done. The cake should also spring back lightly when you press the top.
8. The Hardest Part
Let the cake cool in the pan for about 10 minutes – I know, the smell is torture, but this prevents it from falling apart. Then run a knife around the edges and transfer it to a wire rack to cool completely. Or, if you’re impatient like me, slice into it while it’s still warm and let the melty crumbs be your reward!
See? Simple as can be. Now the only challenge is waiting for it to cool before devouring the whole thing!
Tips for the Perfect Maple Walnut Loaf Cake
Alright, I’ve made this maple walnut loaf cake more times than I can count, and I’ve learned a thing or two along the way. Here are my tried-and-true tips to make sure your cake turns out flawless every single time:
- Don’t overmix the batter: This is the #1 rule in my kitchen. Once you add the dry ingredients, mix just until everything is combined. Overmixing leads to a tough, dense cake, and we want light and tender crumb perfection. A few lumps are totally fine—they’ll disappear in the oven.
- Room-temperature ingredients are key: Take your butter, eggs, and milk out of the fridge about an hour before baking. Room-temperature ingredients mix together more evenly, giving you a smoother batter and better texture. If you’re in a rush, pop the eggs in warm water for 5 minutes—it’s a game-changer.
- Toast those walnuts: Want to take your cake to the next level? Toast the walnuts before adding them to the batter. Just spread them on a baking sheet and pop them in the oven at 350°F for 5-7 minutes. It brings out their natural oils and adds an incredible depth of flavor.
- Adjust for altitude: If you’re baking at high altitude, reduce the baking powder by 1/4 teaspoon and add an extra tablespoon of flour. Also, check the cake 5-10 minutes earlier than the recipe suggests—it tends to bake faster up there.
- Test for doneness properly: Don’t rely solely on the timer. Start checking the cake at 40 minutes by inserting a toothpick near the center. If it comes out with a few moist crumbs (not wet batter), it’s done. The top should also spring back when lightly pressed.
Follow these tips, and you’ll have a maple walnut loaf cake that’s not just good, but wow-worthy. Trust me, your future self (and anyone lucky enough to get a slice) will thank you!
Maple Walnut Loaf Cake Variations
Okay, let’s play around! While I adore the classic version, sometimes it’s fun to switch things up. Here are my favorite twists on this maple walnut loaf cake—all tried and loved in my kitchen:
- Pecans instead of walnuts: For a slightly sweeter, buttery crunch, swap in pecans. They pair amazingly with maple. Bonus: toast them with a pinch of cinnamon first!
- Honey or golden syrup: Out of maple syrup? Use an equal amount of honey or golden syrup. The flavor’s different but still delicious—just expect a lighter color.
- Spice it up: Add 1/2 teaspoon of cinnamon or pumpkin pie spice to the dry ingredients for a cozy autumn vibe. I call this my “sweater weather” version.
- Gluten-free option: Replace the all-purpose flour with a 1:1 gluten-free blend. The texture might be slightly denser, but still totally crave-worthy.
- Double the maple: Drizzle warm cake slices with extra maple syrup before serving—because sometimes more is more!
The beauty of this recipe? It’s like your favorite pair of jeans—adaptable to whatever mood strikes. Just promise me you’ll try the original first!
Serving Suggestions for Maple Walnut Loaf Cake
Oh, the possibilities! This maple walnut loaf cake is delicious on its own, but if you want to take it to the next level, here are my favorite ways to serve it—because why stop at amazing when you can go to incredible?
- With a cup of coffee: Morning, noon, or night, a slice of this cake with a steaming cup of coffee is pure bliss. The maple and coffee flavors? A match made in heaven.
- Whipped cream or vanilla ice cream: For dessert, top a warm slice with a dollop of whipped cream or a scoop of vanilla ice cream. The contrast of warm cake and cool topping is divine.
- Maple glaze drizzle: Mix powdered sugar with a little maple syrup and milk for a quick glaze. Drizzle it over the cooled cake for extra sweetness and a bakery-worthy finish.
- Fresh fruit on the side: Pair it with fresh berries or sliced apples for a touch of brightness. The tartness balances the cake’s richness perfectly.
- Breakfast upgrade: Toast a slice lightly and spread it with a bit of butter or cream cheese. Because cake for breakfast is always a good idea.
However you serve it, this cake is guaranteed to make any moment a little sweeter. Go ahead—get creative and enjoy every bite!
Storing and Reheating Maple Walnut Loaf Cake
Let’s talk about keeping that maple walnut loaf cake as fresh as the day you baked it. Because let’s be real—this cake rarely lasts long, but if you’re lucky enough to have leftovers (or if you’re planning ahead), here’s how to store and reheat it like a pro.
Storing Your Cake
First things first—once your cake has cooled completely, wrap it tightly in plastic wrap or aluminum foil. This keeps it from drying out. Then, pop it into an airtight container or a resealable plastic bag. Store it at room temperature for up to 2 days, or in the fridge for up to 5 days. The fridge will keep it fresher longer, but I’ll warn you—cold cake is a little denser. (Still delicious, though!)
Freezing for Later
Want to save some for later? This cake freezes like a dream! Slice it into individual portions (trust me, it’s easier to grab a slice than defrost the whole loaf), wrap each slice in plastic wrap, and then place them in a freezer-safe bag or container. It’ll keep in the freezer for up to 3 months. When you’re ready to enjoy, just let it thaw at room temperature for about an hour, or pop it in the microwave for a quick warm-up.
Reheating Like a Boss
If you like your cake warm and toasty (and who doesn’t?), here’s how to bring it back to life:
- Microwave: Place a slice on a microwave-safe plate and heat it in 10-second intervals until warm. Be careful not to overdo it—no one likes rubbery cake!
- Oven: Wrap the slice in aluminum foil and warm it in a 300°F (150°C) oven for about 10 minutes. This method keeps the moisture intact and gives you that fresh-from-the-oven feel.
- Toaster oven: Pop a slice directly into the toaster oven on a low setting for 5-7 minutes. Perfect for when you’re craving a quick warm-up.
And there you have it—your maple walnut loaf cake, ready to enjoy anytime. Because good cake waits for no one!
Maple Walnut Loaf Cake Nutrition
Alright, let’s talk numbers—because even though this maple walnut loaf cake tastes like pure indulgence, it’s nice to know what you’re biting into! Here’s the nutritional breakdown per slice (based on cutting the loaf into 10 generous pieces):
- Calories: About 250
- Sugar: 20g (that maple syrup is doing its sweet job!)
- Fat: 12g (with 6g saturated from all that glorious butter)
- Carbohydrates: 32g
- Protein: 4g (thanks to the eggs and walnuts)
- Fiber: 1g (those walnuts count for something!)
Now, here’s my little disclaimer: These numbers are estimates based on standard ingredients. Your actual nutrition facts might vary depending on the exact brands and measurements you use. Did you add extra walnuts? Drizzle more maple syrup on top? Use almond milk instead of whole milk? All those little tweaks will change the numbers slightly.
But let’s be real—when that maple aroma is wafting through your kitchen and you’re slicing into a warm piece of cake, are you really counting? I didn’t think so. Enjoy every bite!
FAQs About Maple Walnut Loaf Cake
Got questions? I’ve got answers! After years of baking this maple walnut loaf cake (and all the trial and error that came with it), here are the most common questions I get—and my hard-earned solutions:
Can I use pancake syrup instead of real maple syrup?
Oh honey, no. I made this mistake once and regretted it instantly. Pancake syrup is mostly corn syrup with flavoring—it won’t give you that deep, rich maple taste we’re after. If you’re in a pinch, try honey or golden syrup instead, but pure maple syrup is absolutely worth the splurge. Trust me, your taste buds will thank you!
Why did my walnuts sink to the bottom?
Ah, the classic walnut sinkage—it’s happened to all of us! The trick is to toss your chopped walnuts in a tablespoon of flour before folding them into the batter. This light coating helps them “float” in the batter instead of sinking like little nutty anchors. Also, make sure your batter isn’t too thin—if it seems runny, add an extra tablespoon of flour.
Can I make this cake ahead of time?
Absolutely! In fact, I think the flavors get even better after a day. Just wrap the cooled cake tightly in plastic wrap and store it at room temperature. Want to bake it further ahead? Freeze it! Slice it first so you can grab individual pieces—just thaw at room temperature when the craving hits. (Though good luck not eating it all at once!)
My cake is browning too fast—what do I do?
Oops! If your cake is getting too dark on top but still needs more baking time, loosely tent it with aluminum foil. This creates a little shield that prevents further browning while letting the inside finish baking. Pro tip: check your oven temperature with a thermometer—many ovens run hot without us realizing!
Can I double this recipe?
You bet! This recipe doubles beautifully—just use two loaf pans instead of one. The baking time might need an extra 5-10 minutes, so keep an eye on it. Or, pour all the batter into a 9-inch round cake pan for a fabulous maple walnut cake (adjust baking time to about 30-35 minutes). More cake is always a good idea, right?
There you have it—all my maple walnut wisdom in one place. Now go bake up something amazing, and remember: the best cakes are made with a little love and a lot of real maple syrup. Enjoy every delicious bite!
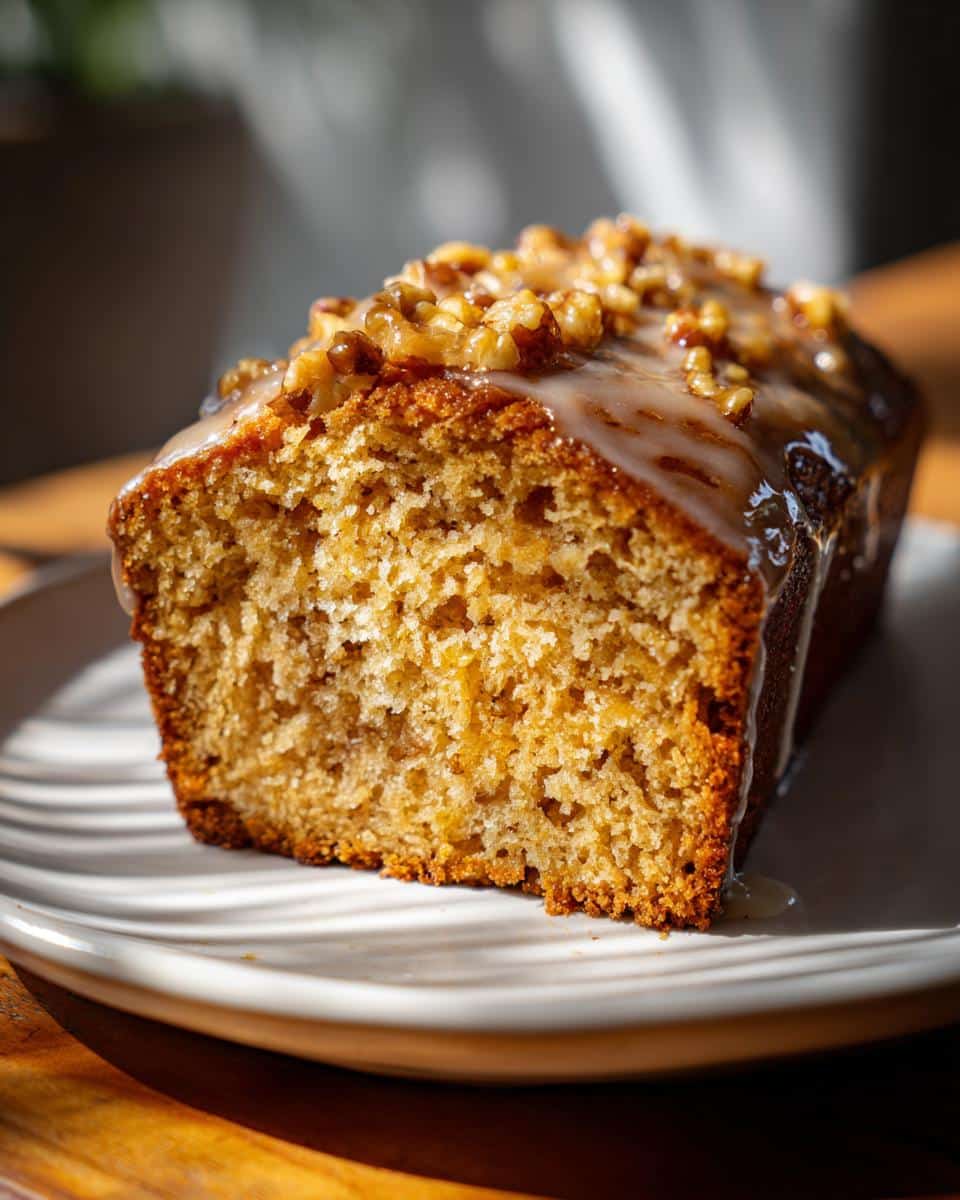

Irresistible 5-Star Maple Walnut Loaf Cake Recipe
- Total Time: 1 hour 5 minutes
- Yield: 1 loaf
- Diet: Vegetarian
Description
A moist and flavorful loaf cake infused with maple syrup and topped with crunchy walnuts.
Ingredients
- 1 1/2 cups all-purpose flour
- 1/2 cup granulated sugar
- 1/2 cup maple syrup
- 1/2 cup unsalted butter, softened
- 2 large eggs
- 1/2 cup milk
- 1 tsp vanilla extract
- 1 tsp baking powder
- 1/2 tsp baking soda
- 1/4 tsp salt
- 1/2 cup chopped walnuts
Instructions
- Preheat your oven to 350°F (175°C). Grease a loaf pan.
- In a bowl, cream the butter and sugar until light and fluffy.
- Add the eggs one at a time, mixing well after each addition.
- Stir in the maple syrup, milk, and vanilla extract.
- In another bowl, whisk together the flour, baking powder, baking soda, and salt.
- Gradually add the dry ingredients to the wet mixture, mixing until just combined.
- Fold in the chopped walnuts.
- Pour the batter into the prepared loaf pan and smooth the top.
- Bake for 45-50 minutes or until a toothpick inserted comes out clean.
- Let cool in the pan for 10 minutes, then transfer to a wire rack to cool completely.
Notes
- Use pure maple syrup for the best flavor.
- Store in an airtight container for up to 3 days.
- For extra crunch, sprinkle additional walnuts on top before baking.
- Prep Time: 15 minutes
- Cook Time: 50 minutes
- Category: Dessert
- Method: Baking
- Cuisine: American
