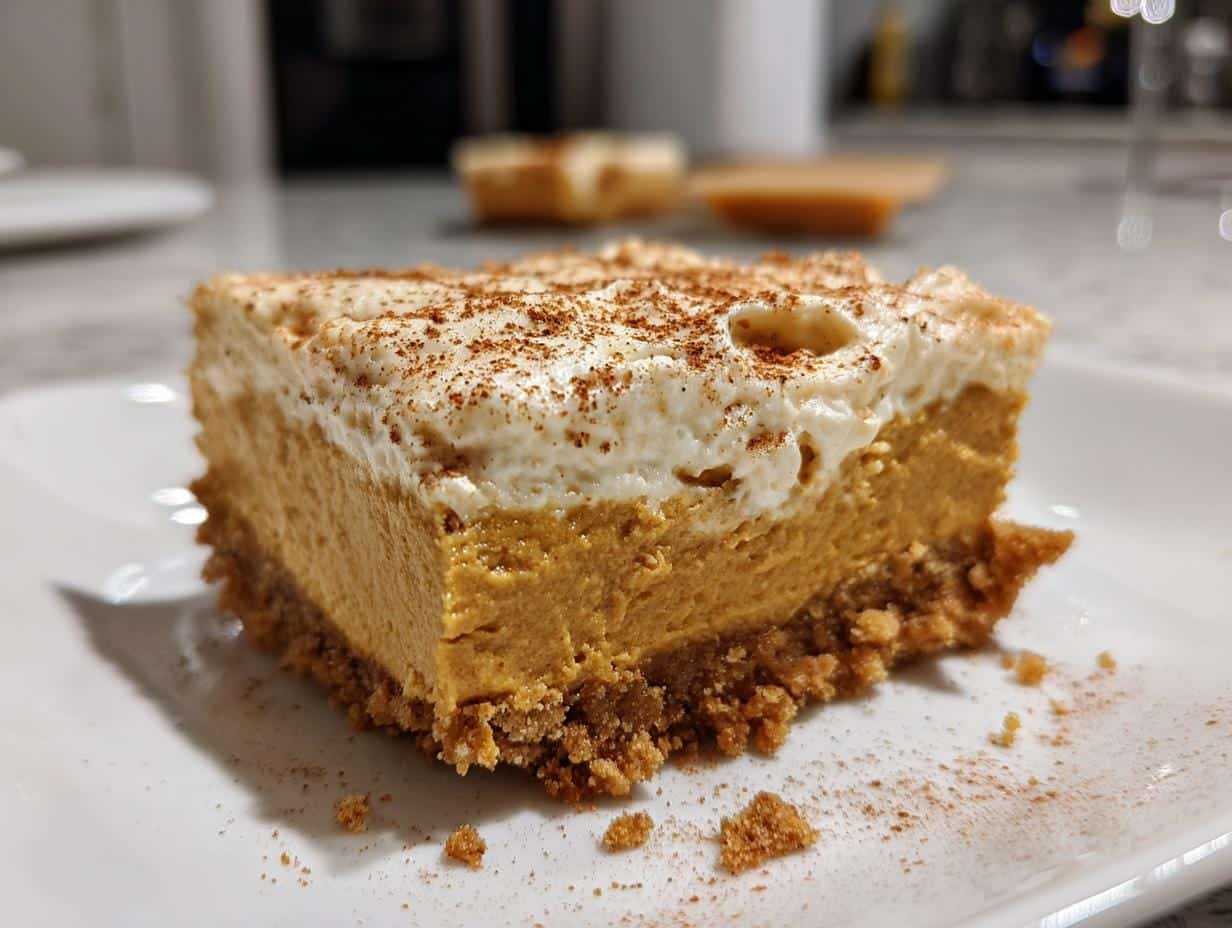
Oh my gosh, you guys – these No-Bake Pumpkin Cheesecake Bars with Graham Cracker Crust are my absolute favorite fall treat to whip up when I’m craving something sweet but don’t want to turn on the oven. I mean, who has time for baking when there are pumpkin patches to visit and cozy sweaters to wear? The best part is they come together in about 20 minutes of active time, and then you just pop them in the fridge while you go about your day (or, let’s be real, while you watch your third Halloween movie of the week).
I first made these years ago when I needed a last-minute dessert for Friendsgiving, and they were such a hit that they’ve become my go-to autumn dessert. That graham cracker crust? So buttery and crisp. The pumpkin cheesecake layer? Creamy and spiced just right. And the fact that you don’t even have to preheat your oven? Absolute magic. These bars taste like you spent hours in the kitchen, but our little secret is how ridiculously easy they really are!
Table of Contents
Ingredients for No-Bake Pumpkin Cheesecake Bars with Graham Cracker Crust
Okay, let’s gather our goodies! Here’s everything you’ll need to make these dreamy pumpkin cheesecake bars. I’ve learned through many batches that quality ingredients really make a difference here – especially when we’re not baking them. Trust me, your taste buds will thank you!
For the Graham Cracker Crust:
- 2 cups graham cracker crumbs (about 14-15 full sheets – I just toss them in a bag and crush with a rolling pin when I’m feeling energetic!)
- 1/2 cup melted butter (salted or unsalted both work, but I prefer salted for that sweet-salty magic)
- 1/4 cup granulated sugar (this little bit of sweetness makes the crust sing)
For the Pumpkin Cheesecake Filling:
- 16 oz cream cheese, softened (yes, full-fat! And let it sit out for at least 30 minutes – cold cream cheese will leave you with lumps)
- 1 cup canned pumpkin puree (NOT pumpkin pie filling – check that label carefully!)
- 1/2 cup powdered sugar (sifts in beautifully without graininess)
- 1 teaspoon vanilla extract (the good stuff makes a difference here)
- 1 teaspoon pumpkin pie spice (or make your own blend if you’re fancy like that)
- 1 cup whipped topping (Cool Whip or homemade – either works, but don’t skip this for that perfect light texture)
See? Nothing too crazy! Just simple ingredients that come together to make something magical. Now let’s get mixing!
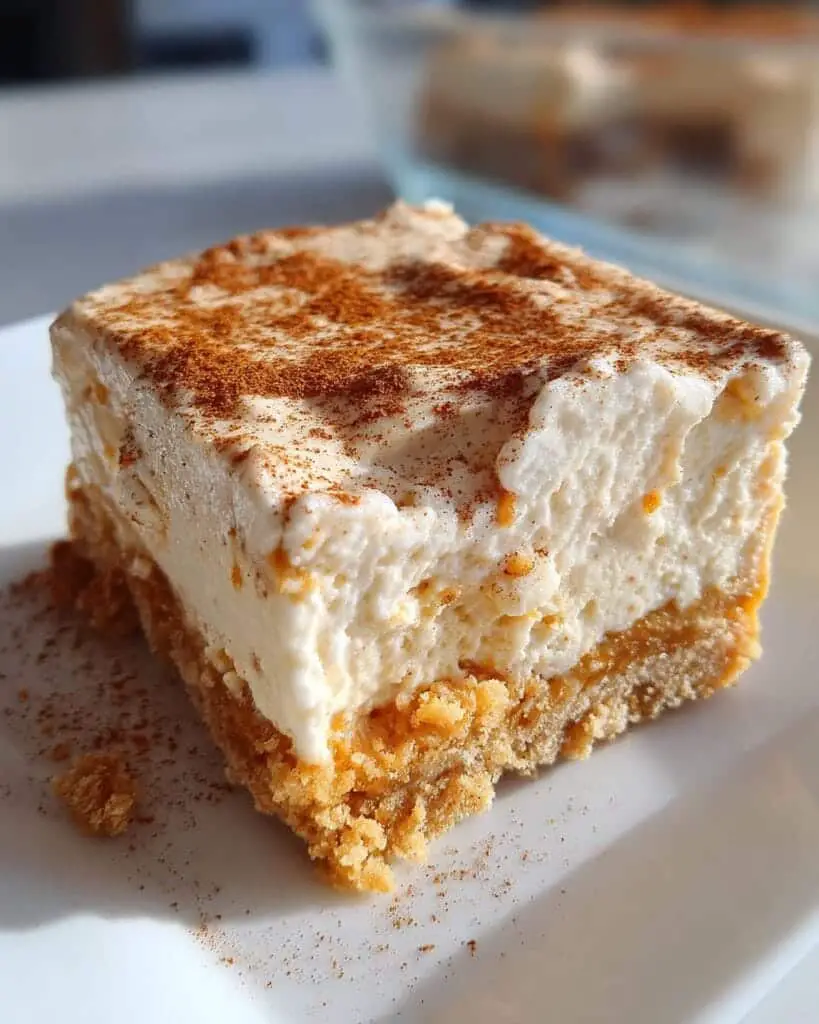
How to Make No-Bake Pumpkin Cheesecake Bars with Graham Cracker Crust
Alright, let’s dive into the fun part – putting these gorgeous pumpkin cheesecake bars together! I promise it’s easier than carving a pumpkin (and way less messy). Just follow these simple steps, and you’ll have dessert magic in no time.
Prepare the Graham Cracker Crust
First things first – that glorious crust! Here’s my foolproof method:
- Grab your graham cracker crumbs and dump them into a medium bowl. Add the melted butter and sugar – it should look like wet sand when mixed properly.
- Pour the mixture into your lined 9×9 pan (parchment paper is your friend here!). Now comes the important part – press it down FIRMLY with your fingers or the bottom of a measuring cup. I mean really get in there – we want that crust to hold together when we slice it later.
- Pop it in the fridge for 15 minutes while you make the filling. This quick chill helps set the crust so it doesn’t crumble when we add the creamy topping.
Make the Pumpkin Cheesecake Filling
Time for the star of the show – that velvety pumpkin filling!
- In a large bowl, beat the softened cream cheese until it’s completely smooth. No lumps allowed! I use my hand mixer on medium for about 2 minutes.
- Add the pumpkin puree, powdered sugar, vanilla, and pumpkin pie spice. Mix until everything is beautifully incorporated – the color should be this gorgeous uniform orange.
- Now gently fold in the whipped topping with a spatula. Don’t overmix here – we want to keep all that airiness for the lightest texture. Fold just until no white streaks remain.
Chill and Serve
Almost there! Just need some patience now:
- Spread the pumpkin mixture evenly over your chilled crust. Smooth the top with your spatula – I sometimes make little swirls for a pretty finish.
- Cover with plastic wrap and refrigerate for at least 4 hours. I know, I know – the wait is torture! But trust me, this is crucial for that perfect sliceable texture. Overnight is even better if you can wait.
- When ready to serve, lift the bars out using the parchment paper and slice into squares. Top with extra whipped cream or a sprinkle of cinnamon if you’re feeling fancy!
Tips for Perfect No-Bake Pumpkin Cheesecake Bars
After making these bars more times than I can count (okay fine, I may have a pumpkin cheesecake problem), I’ve picked up some tricks that guarantee perfect results every single time. Here are my absolute must-know tips:
- Don’t skimp on the cream cheese! Full-fat is non-negotiable here – it gives that rich, creamy texture we all love. Low-fat versions will leave you with a weird, grainy mess. And please, please let it soften properly – cold cream cheese equals lumpy filling, and nobody wants that!
- Fold, don’t mix! When adding the whipped topping, treat it gently like you’re handling a cloud. Overmixing will deflate all that lovely airiness we worked so hard to incorporate. Just fold until combined – a few white streaks are okay!
- Line your pan like a pro. Leave parchment paper hanging over the edges so you can lift the whole slab out for clean slicing. Trying to dig bars out of an unlined pan? Disaster waiting to happen!
- Chill that crust first. Those 15 minutes in the fridge make all the difference for a crust that holds together. Think of it like giving your graham cracker base a little power nap before its big debut.
- Patience is key. I know it’s tempting to dig in after an hour, but trust me – wait the full 4 hours (or overnight!). The filling needs time to set properly so you get those picture-perfect slices instead of pumpkin soup.
Follow these simple tricks, and you’ll be the pumpkin cheesecake hero of every fall gathering. Just don’t be surprised when people start requesting “your famous bars” year after year!
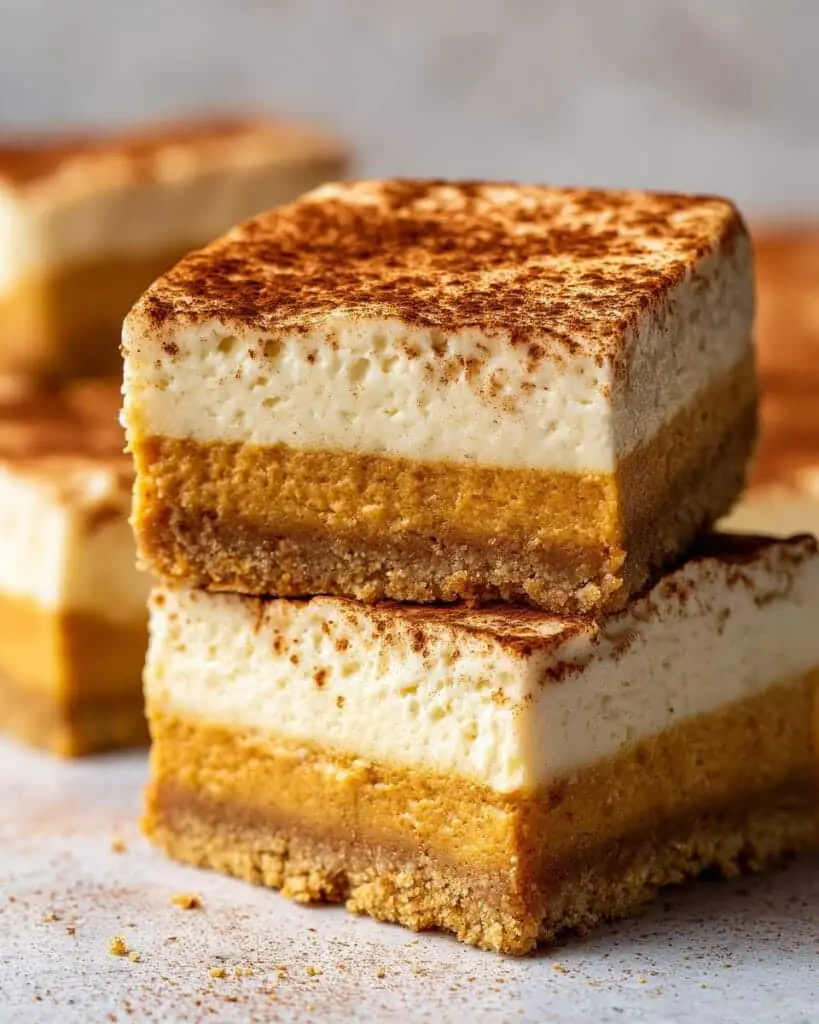
Ingredient Substitutions & Notes
Okay, let’s chat about making these pumpkin cheesecake bars work for different diets and what’s in your pantry! I’ve tested all sorts of variations over the years, and here’s what absolutely works (and what doesn’t) when you need to make some swaps.
Graham Cracker Crust Alternatives
No graham crackers? No problem! You can use:
- Gluten-free graham crackers – Works perfectly 1:1 if you need to avoid gluten. The texture stays wonderfully crisp.
- Digestive biscuits – My British friends swear by these for a slightly different but equally delicious crust.
- Vanilla wafers or shortbread cookies – Crushed up, they make a sweeter, more buttery base that’s amazing.
Butter Substitutes
If you’re dairy-free or just out of butter:
- Coconut oil – Use refined for neutral flavor. Melt it first just like butter – same quantity works great!
- Vegan butter – The stick kind (not tub) mimics real butter’s texture perfectly in the crust.
Pumpkin Puree Pointers
A few crucial notes about this star ingredient:
- Fresh pumpkin? You can use it, but canned is more consistent. If using fresh, roast and puree it first – and squeeze out excess liquid in cheesecloth!
- Pumpkin pie filling alert! They’re not interchangeable. Puree has no added spices or sugar – using pie filling will make your bars WAY too sweet.
Cream Cheese Considerations
For the dairy-challenged:
- Vegan cream cheese – The block style (not tub) works surprisingly well! Just know the flavor will be slightly different.
- Don’t try yogurt or ricotta – They won’t set properly and you’ll end up with a runny mess. Learned this the hard way!
Remember, some swaps change the final texture or flavor slightly – but that’s part of the fun of making it your own! The most important thing is that crust gets packed tight and that filling gets its full chilling time, no matter what ingredients you use.
Serving Suggestions for No-Bake Pumpkin Cheesecake Bars
Now for my favorite part – dressing up these pumpkin cheesecake bars to make them extra special! I love how a few simple toppings can take them from delicious to “wow, did you really make these?” Here are my go-to ways to serve them that always impress:
Classic Whipped Cream & Spice
You can’t go wrong with a dollop of fresh whipped cream on top – it’s like the pumpkin spice latte of desserts! I pipe little rosettes on each square and dust lightly with cinnamon or extra pumpkin pie spice. The contrast of the cold cream with the spiced filling is absolute perfection.
Caramel Drizzle Magic
Oh honey, when I tell you caramel takes these bars next-level… Warm up some store-bought caramel sauce (or make your own if you’re feeling ambitious) and drizzle it artfully over the top. The way it pools in little pockets of the cheesecake filling? Divine. Add a sprinkle of flaky sea salt if you’re into that sweet-salty thing (and trust me, you should be).
Seasonal Fruit Friends
In the fall, I love pairing these with:
- Thinly sliced apples or pears arranged in a pretty pattern
- A quick compote of cranberries simmered with orange zest
- Candied pecans or walnuts for crunch (toast them first for extra flavor!)
For Special Occasions
When I’m serving these at Thanksgiving or a dinner party, I go all out:
- Gold leaf flakes for a touch of elegance (yes, really – it’s surprisingly affordable!)
- Edible flowers for a pop of color
- Mini gingerbread cookies standing up in each square like little edible decorations
The beauty of these bars is they’re delicious plain but also serve as the perfect canvas for your creativity. Last Halloween I even piped little ghost shapes with white chocolate on top – the kids went wild for them! However you choose to serve them, just make sure to have napkins ready because these disappear fast.
Storage & Reheating
Okay, let’s talk about keeping these pumpkin cheesecake bars tasting fresh – because let’s be real, you might not finish them all in one sitting (or maybe you will, no judgment here!). Here’s everything I’ve learned about storing them properly over years of making batch after batch.
Refrigerator Storage
These bars are happiest in the fridge, where they’ll stay perfectly creamy and delicious for 3-5 days. Just make sure to:
- Store them in an airtight container – I’m partial to glass containers with snap-on lids because they don’t absorb odors.
- If you don’t have a container big enough, you can cover the whole pan tightly with plastic wrap – just press it directly onto the surface to prevent drying out.
- For individual portions, I sometimes separate bars with parchment squares so they don’t stick together.
Fun fact – the flavors actually get better after a day or two as the spices meld together! I may or may not intentionally make extra just to enjoy this magical transformation.
Freezing? Don’t Do It!
Now listen, I’ve tried freezing these bars more times than I’d like to admit (all in the name of science, of course), and it never ends well. The texture turns grainy and the whipped topping separates when thawed – total sadness. That creamy, dreamy filling just wasn’t meant for the freezer, no matter how much we wish it were so.
Serving After Refrigeration
When you’re ready for another slice (let’s be honest, probably in about 5 minutes), just pull them straight from the fridge – no reheating needed! These bars are meant to be enjoyed cold. If they seem a bit too firm right out of the fridge, let them sit at room temperature for about 5 minutes to take the chill off.
One little secret I’ve picked up – if your bars have been in the fridge a few days and the crust seems softer than you’d like, pop them in the freezer for just 15 minutes before serving. This firms everything up beautifully without actually freezing the filling. Just don’t forget about them – set a timer!
Nutritional Information
Okay, let’s talk numbers – because let’s be real, we all want to know what we’re indulging in when we sneak that second (or third…) pumpkin cheesecake bar! Here’s the nutritional breakdown per bar, but remember these are estimates – your exact values might vary slightly depending on your specific ingredients.
- Calories: About 250 per bar (but totally worth every delicious one!)
- Sugar: 18g (mostly from that luscious pumpkin and powdered sugar)
- Fat: 16g (that’s where all the creamy goodness comes from)
- Saturated Fat: 9g (thank you, cream cheese and butter!)
- Carbohydrates: 24g
- Fiber: 1g (hey, pumpkin counts as a vegetable, right?)
- Protein: 3g
- Sodium: 200mg
A little disclaimer from someone who’s made these bars with every variation imaginable: These numbers can change if you use different brands, substitutions, or adjust the recipe. Using low-fat cream cheese? The numbers go down. Adding caramel drizzle? Well… let’s just say some things are better left uncalculated!
The way I see it? These pumpkin cheesecake bars are a seasonal treat meant to be savored. I focus more on sharing them with people I love than counting every gram. Life’s too short not to enjoy dessert – especially when it tastes this good!
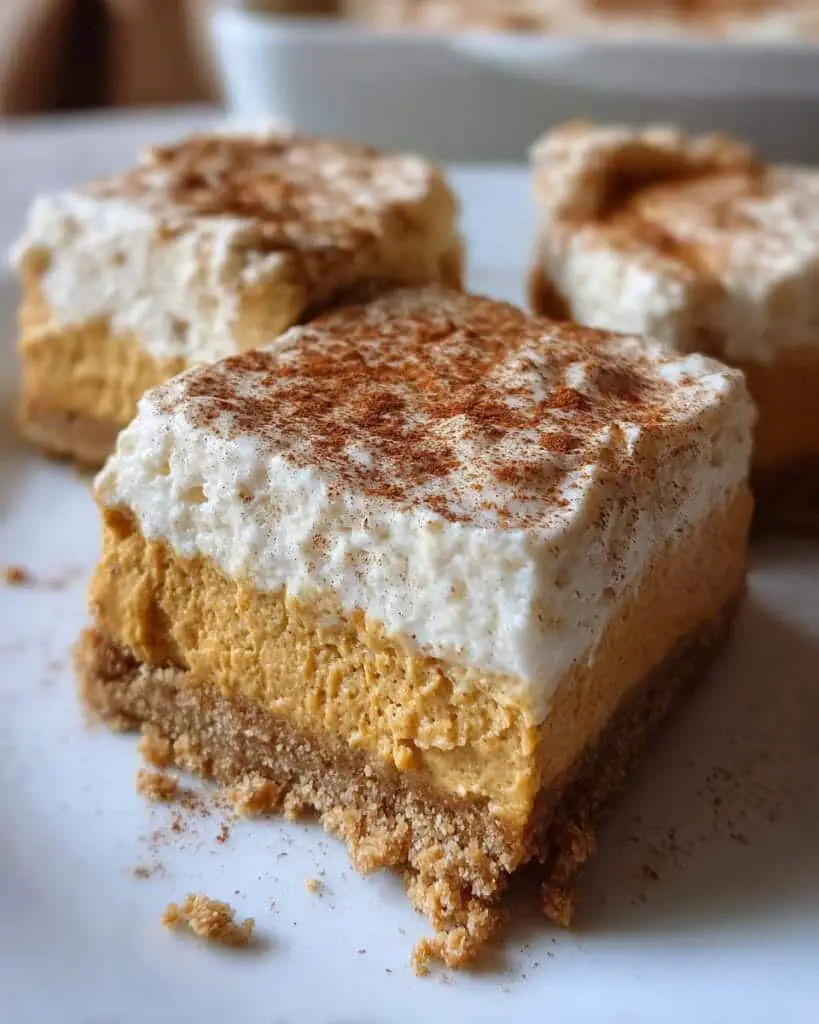
FAQ About No-Bake Pumpkin Cheesecake Bars
I get SO many questions about these pumpkin cheesecake bars every fall – seems like everyone wants to make them but has a few worries first! Here are the answers to all the most common questions I hear, from my kitchen to yours:
Can I use fresh pumpkin instead of canned?
You totally can, but there’s a catch! Fresh pumpkin needs some prep work first. Roast it until super soft, then puree and – this is key – strain it through cheesecloth to remove excess water. Canned is so much easier because it’s consistently thick, but if you’re using fresh, just know you’ll need about 1.5 cups raw pumpkin to get 1 cup of proper puree after draining.
Help! My filling is too runny – how can I fix it?
Don’t panic! First, make sure you chilled it the full 4 hours (I know, the wait kills me too). If it’s still too soft, you might have overmixed the whipped topping or used low-fat cream cheese (I warned you!). Pop it in the freezer for 30 minutes before serving to firm up. Next time, try adding an extra 1/4 cup powdered sugar to help stabilize the filling.
What are the best vegan substitutes?
I’ve had great luck with:
- Vegan cream cheese (the block kind, not tub)
- Coconut oil instead of butter in the crust
- Coconut whipped cream instead of Cool Whip
The texture will be slightly different but still delicious! Just avoid using tofu or yogurt – they don’t set right.
Can I make these ahead for a party?
Absolutely! These bars are actually BETTER made 1-2 days in advance. The flavors develop beautifully, and you’ll be stress-free on party day. Just keep them covered in the fridge until serving time. I often make a double batch on Wednesday for weekend gatherings – they keep perfectly!
Why did my crust fall apart when I cut the bars?
Oh no! Two likely culprits:
- You didn’t press the crust firmly enough into the pan (really get in there with some muscle!)
- You didn’t chill the crust before adding filling (those 15 minutes matter!)
Next time, try using the bottom of a glass to compact the crust extra tight – it makes all the difference for clean slices.
Still have questions? Drop them in the comments – I’m happy to help troubleshoot your pumpkin cheesecake adventures! After dozens of batches (and a few happy accidents), I’ve probably encountered – and solved – whatever issue you’re facing.
Conclusion
Well there you have it, friends – my absolute obsession in dessert form! These No-Bake Pumpkin Cheesecake Bars with Graham Cracker Crust have saved me at countless potlucks, wowed my in-laws at Thanksgiving, and satisfied my midnight pumpkin cravings more times than I can count. I’d love to hear how they turn out for you!
Did you add any fun toppings? Discover a genius shortcut? Have a hilarious kitchen fail that turned out delicious anyway? Drop a comment below and tell me all about it – your tips might help fellow pumpkin lovers too! And if you snap a photo of your beautiful bars (we all know you will), tag me so I can admire your handiwork.
Thinking about making these for a special occasion? Save this recipe by pinning it! That way you’ll have it handy when pumpkin season rolls around again (though in my house, pumpkin season is year-round – no shame!). Most importantly – enjoy every creamy, spiced bite. You’ve earned it!
For more inspiration follow me on Pinterest
Print
25-Minute No-Bake Pumpkin Cheesecake Bars You’ll Crave!
- Total Time: 4 hours 20 minutes
- Yield: 12 bars
- Diet: Vegetarian
Description
Delicious no-bake pumpkin cheesecake bars with a graham cracker crust, perfect for fall desserts.
Ingredients
- 2 cups graham cracker crumbs
- 1/2 cup melted butter
- 1/4 cup sugar
- 16 oz cream cheese, softened
- 1 cup pumpkin puree
- 1/2 cup powdered sugar
- 1 tsp vanilla extract
- 1 tsp pumpkin pie spice
- 1 cup whipped topping
Instructions
- Mix graham cracker crumbs, melted butter, and sugar. Press into a lined baking dish.
- Beat cream cheese until smooth. Add pumpkin puree, powdered sugar, vanilla, and pumpkin pie spice.
- Fold in whipped topping. Spread over crust.
- Refrigerate for 4 hours before serving.
Notes
- Use canned pumpkin puree for best results.
- Chill the crust for 15 minutes before adding filling.
- Prep Time: 20 minutes
- Cook Time: 0 minutes
- Category: Dessert
- Method: No-Bake
- Cuisine: American
