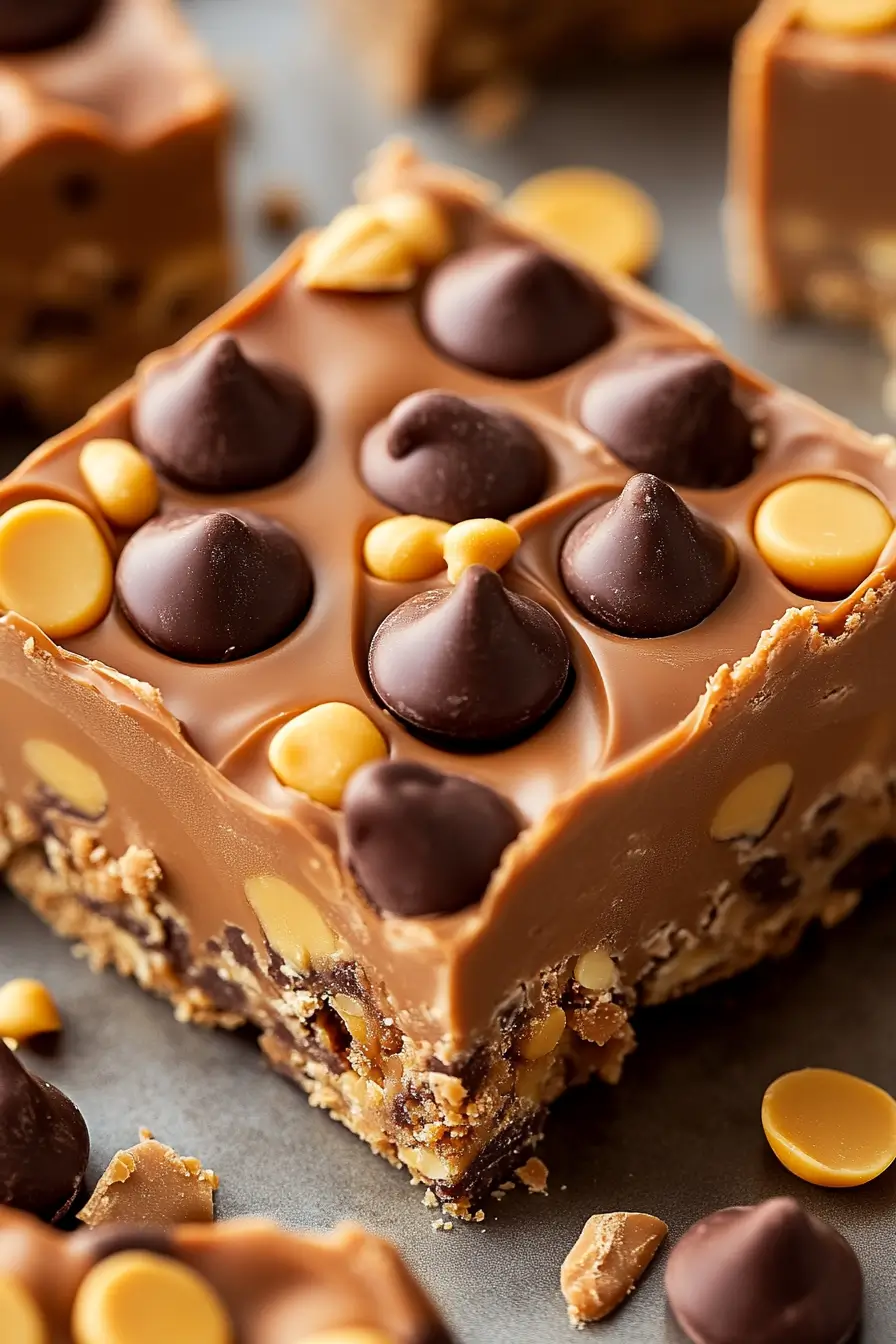
If you’ve ever craved that classic Reese’s flavor but didn’t want to turn on the oven, these Reese’s Peanut Butter No-Bake Bars are the ultimate answer. This article explores the recipe’s roots, helpful swaps, and creative tips that make it a favorite. We’ll also answer popular questions, like whether you can use crunchy peanut butter or make it vegan. Plus, we’ll show you how to customize your bars and know when they’re ready to serve. Let’s dive in with a little story from my kitchen to yours.
Table of Contents
Table of Contents
The Story Behind These Reese’s Peanut Butter No-Bake Bars
Some recipes aren’t born—they just show up when you need them. The first time I made Reese’s Peanut Butter No-Bake Bars, I was deep in a Texas summer, dodging triple-digit heat and still craving something sweet. Turning on the oven? Absolutely not. But skipping dessert? Never an option in my house.
Growing up, my mom always kept graham crackers and peanut butter in the pantry for quick, after-school treats. One day, I grabbed those old staples, melted a bit of butter, and crushed the crackers into a golden base. The peanut butter filling came next, followed by a glossy layer of chocolate chips and a touch more peanut butter on top. After one bite, I knew I’d stumbled into no-bake gold.
That’s how this recipe landed in my regular rotation—and why I’ve kept tweaking it to be easy, foolproof, and super adaptable. These bars deliver that bold, chocolate-peanut butter combo that people can’t resist. They’ve shown up at potlucks, backyard BBQs, and lazy Saturdays when all I wanted was something nostalgic but new. What makes them even better? You don’t need fancy equipment or baking experience—just a love of dessert and five simple ingredients.
Just like these Mini Chocolate Peanut Butter Pies and the ever-popular No-Bake Chocolate Oatmeal Bars, this treat is all about big flavor with zero oven time. Whether you’re feeding a crowd or sneaking a late-night square from the fridge, this no-bake recipe always satisfies.
The Base That Makes It All Work
At the heart of any great no-bake bar is structure. In this case, we use crushed graham crackers and powdered sugar to create a foundation that’s both chewy and firm enough to hold together. The melted unsalted butter binds everything and adds richness. When you press the mixture into your pan, aim for even pressure—you want a compact base that won’t crumble when sliced.
Some folks prefer blending the dry ingredients first, then folding in the butter and peanut butter until smooth. I’ve found that using a silicone spatula makes this process easier and keeps your hands clean. Let the base chill for at least 15 minutes before adding the topping—this helps keep the layers distinct when cutting later.
Peanut Butter and Chocolate: A Match Made in Heaven
There’s just something about the mix of chocolate and peanut butter that taps straight into childhood joy. For this recipe, I recommend semi-sweet chocolate chips if you want that Reese’s-style balance. Milk chocolate works too, but it’ll lean sweeter. Either way, melt the chips with a couple tablespoons of creamy peanut butter for a smooth, pourable finish that sets beautifully.
Want to change things up? You can switch the chocolate for dark or even white chips, or go rogue with a swirl of Chocolate Date Bark for something more nutrient-rich. The goal is that velvety top layer that cracks just a bit when chilled—pure satisfaction.
Creative Variations for No-Bake Peanut Butter Bars
Sometimes the only thing better than a classic is a clever twist. With Reese’s Peanut Butter No-Bake Bars, you’ve got room to play. Whether you’re working around allergies or simply trying to impress, these easy add-ins and swaps help tailor the recipe to your taste.
Ingredients You’ll Need for the Base Recipe
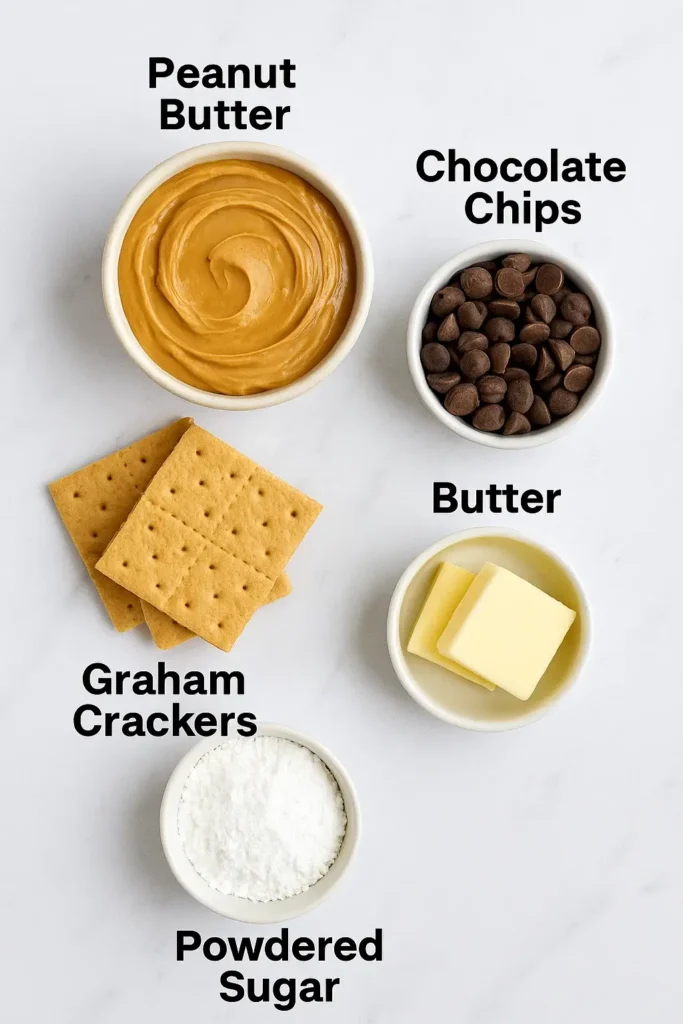
Before getting creative, master the basics. Here’s the full ingredient list:
- 1 cup (240g) creamy peanut butter
- 1/2 cup (115g) unsalted butter, melted
- 1 1/4 cups (150g) powdered sugar
- 1 1/2 cups (180g) crushed graham crackers
- 1 1/2 cups (270g) semi-sweet or milk chocolate chips
- 2 tbsp creamy peanut butter (for topping)
This foundation delivers that perfect balance of salty, sweet, crunchy, and creamy. The beauty of these bars is that you can swap, mix, or top them however you like. But start here—you won’t regret it.
Instructions for the Perfect No-Bake Bars
Follow these quick steps and you’ll have perfect bars every time:
- Prepare the base: In a bowl, mix melted butter, 1 cup peanut butter, powdered sugar, and crushed graham crackers until fully combined.
- Form the crust: Press the mixture evenly into the bottom of a parchment-lined 9×9-inch pan. Use a flat spatula to compress firmly.
- Melt the topping: In a microwave-safe bowl, melt the chocolate chips with 2 tbsp peanut butter in 20–30 second bursts. Stir until smooth.
- Add the topping: Pour melted chocolate over the base and spread evenly with a spatula.
- Chill: Refrigerate for at least 2 hours until fully set.
- Serve: Cut into squares using a warm knife for clean edges.
Looking for another freezer-friendly hit? This No-Bake Chocolate Cheesecake Recipe is silky smooth and just as adaptable. Or try these No-Bake Brownie Bites for quick treats you can make in under 15 minutes.
Flavor Add-Ins That Take These Bars Next Level
Once you’ve mastered the base, it’s time to get creative. Add-ins turn your classic Reese’s Peanut Butter No-Bake Bars into something unforgettable. From crunch to sweetness to a little salt, the possibilities are endless—and every new version is still just as easy to make.
Mix-Ins for the Peanut Butter Filling
Let’s talk texture. While the original recipe delivers that smooth, melt-in-your-mouth feel, mix-ins add fun contrast. Try folding in chopped pretzels, mini chocolate chips, or roasted peanuts for a salty crunch. Crushed toffee bits or peanut butter cups also dial up the indulgence factor fast.
If you’re after something a little more sophisticated, shredded coconut or dried cranberries give your bars complexity. I’ve even used freeze-dried raspberries once—they add a punch of tartness that cuts through the sweetness beautifully. No matter what you choose, just keep it to about ½ cup of mix-ins so the structure stays firm and sliceable.
These kinds of creative upgrades remind me of the Strawberry Cheesecake Rolls—a classic dessert turned into a playful new treat. Or the way Chocolate Date Bark layers nuts, fruit, and chocolate in every bite. Small tweaks, big flavor.
Print
Reese’s Peanut Butter No-Bake Bars: Rich, Easy, and Perfect Every Time
- Total Time: {{total_time}}
- Yield: {{yield}}
Description
These Reese’s Peanut Butter No-Bake Bars deliver big flavor with zero oven time. They’re rich, customizable, and crowd-approved.
Ingredients
1 cup (240g) creamy peanut butter
1/2 cup (115g) unsalted butter, melted
1 1/4 cups (150g) powdered sugar
1 1/2 cups (180g) crushed graham crackers
1 1/2 cups (270g) semi-sweet or milk chocolate chips
2 tbsp creamy peanut butter (for topping)
Instructions
1. Mix peanut butter, melted butter, powdered sugar, and crushed graham crackers until combined.
2. Press the mixture into a parchment-lined 9×9 inch pan.
3. Melt chocolate chips with 2 tbsp peanut butter; stir until smooth.
4. Pour chocolate over the base and spread evenly.
5. Refrigerate for at least 2 hours until set.
6. Slice and serve with a warm knife for clean cuts.
Notes
Add crushed pretzels, nuts, or toffee bits for crunch.
Use dairy-free chocolate and plant-based butter to make vegan.
- Prep Time: {{prep_time}}
- Cook Time: {{cook_time}}
- Category: {{category}}
- Method: {{method}}
- Cuisine: {{cuisine}}
Toppings That Seal the Deal
The top layer of chocolate and peanut butter is your finishing touch, so why not dress it up? Once you’ve poured and smoothed it over the base, sprinkle on flaky sea salt, crushed peanuts, or even colorful sprinkles for a bit of fun. A drizzle of white chocolate adds contrast, while crushed candy bars (looking at you, Butterfingers) make each square feel like a celebration.
If you want your bars to feel a bit more gourmet, press a few whole roasted peanuts into the topping before chilling. Not only does it look great, but it also adds that satisfying bite right on top. These finishing touches turn a simple dessert into a showstopper, just like how Mini Chocolate Peanut Butter Pies use whipped cream and shavings for visual pop.
Or if you’re feeling extra bold, pair your bars with a scoop of ice cream and crushed graham crackers—because why not go all in?
Mastering Set, Serve, and Storage Techniques
There’s something deeply satisfying about pulling a perfectly chilled tray of Reese’s Peanut Butter No-Bake Bars from the fridge. Getting the texture right depends on a few small but essential techniques. Let’s make sure yours come out as smooth, firm, and sliceable as they should.
How to Know When Your Bars Are Set
The biggest question people ask is: “How do I know when the bars are ready?” The answer is all in the texture. You’ll know your bars are fully set when the top layer is glossy, firm to the touch, and doesn’t smear when pressed gently with a finger. Refrigeration is key—these bars need at least two hours, but overnight is best if you want clean, crisp edges.
Use a sharp knife warmed under hot water and wiped dry between each cut. This gives you those perfect, bakery-style squares. If you’ve added mix-ins like pretzels or nuts, give it an extra 15 minutes to ensure everything is chilled through.
This chill-and-slice method is also perfect for desserts like the Mini Chocolate Peanut Butter Pies and Chocolate Date Bark—both rely on that same set-and-serve confidence.
Storage Tips and How to Keep Them Fresh
The beauty of no-bake bars? They store like a dream. Once sliced, layer the bars between sheets of parchment in an airtight container. Keep them in the fridge for up to 1 week, or freeze them for up to 2 months. Frozen bars are great straight from the freezer or can be softened in the fridge for 15–20 minutes before serving.
If storing long-term, you can even wrap individual bars in wax paper for lunchbox treats or last-minute snacks. And if you love batch-making desserts, consider how Strawberry Cheesecake Rolls freeze and reheat just as smoothly. You’ll never be without a sweet bite again.
Conclusion: Why Reese’s Peanut Butter No-Bake Bars Belong in Your Recipe Box
Whether you need a crowd-pleaser for your next gathering or a no-fuss dessert to satisfy late-night cravings, Reese’s Peanut Butter No-Bake Bars are pure comfort. They’re rich, easy, and endlessly customizable. You can swap ingredients, fold in new flavors, and still get that classic chocolate-peanut butter combo that everyone loves. It’s a recipe that works, no oven required.
So grab those pantry staples, clear a little space in your fridge, and treat yourself to a batch. You’ll be surprised how often you come back to this one.
Frequently Asked Questions About Reese’s Peanut Butter No-Bake Bars
Can I use crunchy peanut butter instead of creamy?
Yes, you can swap creamy for crunchy peanut butter. It adds great texture and nutty depth to the bars. Just stir it well before using so the oils don’t separate, and keep in mind the added crunch may make slicing slightly less clean—but every bit as delicious.
How do I make these bars vegan or gluten-free?
To go vegan, use plant-based butter and dairy-free chocolate chips. Choose almond or sunflower butter for a creamy, dairy-free base. For a gluten-free version, replace regular graham crackers with certified gluten-free alternatives. Be sure to check your powdered sugar, as some brands use starches containing gluten.
Can I add mix-ins to the peanut butter filling?
Absolutely. Stir in up to ½ cup of mix-ins like mini chocolate chips, pretzels, toffee bits, or roasted nuts. Keep the total volume manageable to preserve the bar’s structure. Even dried fruit or shredded coconut work well for texture and flavor contrast.
How do I know when the bars are set and ready to serve?
They’re set when the chocolate top is firm and glossy. After at least two hours in the fridge, press lightly—if it doesn’t smear and feels solid, you’re good to go. For best slicing, use a warm, clean knife for each cut.
