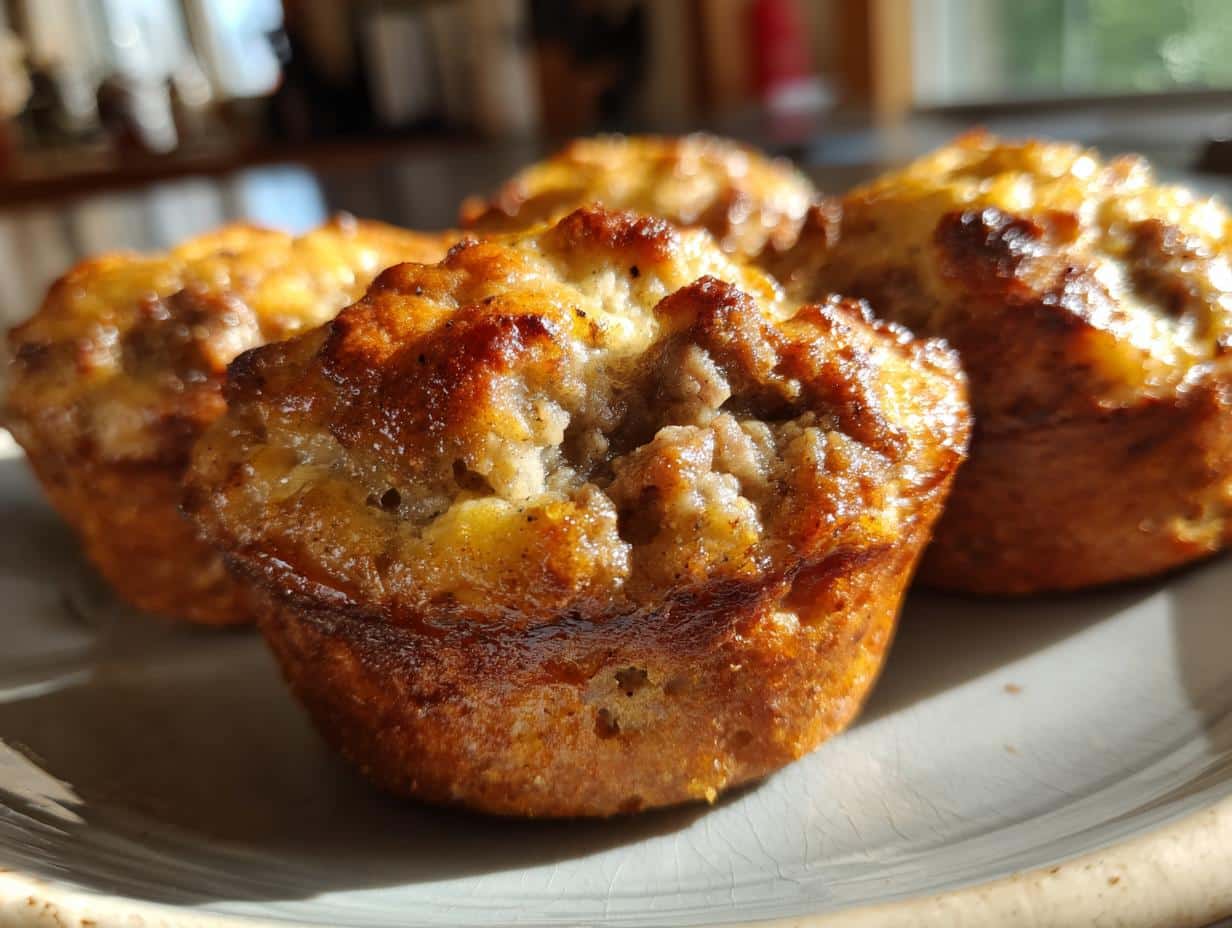
Oh, stuffing muffin cups for a crowd—where have you been all my life? I first made these little bites of heaven when I needed to feed a hungry houseful of relatives last Thanksgiving. The turkey was taking forever, but these golden, savory muffins saved the day. No more scooping messy stuffing from a big dish—each guest got their own perfect little portion, crispy on top and tender inside. And the best part? You can tweak the flavors to match any meal, from holiday feasts to casual potlucks. Trust me, once you try stuffing muffin cups, you’ll never go back to the old way!
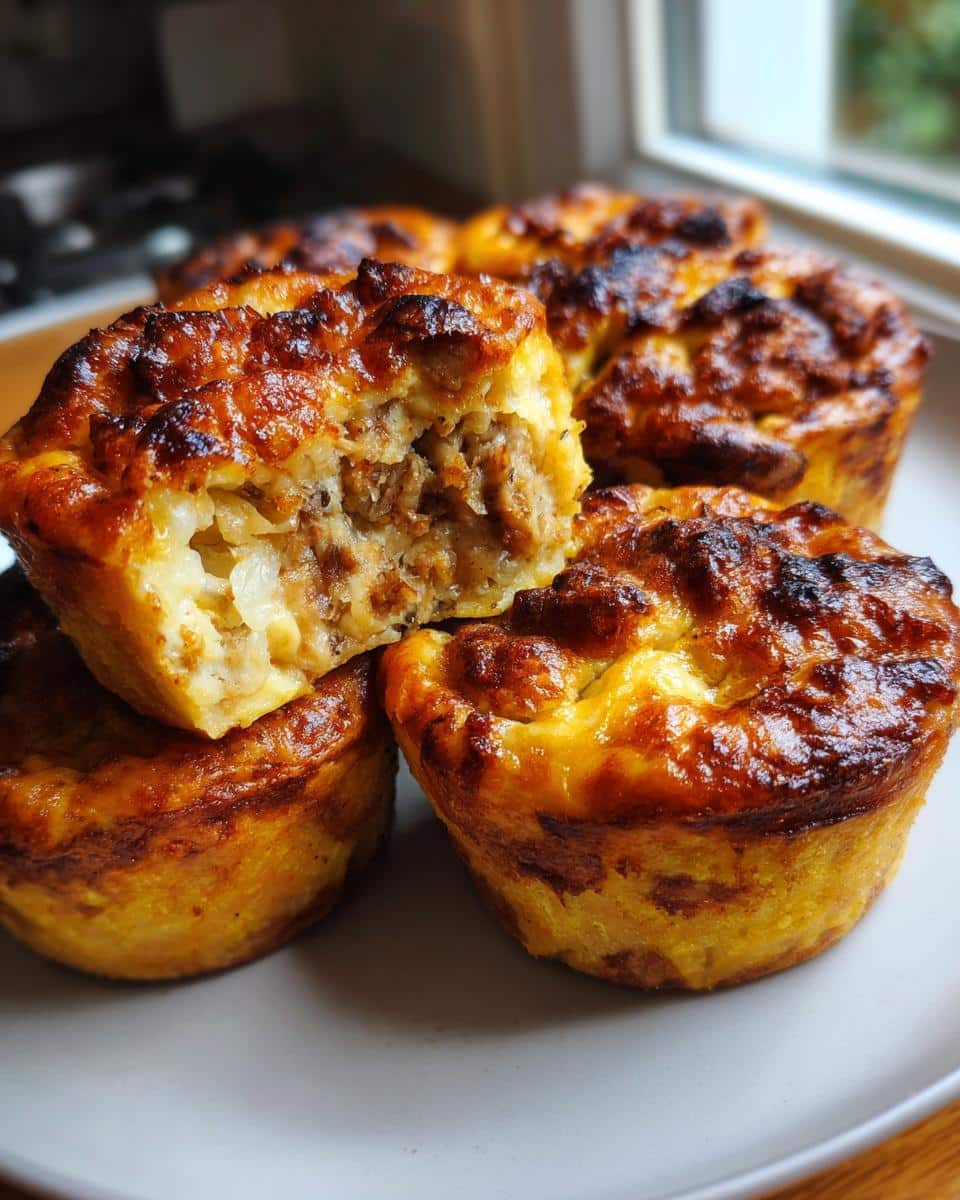
Why You’ll Love These Stuffing Muffin Cups for a Crowd
Listen, these aren’t just any stuffing muffins—they’re your new secret weapon for stress-free entertaining. Here’s why you’ll adore them:
- Perfect portions every time – No more fighting over the crispy bits! Each guest gets their own golden cup with the ideal crust-to-soft ratio
- Faster than a casserole – These bake in half the time of a traditional stuffing dish, and no last-minute stirring required
- Customizable to your crowd – Add sausage for meat lovers, extra herbs for foodies, or keep it veggie-friendly
- Mess-free serving – Just pop them out of the tin – no serving spoons or drippy dishes
- Leftovers that stay crispy – Unlike soggy pan stuffing, these keep their texture when reheated
I make these for everything from holiday dinners to football Sundays – they disappear every single time!
Ingredients for Stuffing Muffin Cups for a Crowd
Now, let’s talk ingredients – and I promise, nothing too fussy here! This is the kind of recipe where you might already have most things in your pantry. Though I will say, fresh is always best when it comes to the veggies. Here’s what you’ll need to make a dozen of these little flavor-packed cups:
- 4 cups bread crumbs – I use day-old French bread pulsed in the food processor, but store-bought plain crumbs work too (just avoid the seasoned kind – we’re adding our own flavors!)
- 1 cup diced onions – About 1 medium onion, and take the time to chop them small – big chunks make the muffins harder to form
- 1 cup diced celery – Same deal as the onions – nice small dice so everything bakes evenly
- 2 cloves garlic, minced – And I mean minced – no one wants a big bite of raw garlic!
- 1 cup chicken or vegetable broth – Use what you’ve got! I’ve even used turkey broth after Thanksgiving with amazing results
- 2 eggs, beaten – These are our glue – helps everything hold together in perfect muffin form
- 1/2 cup melted butter – Real, honest-to-goodness butter please – it makes all the difference in flavor and that golden crust
- 1 tsp salt – I use kosher – adjust to your taste if using table salt
- 1/2 tsp black pepper – Freshly cracked if you’re feeling fancy
- 1 tsp dried sage – The classic stuffing flavor – though sometimes I’ll mix in a pinch of thyme too
A little note about substitutions – this recipe is super flexible! No celery? Try chopped fennel for a fun twist. Want to make it heartier? Toss in some chopped cooked mushrooms. The beauty is in making it your own while keeping that classic stuffing taste we all love.
How to Make Stuffing Muffin Cups for a Crowd
Okay, let’s get to the fun part – turning these simple ingredients into golden, savory perfection! Don’t worry, it’s easier than you think. Just follow these steps, and you’ll have a crowd cheering for more in no time.
Prep the Stuffing Mixture
First things first – preheat that oven to 375°F (190°C). Trust me, you want it nice and hot when your muffin cups go in!
Now, grab your biggest mixing bowl – I use the same giant yellow one my mom gave me when I moved out. Toss in your bread crumbs, diced onions, celery, and minced garlic. Give it all a good stir with a wooden spoon until everything’s evenly distributed.
In a separate bowl (or heck, I sometimes use a big measuring cup), whisk together your broth, beaten eggs, and melted butter. Pour this liquid gold over your dry ingredients and mix gently but thoroughly. You’ll know it’s ready when every bread crumb looks moistened and the mixture holds together when you press it.
Now comes the flavor magic – sprinkle in your salt, pepper, and sage. Mix again until you can smell that wonderful herby aroma. The mixture should be moist but not soupy – if it seems dry, add a splash more broth.
Fill and Bake the Muffin Cups
Here’s where the muffin tin becomes your best friend. Lightly grease it or line with parchment cups – either works great. Now, scoop that delicious stuffing mixture into each cup. I use an ice cream scoop for perfect portions, but a spoon works too!
Press the mixture down gently with your fingers or the back of the spoon. You want it packed enough to hold its shape but not so tight it becomes dense. Aim for filling each cup about 3/4 full – they’ll puff up beautifully as they bake.
Pop them in the oven and set your timer for 20 minutes. Resist the urge to open the oven door! At the 20-minute mark, peek in – you’re looking for golden-brown tops that look crispy and smell amazing. If they need more color, give them another 5 minutes.
When they’re done, let them rest in the pan for about 5 minutes – this helps them firm up. Then run a butter knife around the edges if needed, and transfer to a serving platter. Watch how fast they disappear!
Tips for Perfect Stuffing Muffin Cups for a Crowd
Alright, let me share my hard-earned secrets for stuffing muffin cups that’ll have everyone asking for your recipe! These little tricks make all the difference between good and oh-my-goodness amazing:
- Press, don’t pack – When filling your muffin cups, use gentle pressure to compact the mixture just enough to hold its shape. Too loose and they’ll crumble; too tight and they’ll be dense hockey pucks!
- The toothpick test – Just like cake, insert a toothpick near the center after 20 minutes. It should come out with moist crumbs (not wet batter) when they’re perfectly done.
- Cool before serving – I know it’s tempting, but let them rest 5 minutes in the pan. This helps them set so they don’t fall apart when you take them out.
- Grease generously – Even with non-stick pans, I brush melted butter in every nook. Those crispy edges are the best part – you don’t want them sticking!
- Double batch magic – These freeze beautifully! Cool completely, then freeze in a single layer before transferring to bags. Reheat at 350°F for 10 minutes straight from frozen.
One last pro tip? Make extra. Seriously. I’ve never once had leftovers last more than an hour after serving – they’re that good!
Variations for Stuffing Muffin Cups for a Crowd
Oh, the fun part—playing with flavors! One of my favorite things about stuffing muffin cups is how easily you can switch them up to match any occasion or craving. Here are my go-to twists that always impress:
- Meat lover’s delight – Stir in 1/2 lb cooked crumbled sausage (I use sweet Italian) or diced bacon for extra richness. Just brown it first and drain the grease!
- Sweet & savory – Add 1/2 cup dried cranberries or chopped apples with a pinch of cinnamon – perfect for Thanksgiving!
- Herb garden special – Swap the sage for fresh rosemary or thyme if you’re feeling fancy (use 1 tbsp fresh instead of dried).
- Mushroom magic – Sauté 1 cup chopped mushrooms with the onions for an earthy twist my vegetarian friends adore.
- Cheesy goodness – Fold in 1/2 cup shredded sharp cheddar or parmesan right before baking – the melted bits are incredible!
My rule of thumb? Keep add-ins to about 1 cup total so the muffins still hold together. And always taste your mixture before baking – trust your instincts with seasoning!
Serving Suggestions
Now, let’s talk about how to make these stuffing muffin cups the star of your table! Honestly, they’re so versatile I’ve served them at everything from fancy holiday dinners to backyard barbecues. Here’s how I love to present them:
Classic holiday style: Arrange them around your roasted turkey or ham with a bowl of warm gravy for dipping. The individual cups make serving buffet-style a breeze – no more gravy spills on the tablecloth!
Weeknight dinner hero: Pair them with roasted chicken (I cheat with a store-bought rotisserie chicken when I’m short on time) and a simple green salad. The muffins soak up all those delicious pan juices perfectly.
Brunch surprise: Serve them alongside scrambled eggs and fresh fruit for a savory-sweet breakfast spread. My kids go crazy when I do this the day after Thanksgiving!
Potluck perfection: Bring them to gatherings in a festive basket lined with a checkered napkin. They travel like a dream and stay warm for hours – just cover loosely with foil.
My absolute favorite way? Set up a “stuffing muffin bar” with small bowls of different toppings – cranberry sauce, gravy, even melted cheese for dipping. It turns dinner into a fun, interactive experience that always gets compliments!
Storing and Reheating Stuffing Muffin Cups
Let me tell you a little secret—these stuffing muffin cups actually taste better the next day! The flavors meld together beautifully, and with the right storage tricks, they stay just as delicious as when they first came out of the oven. Here’s how I keep mine tasting fresh:
Room temp short-term: If you’re serving them within a few hours, just cover loosely with a clean kitchen towel. This keeps them from getting soggy while maintaining that perfect crispy top.
Refrigerator storage: Once completely cooled, pop them in an airtight container with parchment between layers. They’ll keep for up to 3 days—though mine never last that long! The key is letting them cool first—no one wants a steamy container creating condensation.
Freezer magic: For longer storage, freeze them in a single layer on a baking sheet first (about 1 hour), then transfer to freezer bags. They’ll keep for up to 3 months this way—perfect for holiday prep!
Now, for reheating—this is where you can really bring them back to life:
- Oven method (best for crispness): Preheat to 350°F (175°C). Place muffins on a baking sheet and spritz lightly with water or broth. Heat for 5-8 minutes if refrigerated, 10-12 if frozen.
- Air fryer shortcut: 3-4 minutes at 350°F works wonders! Just check frequently so they don’t over-brown.
- Microwave (in a pinch): 20-30 seconds wrapped in a damp paper towel prevents drying out—but they won’t be as crispy.
Pro tip from my many kitchen experiments: If you’re reheating a whole batch, cover loosely with foil for the first half of heating time, then remove for the last few minutes to crisp up. Works like a charm every time!
Nutritional Information
Now, I know we’re all here for the flavor, but it doesn’t hurt to know what you’re enjoying, right? Keep in mind, these nutritional values are estimates and can vary based on the specific ingredients you use. But here’s the breakdown for one delicious stuffing muffin cup:
- Serving Size: 1 muffin cup
- Calories: 150
- Total Fat: 8g
- Saturated Fat: 4g
- Unsaturated Fat: 3g
- Trans Fat: 0g
- Cholesterol: 40mg
- Sodium: 300mg
- Total Carbohydrates: 15g
- Dietary Fiber: 1g
- Sugars: 2g
- Protein: 4g
Not too shabby for something that tastes this good, huh? And remember, if you’re adding extras like sausage or cheese, those numbers will shift a bit. But hey, it’s all about balance—enjoy every bite!
FAQs About Stuffing Muffin Cups for a Crowd
I get asked these questions all the time when I serve my famous stuffing muffin cups—so let me share the answers that’ll help you become a pro at making them too!
Can I make these ahead of time?
Absolutely! These muffin cups are practically made for advance prep. You can mix the stuffing mixture up to 24 hours ahead—just keep it covered in the fridge. When you’re ready, scoop and bake as usual (you might need an extra minute or two in the oven since the mix will be cold). They also reheat beautifully after baking—see my storage tips above!
Can I freeze stuffing muffin cups?
Oh honey, yes—and you should! Once fully cooled, freeze them in a single layer before transferring to freezer bags. They’ll keep for up to 3 months. When the craving hits (or surprise guests arrive), pop them straight from freezer to 350°F oven for 10-12 minutes. They come out tasting fresh-baked—no one will ever know!
What’s the best way to keep them from sticking to the pan?
After one too many “oops” moments, I’ve perfected this! First, grease every nook with butter (not cooking spray—it doesn’t work as well). For extra insurance, I sometimes line with parchment muffin cups—just peel them off after baking. If they do stick? Let them cool 5 minutes, then run a butter knife around the edges while gently twisting. They’ll pop right out!
Can I use different bread?
Please do! This recipe is super flexible. I’ve used everything from sourdough to cornbread (just reduce the broth slightly with cornbread). Day-old artisan bread makes amazing crumbs, but even plain sandwich bread works in a pinch. Just avoid super soft bread—it makes the muffins too dense. Pro tip: toast fresh bread lightly before cubing for better texture!
Why did my muffins turn out dry?
Ah, the cardinal sin of stuffing! Usually this means either not enough liquid (add an extra splash of broth next time) or overbaking. Remember—they continue cooking a bit in the pan after coming out. Also, be sure to pack the mixture gently—over-packing squeezes out moisture. If all else fails? Serve with extra gravy for dipping—problem solved deliciously!
Print
Perfect Crispy Stuffing Muffin Cups for a Crowd in 25 Minutes
- Total Time: 40 minutes
- Yield: 12 muffin cups
- Diet: Vegetarian
Description
Perfect for feeding a large group, these muffin cups are filled with a savory stuffing that’s easy to prepare and serve.
Ingredients
- 4 cups bread crumbs
- 1 cup diced onions
- 1 cup diced celery
- 2 cloves garlic, minced
- 1 cup chicken or vegetable broth
- 2 eggs, beaten
- 1/2 cup melted butter
- 1 tsp salt
- 1/2 tsp black pepper
- 1 tsp dried sage
Instructions
- Preheat your oven to 375°F (190°C).
- In a large bowl, mix bread crumbs, onions, celery, and garlic.
- Add broth, eggs, and melted butter to the mixture. Stir until well combined.
- Season with salt, pepper, and sage. Mix thoroughly.
- Scoop the stuffing mixture into muffin cups, pressing down slightly.
- Bake for 20-25 minutes or until the tops are golden brown.
- Let cool for 5 minutes before serving.
Notes
- You can add cooked sausage or bacon for extra flavor.
- Use a non-stick muffin pan or line with parchment paper for easy removal.
- Store leftovers in an airtight container for up to 3 days.
- Prep Time: 15 minutes
- Cook Time: 25 minutes
- Category: Appetizer
- Method: Baking
- Cuisine: American
